Time required: 1-2 hours
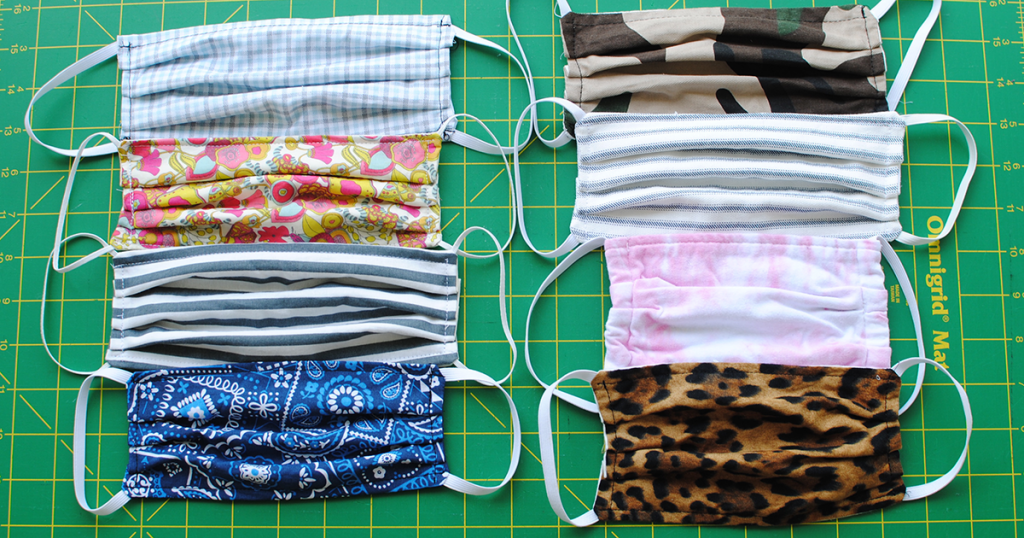
Our Brother Sews Ambassadors, Laura Pifer has created a quick and easy tutorial for making your own masks using supplies you most likely already have at home. Check it out below to whip up some masks in no time for everyone in your family. And if you find yourself with a little extra time and materials, maybe you can make additional ones for people who might need them. We hope you enjoy this project and that it brings you comfort during this uncertain time.
Materials and supplies
- Tightly woven cotton: other alternatives (Batik, cotton duck)
- 1/4″ – 1/8″ elastic
- Alternative options: Knit jersey cut in strips, self-made fabric straps, or bias tape
- Sewing Machine: I’m using the Brother SE1900
- Basic cutting and sewing notions
Project Created By: Laura Pifer
Disclaimer: It is important to note that cloth face masks have not been proven to provide effective protection against the spread of viruses.
For more information visit the CDC for more information. Thank you.
For step by step instructions, download the PDF.
Time required: 1 hour
It’s always fun to make your own custom greeting cards to send to your friends and family during the holiday season. Check out how I made this beautiful poinsettia card using the ScanNCut machine!

Materials and supplies
- Brother™ ScanNCut machine
- 6″ x12″ white cardstock card (rounded corners)
- Green and gold glittered paper
- Red fabric scrap
- Holiday sentiment stamp
- Black archival or solvent based ink (to stamp)
- Fabric support sheet (CASTBL2)
Instructions
-
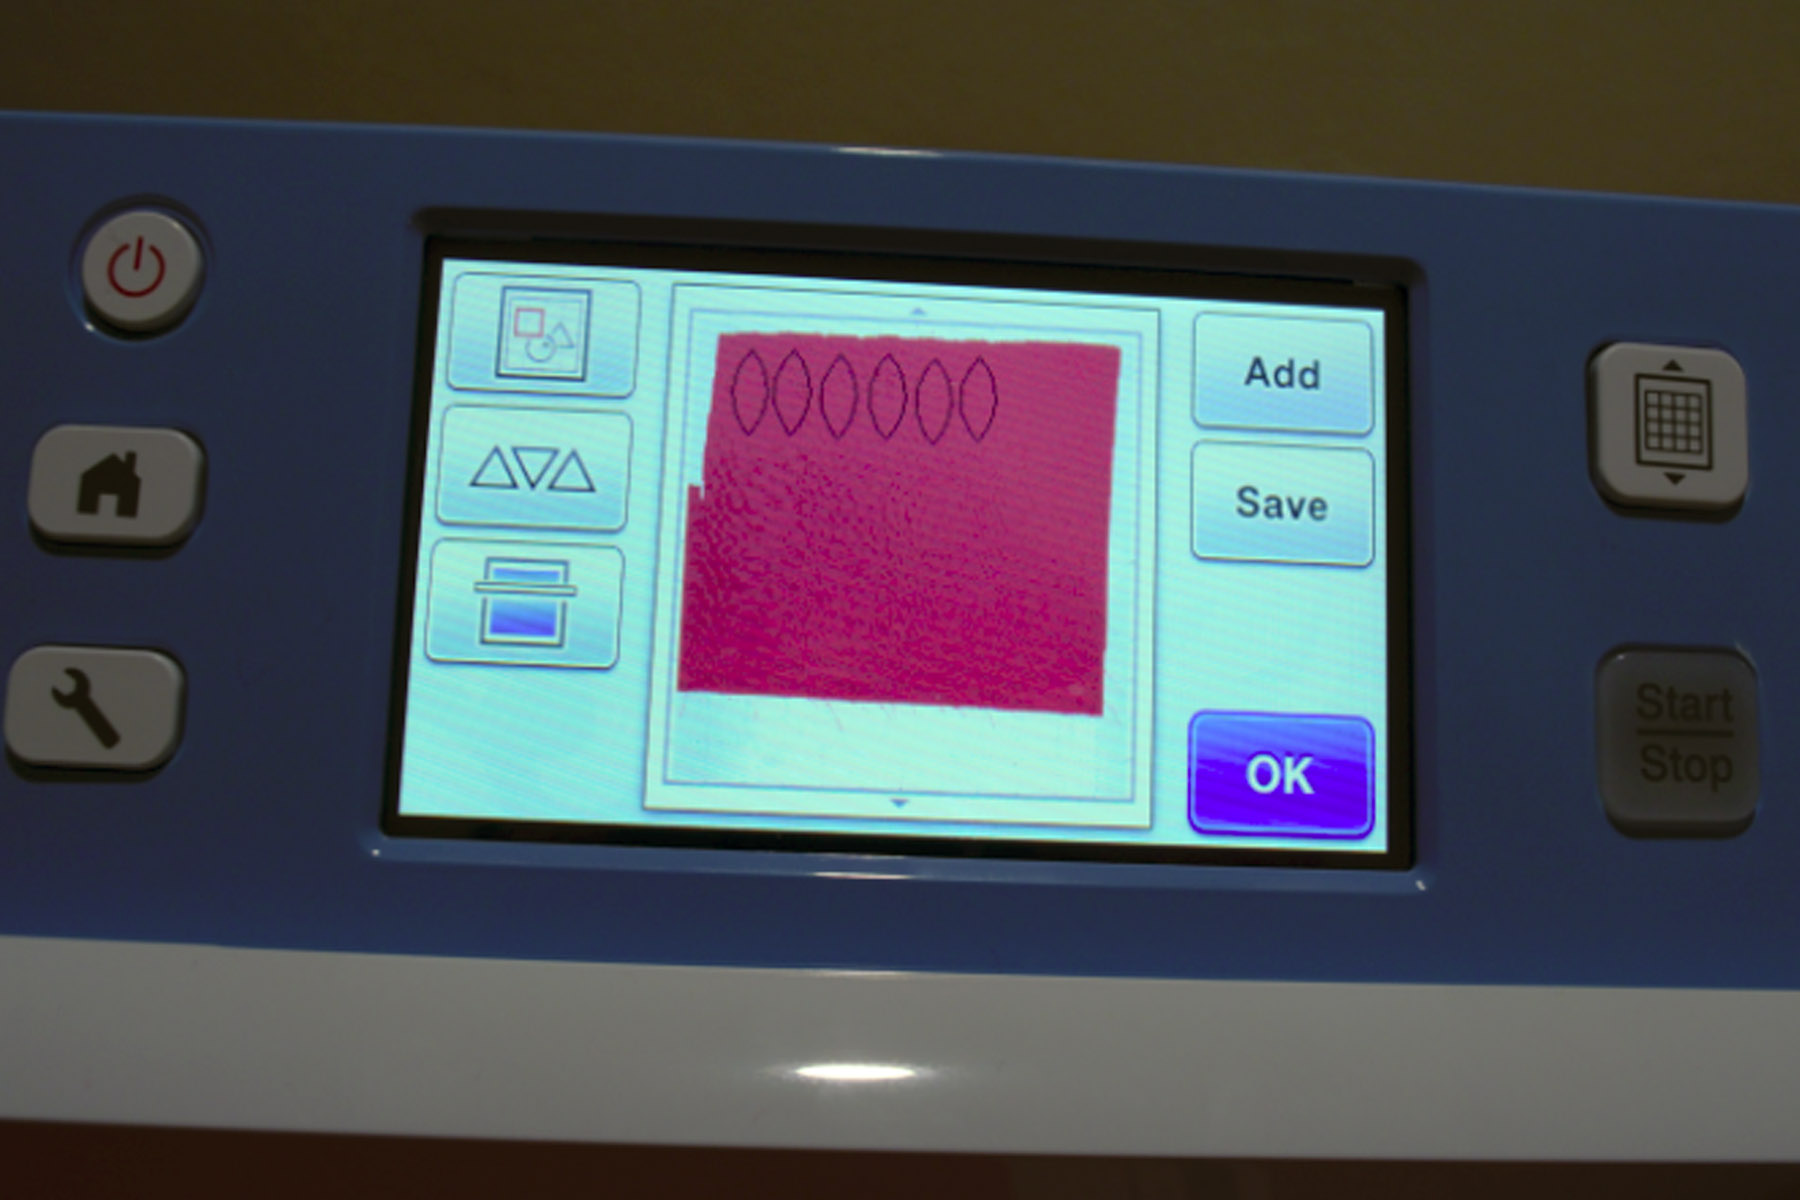
STEP 1: Take your red fabric scrap and place it securely on the standard mat with the fabric support sheet. For cotton fabric, use the settings as given in the Quick. Start Guide for fabric. Begin by testing out your fabric by creating a test cut.


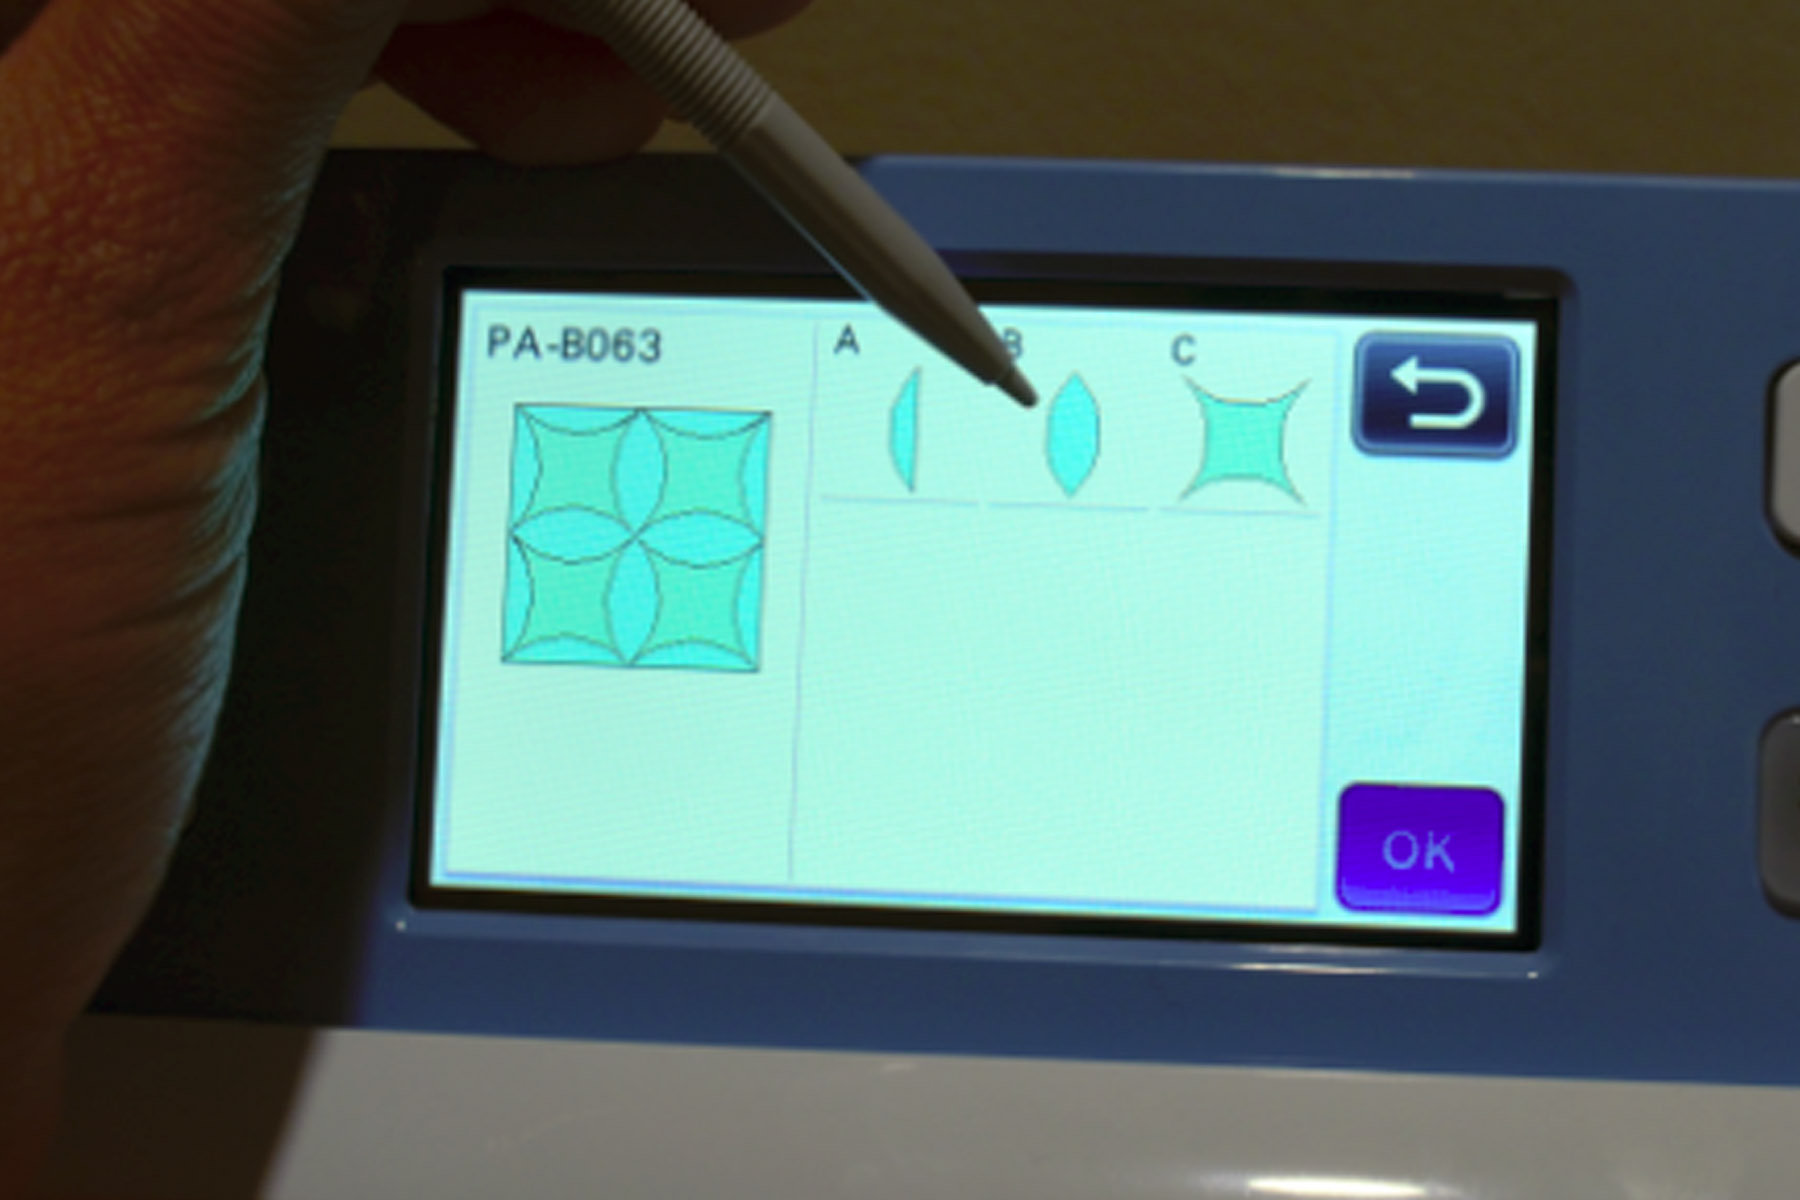
STEP 2: Once your machine is set, cut out 6 pointed ovals. You can find this shape in one of the “Quilt Patterns” as part of the quilt pieces.
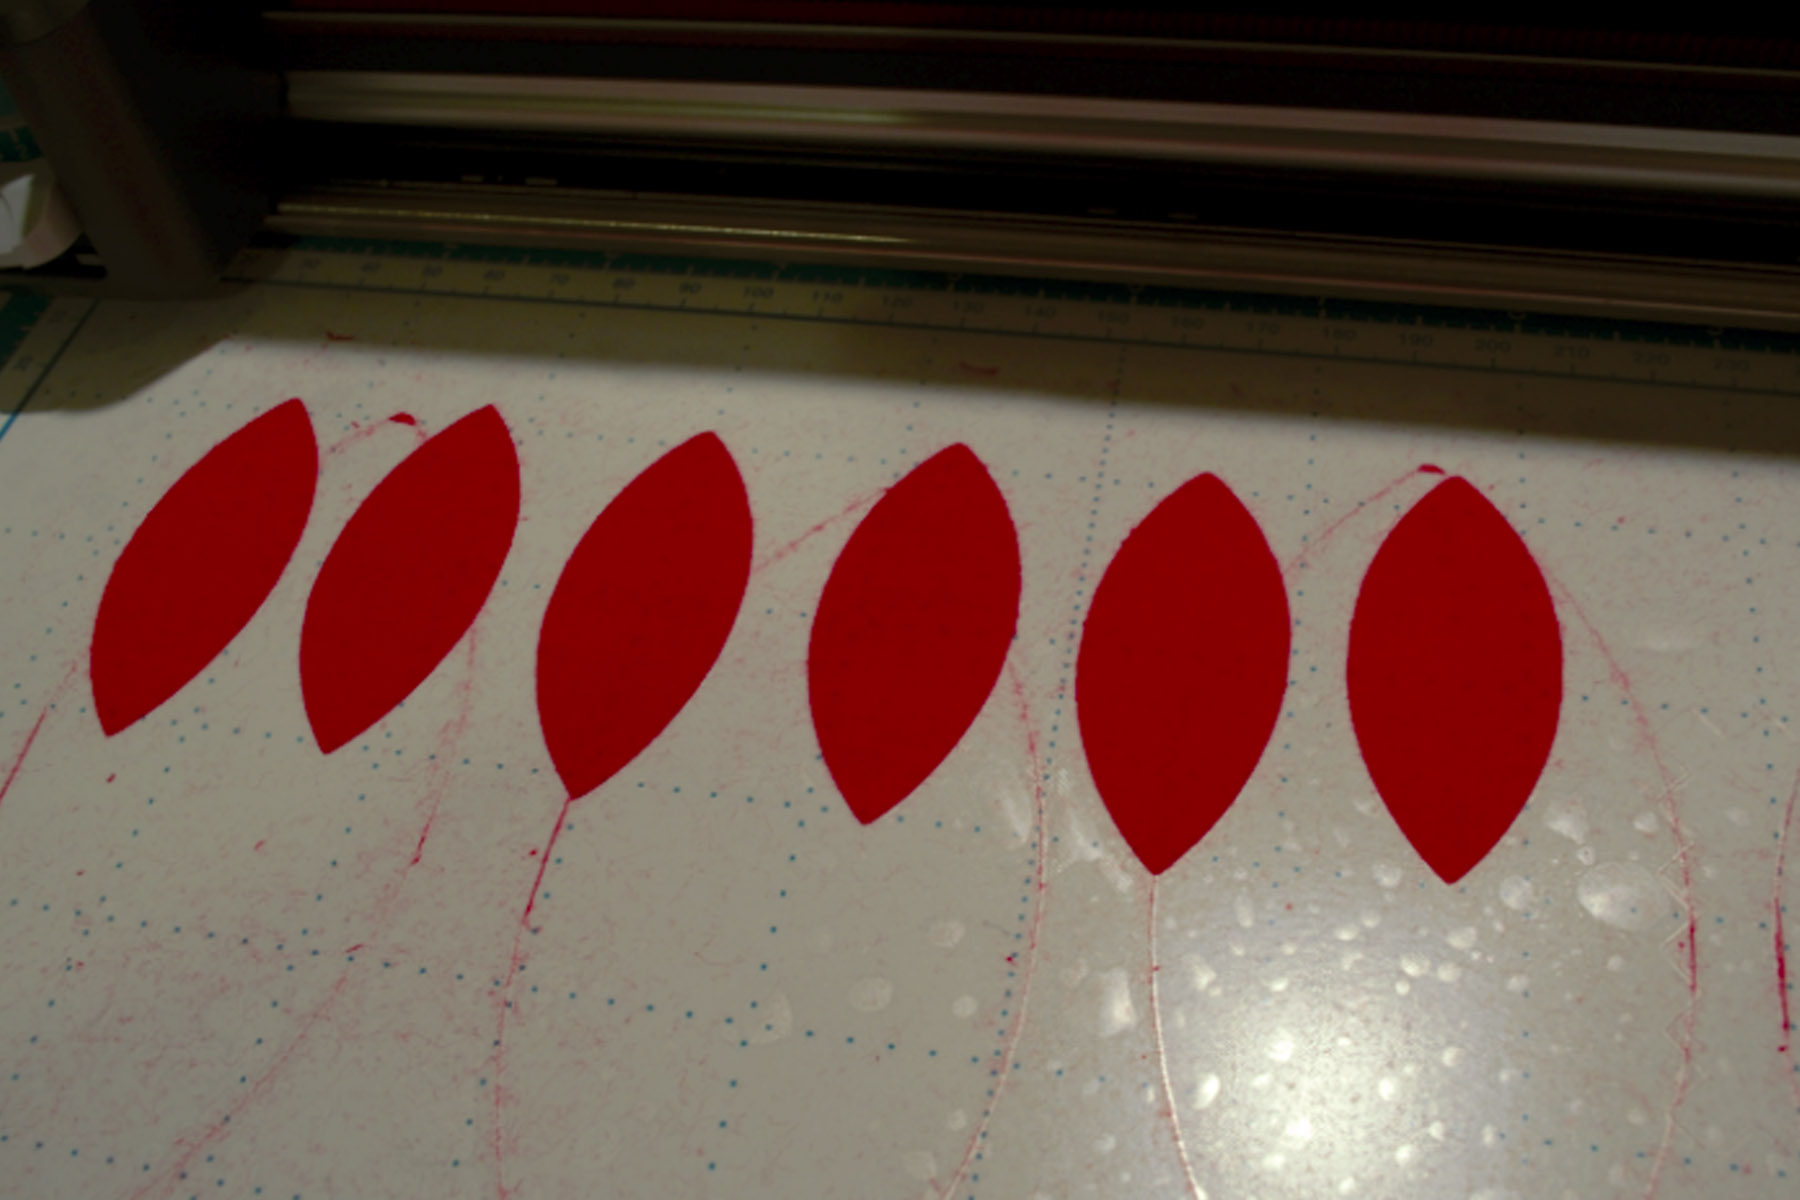
STEP 3: Make each petal about 2 1/2″ inches long. Cut flourish and circle out of gold glittered paper and cut leaves out of green glittered paper.
STEP 4: To begin your card, glue down your leaves and flourish, and allow them to completely dry before sewing.
STEP 5: To create a quilted effect with your poinsettia, place your top and bottom petals to position your card. (Make sure all of your petals fit before you begin to secure them down.)
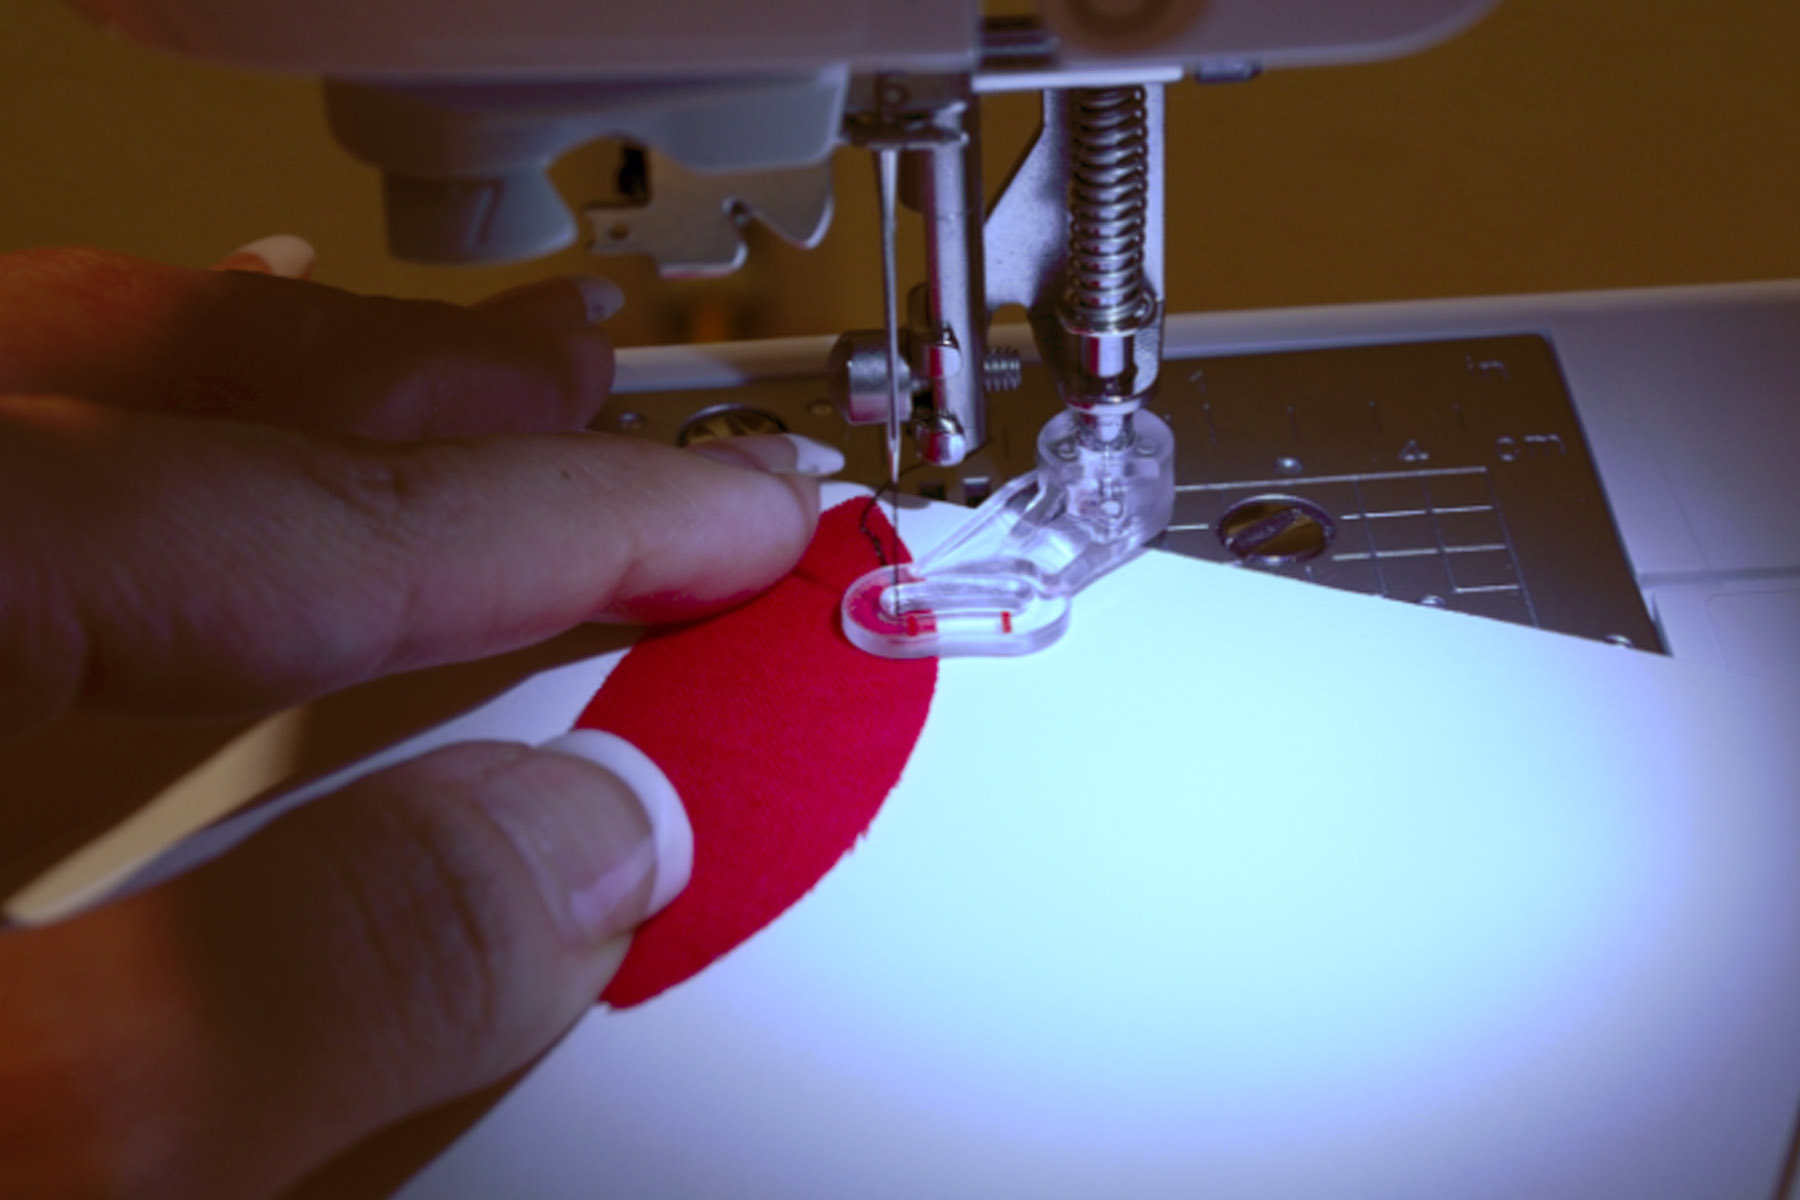
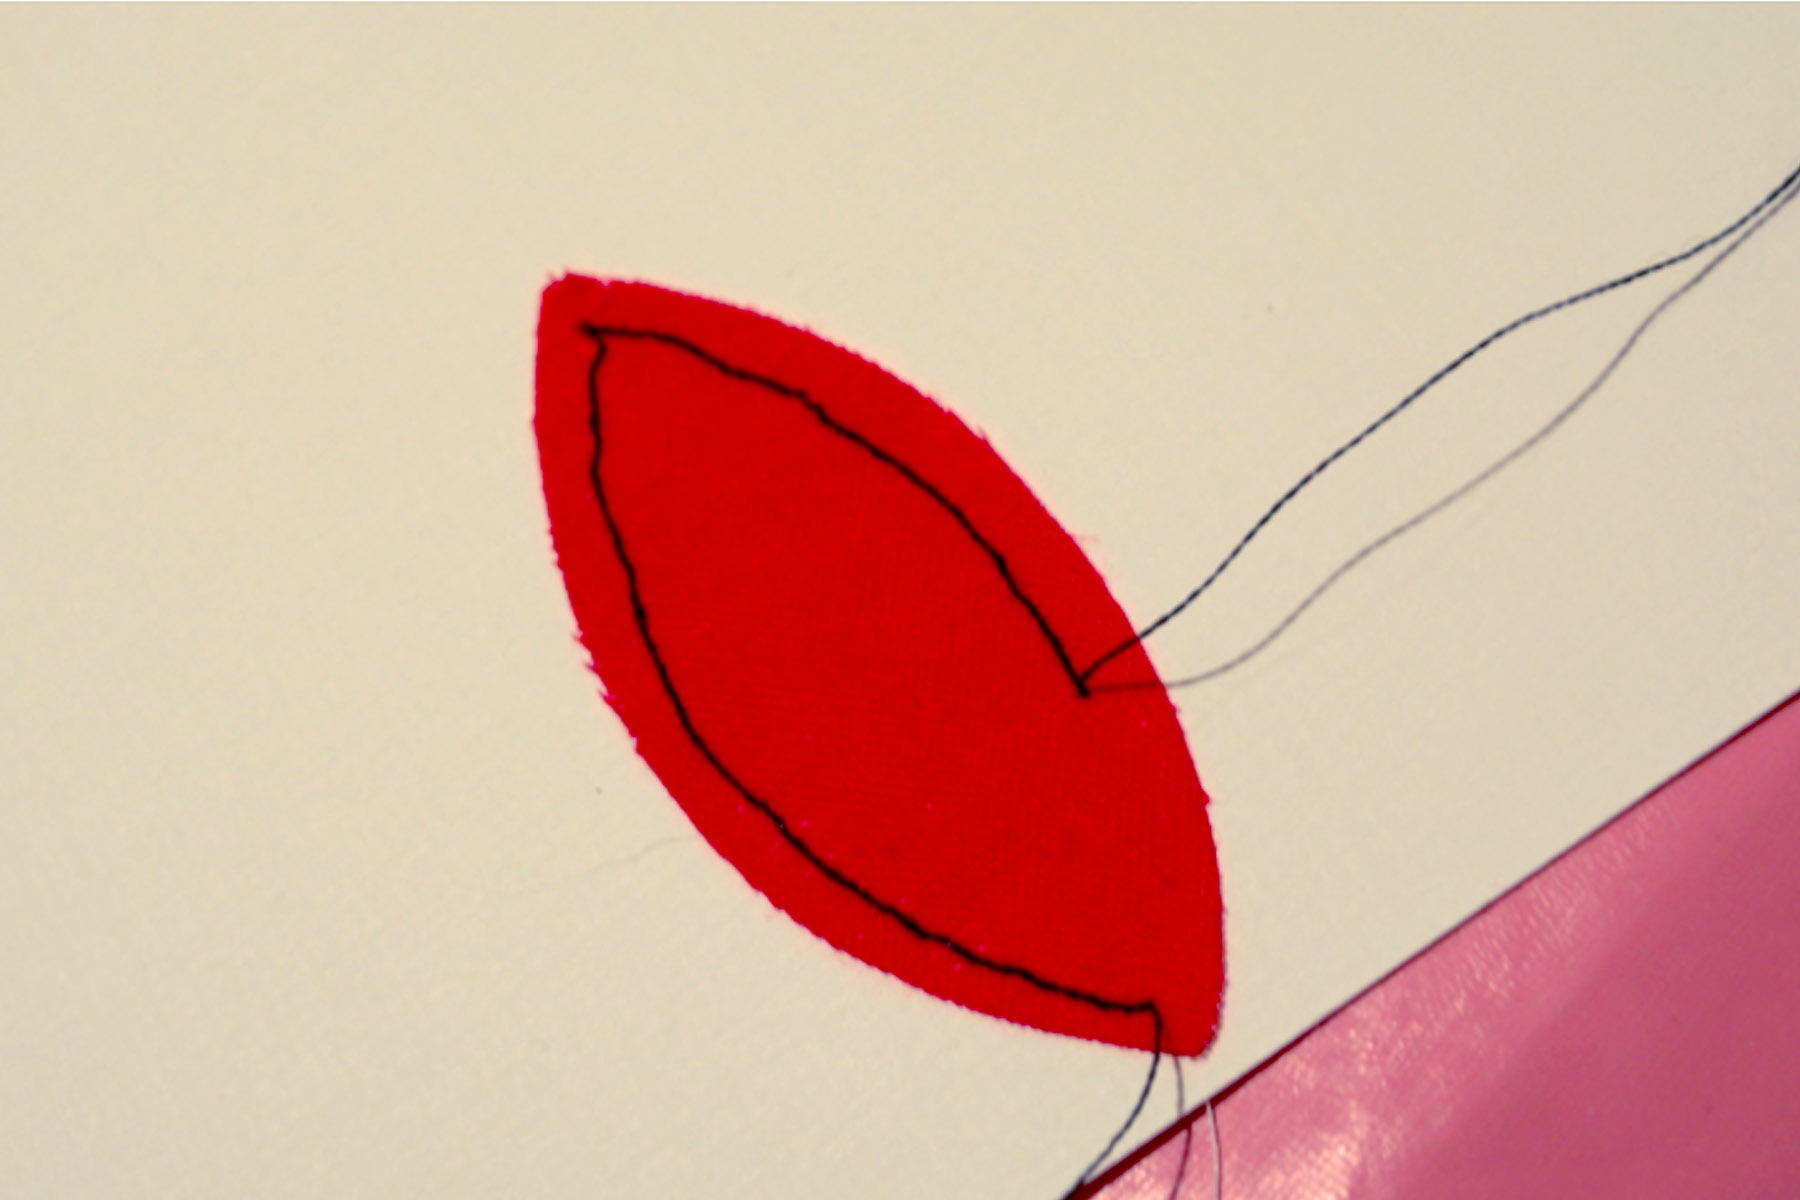
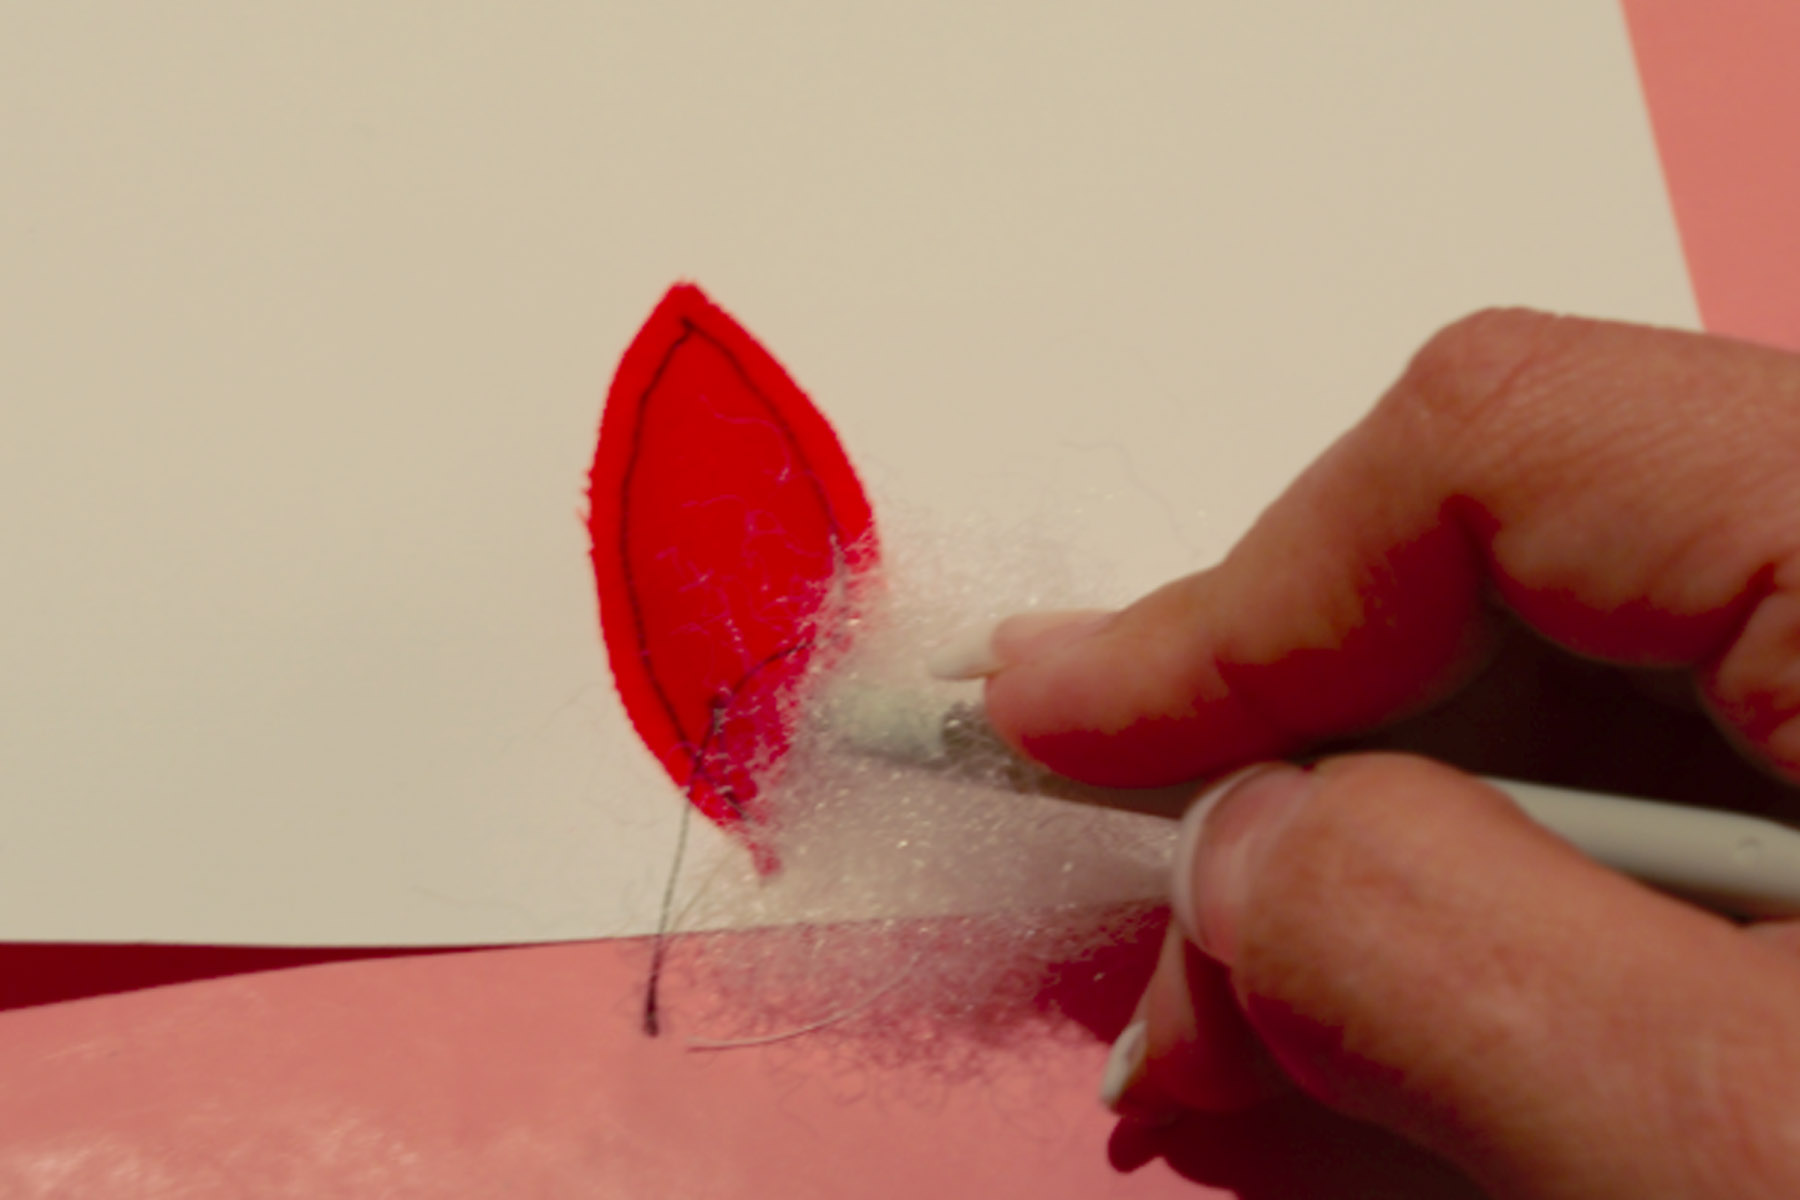
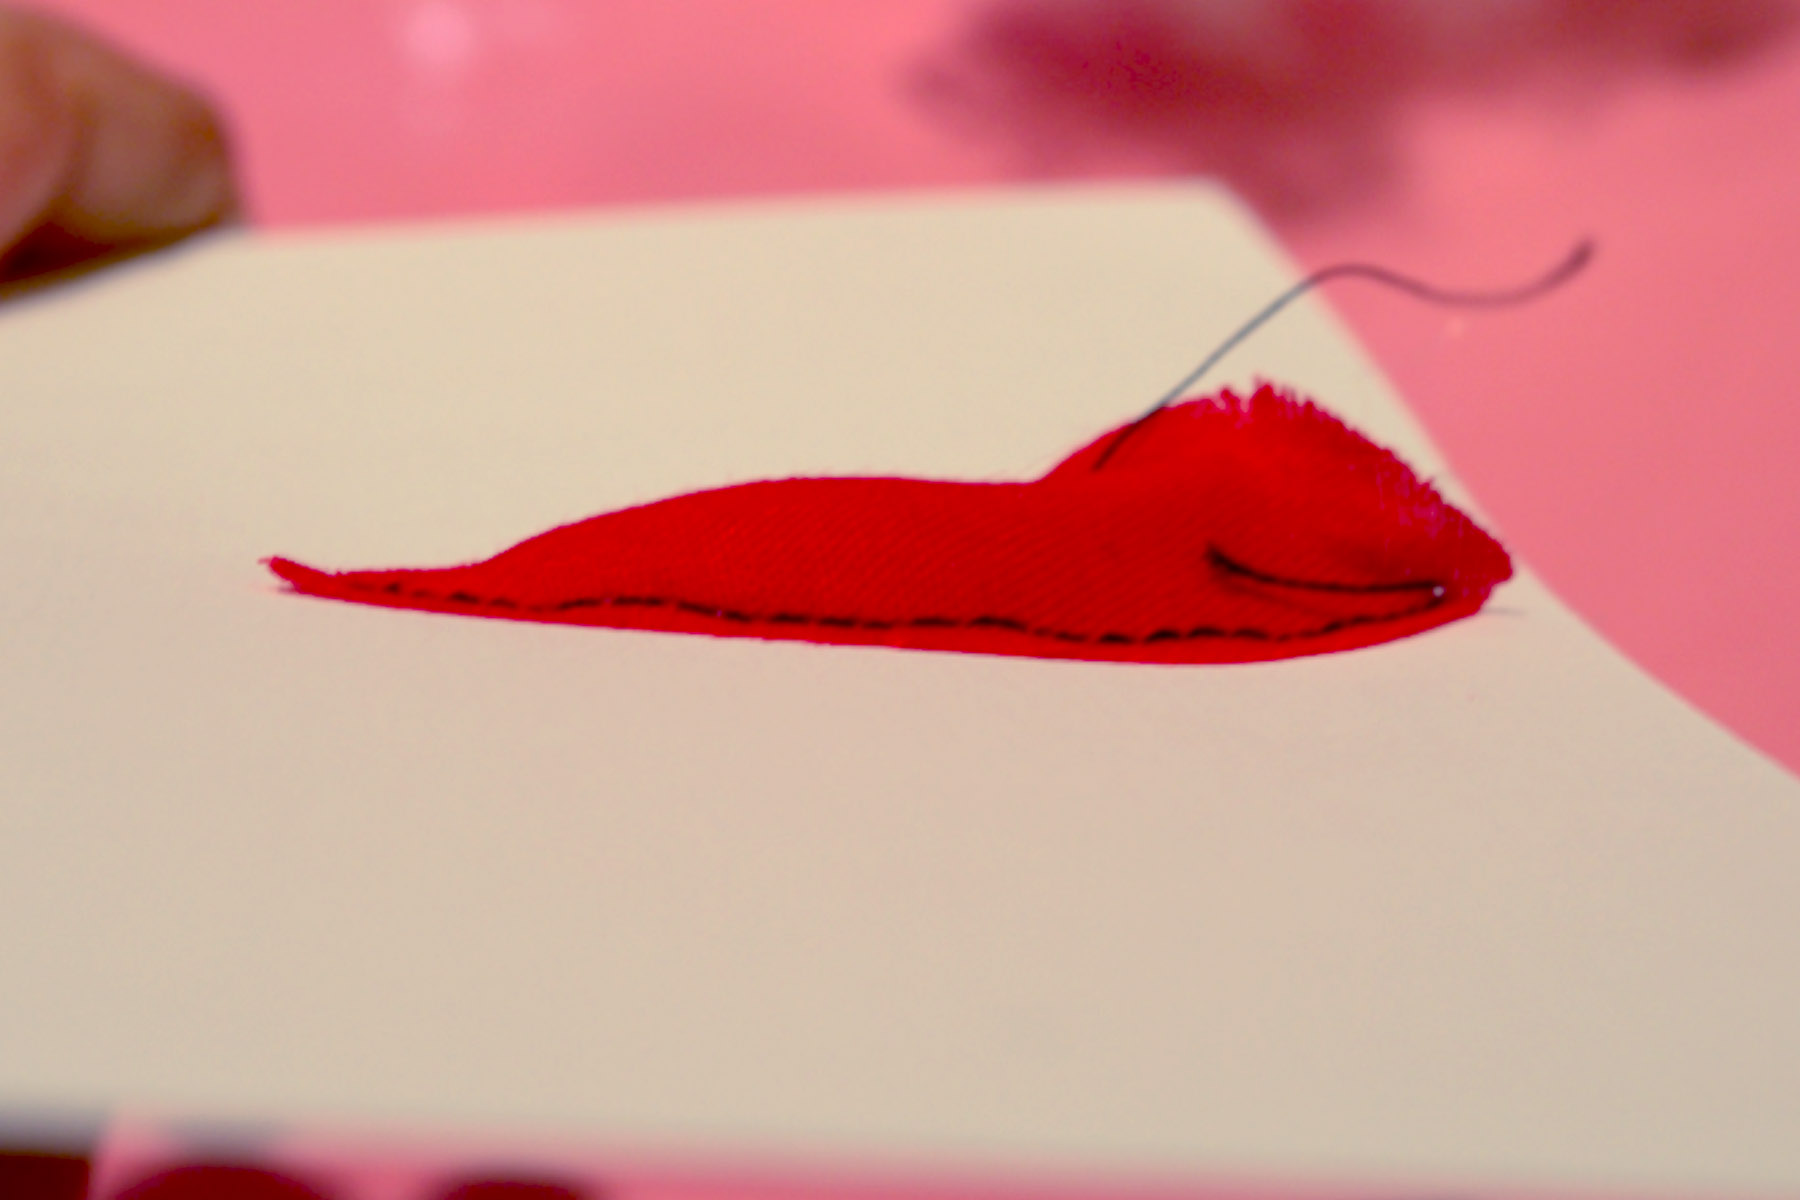
STEP 6: Once your placement is set, sew down your first top petal 3/4″ of the way. Once finished, apply pillow fill to the opening to puff up the fabric. Once full, sew the remaining opening close. Repeat on the bottom petal and then the side petals, always mirroring each petal as you go. This will help keep your flower aligned.
STEP 7: Once your flower is complete, glue a center to your flower made of the gold glittered paper.
STEP 8: Finish off your card with your favorite holiday sentiment. This quilted effect not only adds depth to your project but also makes a nice marriage of crafts –bringing paper crafting and sewing together.

For step by step instructions, download the PDF.[/vc_column_text][/vc_column][/vc_row]
Time required: 2-3 hours
Start a new family tradition with this quick and easy customizable advent calendar project. Our simple step-by-step tutorial will help you create something fun that delivers good cheer to your home as you count down to the holidays in style.

Materials and supplies
- Brother Sewing Machine
- Brother ScanNCut (cutting blade and cutting mat)
- 1 yard of fabric for base of advent calendar and backing
- 36” x 20” piece of quilt batting
- Total of 1 yard of assorted fabric for advent calendar pockets
- 12” x 12” piece of heat activated vinyl for numbers on pockets
- Thread to coordinate with calendar fabric
- Rotary cutter, mat and ruler
- Iron
- Pressing cloth

Cutting Instructions:
- Cut fabric for base of calendar – 36” x 20”
- Cut fabric for backing of calendar – 36” x 20”
- Cut 6 pieces of fabric for hanging tabs – each 4” x 8”
- From assorted coordinating fabric, cut a total of 48 squares in assorted sizes for pockets; you’ll need 2 pieces of the same size for each pocket. Suggested sizes: 3” x 3”, 3” x 4.5”, etc.
Sewing Instructions:
Note: ¼” seams are used throughout this project
- For pockets – place same-sized squares right sides together and stitch around all four sides. Leave a small area unstitched to turn stitched square right side out. Press, making sure the unstitched portion is tucked in; press it closed. Do this for all 24 pockets.
- Position the pockets onto the calendar base fabric however you like and pin them in place. Stitch around 3 sides of each pocket, leaving the top of the pocket opeLayer the pieces in the following order to create a quilt sandwich: batting, base of calendar facing up; backing of calendar right side towards calendar base.Stitch around all 4 sides of quilt sandwich, leaving a 4” area unstitched at the bottom edge. Turn the calendar right side out and press.
- With the right sides together, stitch around the outside edge of each of the hanging tabs leaving a small unstitched opening to turn. Turn the hanging tabs right side out and press. Stitch ¼” from the edge around each of the hang tabs. Fold each tab in half and stitch the unfinished (raw) edge together.
Pocket numbers:
- At your ScanNCut, select a font and type in numbers 1 through 24, sizing up or down as desired. Flip the design so the numbers are facing the wrong way on the ScanNCut display.
- Place the heat activated vinyl on the ScanNCut mat with the wrong side of the vinyl up.
- Do a test cut to check blade depth and blade pressure.
- Cut.
- Remove the numbers from the vinyl.
- Position the numbers on the pockets and press in place using a pressing cloth.
Finishing:
- Position the hang tabs on the top edge of the advent calendar, one in each of the upper corners and one in the middle.
- Topstitch ¼” around all four sides of the advent calendar, making sure to tuck in the seam allowance that was left open for turning purposes.
That’s it! All that’s left now is filling the pockets with treats like movie tickets, candy, gift cards…anything that spreads joy for the holidays! I hope you enjoyed creating this quick and easy advent calendar and that it will fill your home with good times and fun memories year after year.

Time required: 30 minutes or more
Add a personal touch to your wedding or party favours to create Instagram-worthy memories that last a lifetime! The P-touch craft labeller and Brother’s decorative satin ribbons and patterned tapes, make it easy to tap into your creativity.

Materials and supplies
- P-touch Crafting Labeller PT-H200B
- P-touch ribbons and tapes
- Party favours
Time required: 1.5 hours
Make your Decor Bloom with Paper Flowers. Brighten up any space with these one of kind paper flowers created using your ScanNCut. They are the perfect decorative touch for weddings, summertime parties, nurseries or any room in your house

MATERIALS REQUIRED
- ScanNCut Machine
- Self-adhesive mat for cutting paper
- Scissors
- Serrated edge scissors
- Multi blade herb scissors (for mini paper strips)
- Thick cardstock type 8½” X 11” coloured paper (100-pack or more)
- Hot glue gun
- Metal wire
- Plastic stick for folding the cardboard – scoring tool
- Pencils (any colour, with large and small circumferences)
Instructions
For step by step instructions, download the PDF.
Time required: 90 minutes
Keep your teapot and cups nice and warm with these easy-to-make cozies. Sure to add a whole lot of charm, it’s simple to customize them to match any decor. Make some for yourself and some to give as presents. There’s nothing better than a personalized gift made with love!

Brother products used
• The Dream Machine 2 XV8550
• Narrow Zipper Foot SA208C
• P-touch PT-H200BP
Materials and supplies
• 35 cm of main fabric
• 35 cm of interior fabric
• 25 cm of Radiantex or fleece
• TZE decorative ribbon, 12 mm wide (for the P-touch)
• 1 spool of piping, 3 mm x 2.3 mm
• 50 mm of Velcro
• A cardboard cup sleeve from your local coffee shop
(for the template)
• Bodkin (for pulling ribbon through)
Instructions
For step by step instructions, download the PDF.
Time required: 15-20 mins
Surprise your mom on Mother’s Day with a quick and easy, customizable card made just for her! It’s simple when you’ve got your Brother ScanNCut and CanvasWorkshop at your service! Follow this step-by-step tutorial and in no time, you’ll have a card that’s as beautiful and unique as your mom.

Materials and supplies
• 4” x 6” blank card (or 8” x 6” cardstock folded
to create a 4” x 6” card base)
• 3.5” x 3.5” red cardstock
• 3.5” x 3.5” patterned paper
• 3” x 5” gold metallic cardstock
• ScanNCut (I used the CM650W)
• ScanNCut standard size mat, blade and brown
pen with pen holder
• Low tack painter’s tape
• 3D adhesive foam squares
• Gold Sharpie
• Double-sided tape or glue stick
• Dye ink and blending tool (optional)
Instructions
For step by step instructions, download the PDF.
Time required: 30-45 mins
May 15th is National Chocolate Chip Day! What better way to celebrate this holiday than by surprising a friend with a yummy gift? This simple step-by-step tutorial will help you create a fun and functional cookie jar that’s ready to fill with all the ingredients needed to whip up a batch of your favourite chocolate chip cookies. When you give sweet treats, you’re guaranteed to become everyone’s favourite friend!

Materials and supplies
• A lidded clear glass jar (large enough to hold cookies)
• 12” x 12” red patterned cotton fabric
• 6” x 6” natural muslin
• 5” x 5” Brother iron-on fabric applique contact sheet
• Brother ScanNCut Machine (CM650W)
• Brother ScanNCut Standard Cutting Mat
• Brother Sewing Machine (XV8500D)
• Brother Button Presser Foot M
• Brother P-touch H200 Craft Ribbon and Label Printer
• 12mm red wine ribbon
• Brown thread
• 5 small brown buttons
• Small amount of Poly-Fil stuffing
• Brown dye ink and mini sponge applicator
• Stiffening spray (optional)
Instructions
For step by step instructions, download the PDF.
Time required: 1-1.5 hours
Just in time for Earth Day, this fun, environmentally friendly sewing project will have you creating head-turning aprons out of old pairs of jeans. By repurposing denim, you’ll save money on materials and do your part to help the planet! Follow this easy, step-by-step tutorial and in no time, you’ll stitch up a one-of-a-kind, upcycled apron you’ll love to wear.

Materials and supplies
Brother Sewing Machine
• Brother Serger 3034D,
3534DT or 4234DT
• Brother Cover Stitch
Machine CV3550
• Serger Gathering Foot
SA213
• Bias Tape Binding Set
SA224CV
• Old jeans
• Black or dark blue thread (if
you want, you can use orange
or yellow thread to match
the stitching on your jeans)
• Lace trim
• Coordinating fabric or ribbon
for gathers/binding (optional)
• Scissors
• Seam ripper
• Rotary cutter and mat
• Marking chalk
• 2 D-rings – 1.5” each
Instructions
For step by step instructions, download the PDF.
Time required: 5 hours
Set your table in seasonal style with these sweet Easter egg placemats. The perfect things to add a springtime touch to all your family gatherings; you’ll love making these easy, decorative table accessories.

Materials and supplies
- 1 metre each of 4 different solid pastel cotton
fabrics
• 1 metre each of 4 different patterned pastel cotton
fabrics
• 1 metre of warm white cotton fabric
• 1 metre of batting (a thin placement batting with
one side adhesive is ideal)
• Coordinating thread
• Brother ScanNCut
• ScanNCut 12” x 24” Standard Mat
• Brother Sewing & Embroidery machine
• 3 pieces of paper, each 12” x 18” or 12” x 24”
(you can buy large-format paper at an
art supplies store)
• Cutting mat
• Measuring tape
• Pins
• Beam compass with pencil attachment (optional)
• Marker
• Iron

Instructions
For step by step instructions, download the PDF.
Time required: 3 hours
Brighten up your table and welcome spring with this modern quilted table runner. Half-square triangles can be easily stitched using the Sew Straight™ Laser Vision Guide function on the Brother VM5100, VM6200D, or XV8550D. You’ll get a lot of use out of your laser guide when you put it to work, again, along with the Dual Feed MuVit™ foot to quilt your table runner. This project is fun, easy and perfect for spring!

Materials and supplies
- 1 fat quarter each of 3 coordinating fabrics
(shades of violet) - 1 metre of white fabric (for blocks and backing)
- ¼ metre of contrasting fabric for binding
(green stripe) - ¼ metre of low loft batting
- Thread
- Brother Sewing Machine – VM5100, VM6200D,
or XV8550D - Rotary Cutter, Mat and Ruler
Instructions
For step by step instructions, download the PDF.
Time required: 1.5 hours
Give your home a cheerful St Patrick’s Day touch with this traditional burlap door wreath. Using just a few materials and your ScanNCut machine, you’ll create this fun and festive project in no time!

Materials and supplies
- Brother ScanNCut (this project was created
with the CM650W) - Wire wreath form
- Burlap ribbon
- Burlap trim
- Styrofoam moss rocks
- Green ribbon
- 12”x12” light green cardstock
- 12”x12” darker green cardstock
- 2 pieces of wire (4” of 22 gauge wire)
- Low temp hot glue gun
- Fabric glue
- 3D adhesive foam squares
- Burlap dye ink
Instructions
For complete instructions, download the PDF instruction guide.
Time required: 30 min
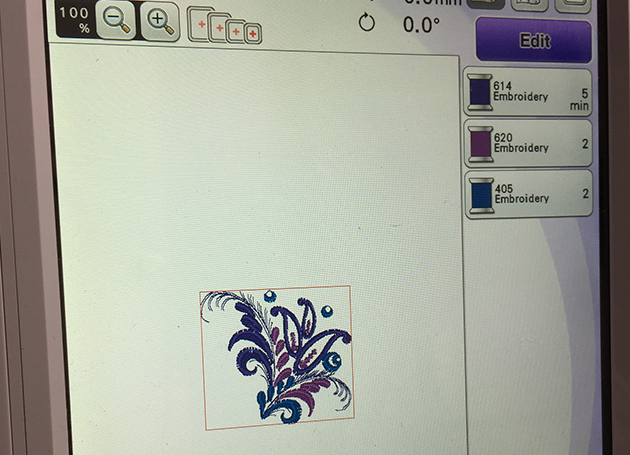
Add a touch of style with an embroidery detail. It’s simple to dress up an existing top by adding a small embroidery design in colours that complement. There are so many options for design. Use one of the built-in designs on your Brother THE Dream Machine, or import your own either by using the scanning mat, through USB, or wirelessly using BES software.

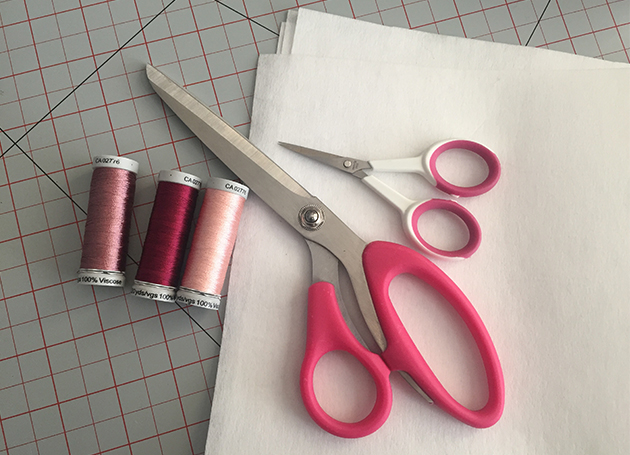
Materials
- Brother THE Dream Machine
- A lightweight woven shirt
- Medium-weight cutaway stabilizer
- Embroidery thread in three colours
- Embroidery scissors
- Fabric scissors
Instructions
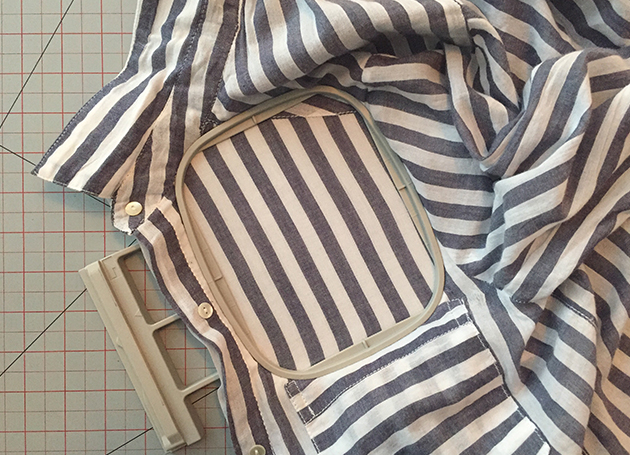
Cut a piece of stabilizer 9” (23 cm) x 10” (26 cm), and hoop the stabilizer and shirt into the smallest hoop included with THE Dream Machine.
From the home screen of your machine, choose “Embroidery”.

From pattern category 1, choose design #65.
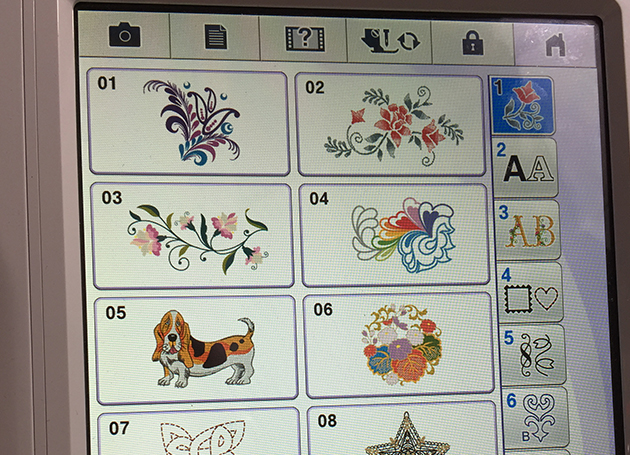
Select “Set”.
Change your presser foot to an embroidery foot.
Load the embroidery hoop into your sewing machine.

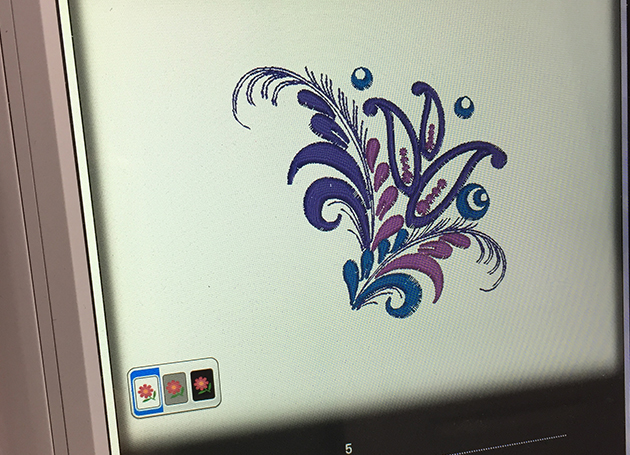
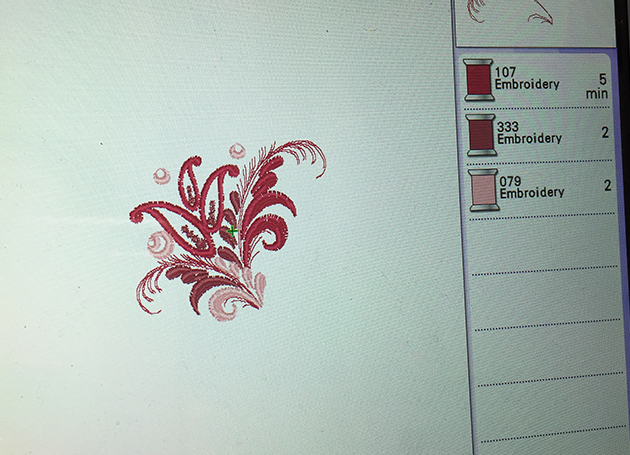
Click “Edit” to adjust your design as needed. I chose to flip my design as a mirror image. When finished, click “Edit” again.
Select a thread colour to modify any of them, if necessary, then press “OK”.
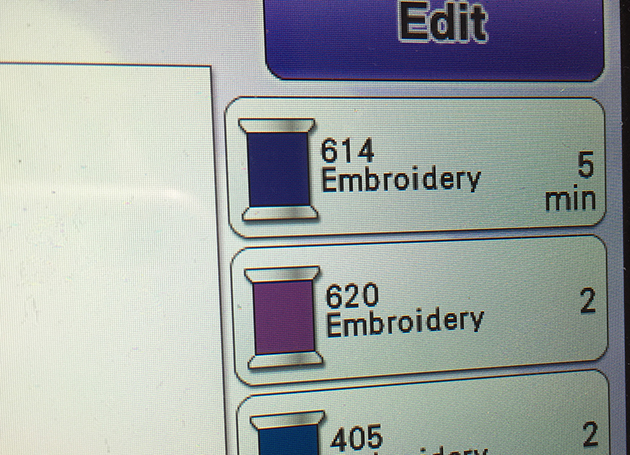
Click “Embroidery”.
Load the embroidery thread colour, lower the presser foot, then press the green arrow.

Repeat Step 10 until the design is complete.

Trim your jump threads.
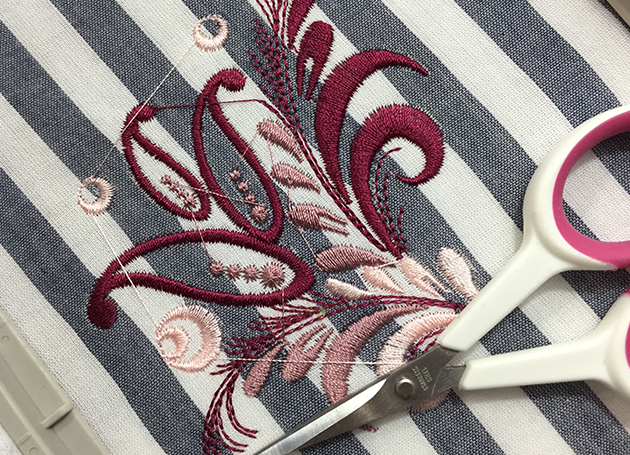
Cut away the excess stabilizer.

Row title
Lorem ipsum dolor sit amet, consectetur adipiscing elit. Nullam venenatis libero egestas dui finibus, nec tempus odio volutpat. Sed a pretium tortor. Mauris eleifend tempus elit ac ornare. Mauris semper bibendum eros a molestie. Fusce non dolor non augue aliquam dictum.

Row title
Lorem ipsum dolor sit amet, consectetur adipiscing elit. Nullam venenatis libero egestas dui finibus, nec tempus odio volutpat. Sed a pretium tortor. Mauris eleifend tempus elit ac ornare. Mauris semper bibendum eros a molestie. Fusce non dolor non augue aliquam dictum.
- Set the ruffler to the gathering position (#1).
- Place the raw edge of the pressed strip along the left side of the ruffler foot and slip into the ruffler.
- Start with a slow machine speed and begin pleating the strip from end to end.
- Draw a circle on the felt square.
- Start at the outside of the circle you drew on the felt and lay the pleats onto the circle. The pleats will naturally form into a circle.
- Attach Straight Stitch Foot to the sewing machine.
- Stitch the pleats to the felt on the ruffle’s seam line. Once you’ve made it all the way around the first time, place the strip just to the inside of the first row and continue in a concentric circle until the entire strip has been sewn down.\ .
Time required:1 hour
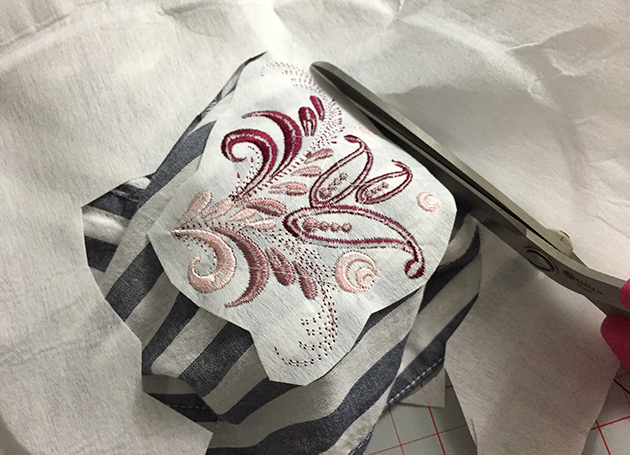
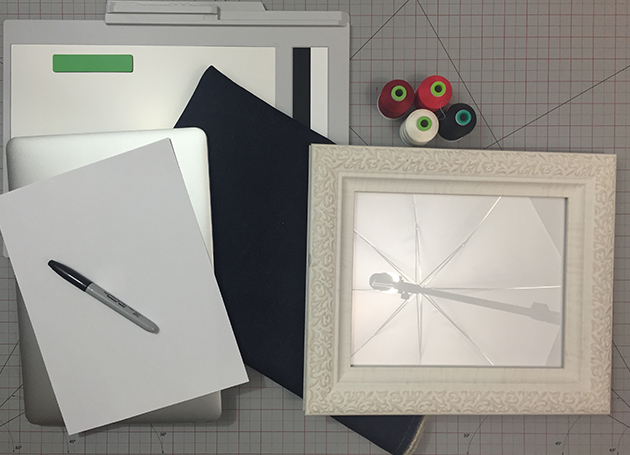
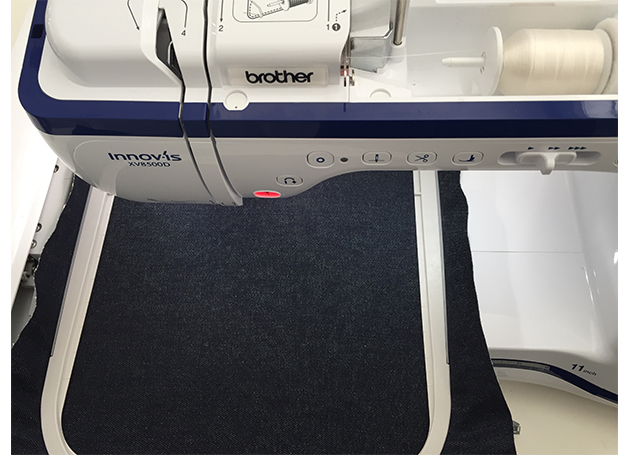
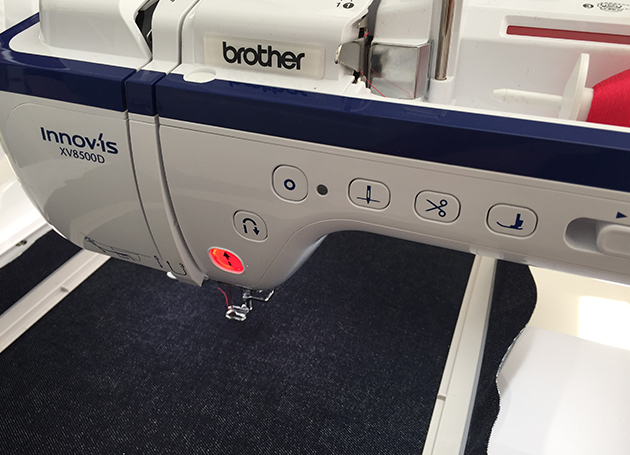
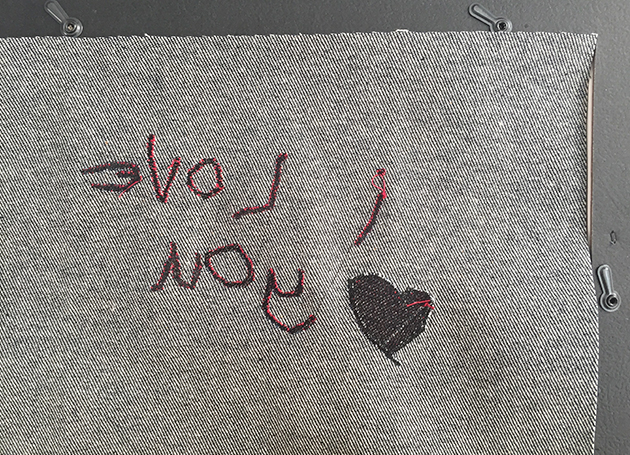
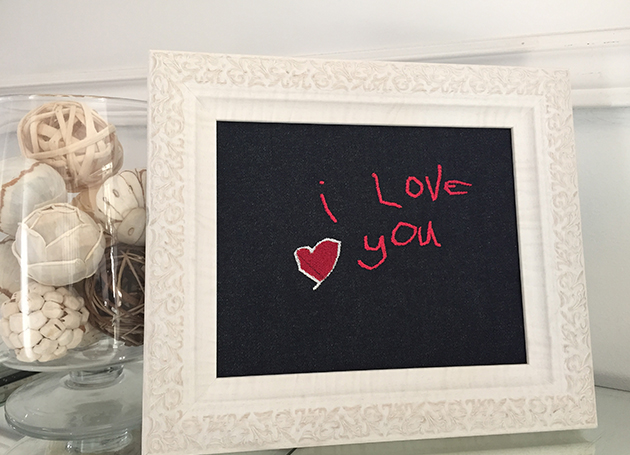
Create a beautiful, embroidered message for your Valentine. Design or draw a special love note, then use The Dream Machine to scan and digitize the message. To save yourself a step, embroider onto heavyweight denim to avoid the need for a stabilizer. Denim also adds an interesting rugged contrast to the sweetness of your message.

Materials and supplies
- Brother’s The Dream Machine
- The Dream Machine scanning attachment
- Embroidery thread: white, red, and burgundy
- Embroidery bobbin thread: black
- Heavyweight denim
- 5” x 11” frame
- Paper and a marker, an existing note, or design software
Instructions
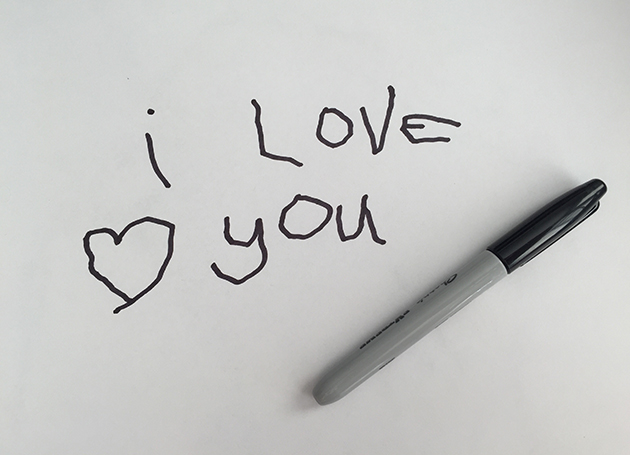
Hand-write your own message, use something existing such as a love note, or even combine text and an image using design software.
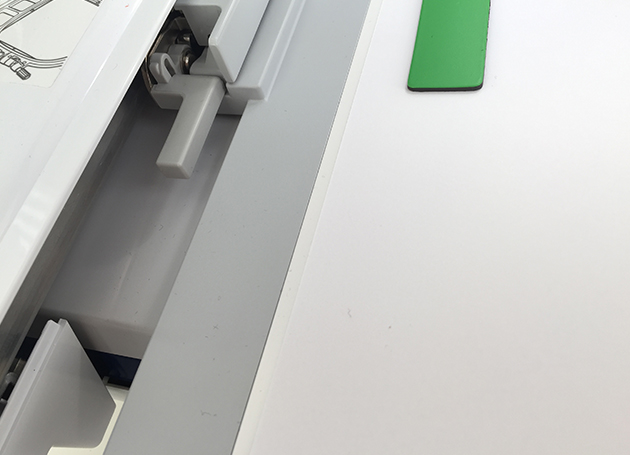
Attach the message to The Dream Machine’s scanning mat with the provided magnets. If you have Brother’s BES4 software, you can send a digital copy of the design to your Dream Machine wirelessly.

Put the scanning mat into the machine, and make sure it’s locked in place.
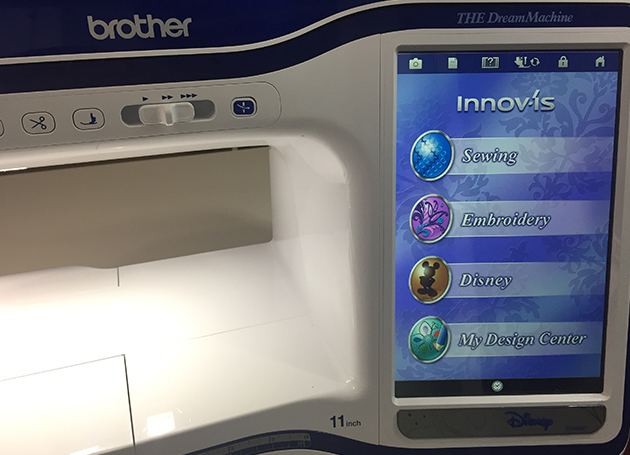
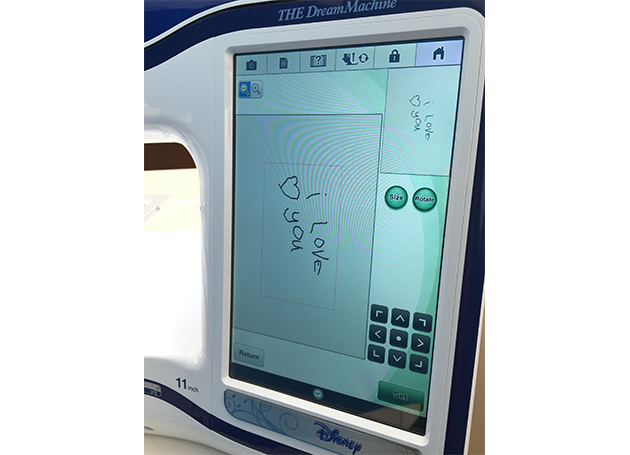
From the machine’s home page, select “My Design Center”.
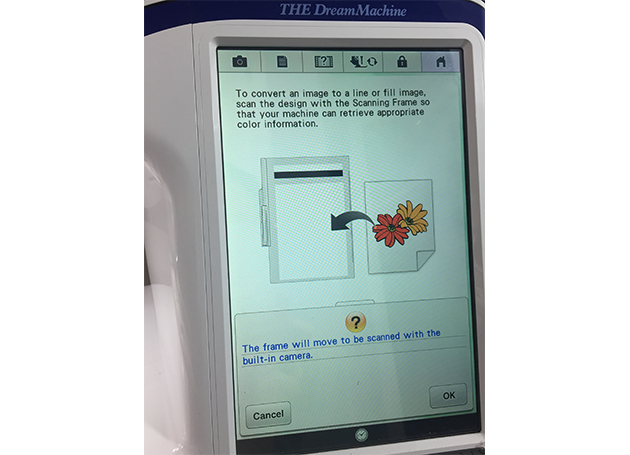
Select “Illust.” then “Scan”.
When the notification screen appears, select “OK” and the machine will scan your message.
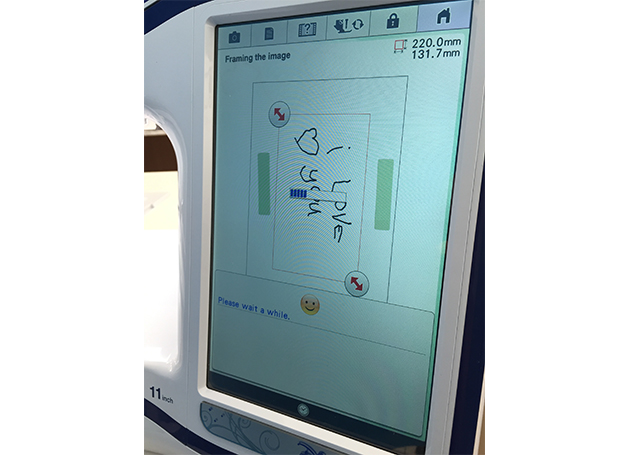
Click and drag the red arrows to crop into the message in order to remove the green magnets from the final scanned image file.

Select “OK”, wait while it processes, then select “OK” again.
Adjust the size or rotate the image as needed. I left mine as-is because I drew it to fit and because of the orientation I want within the frame. Select “Set”.
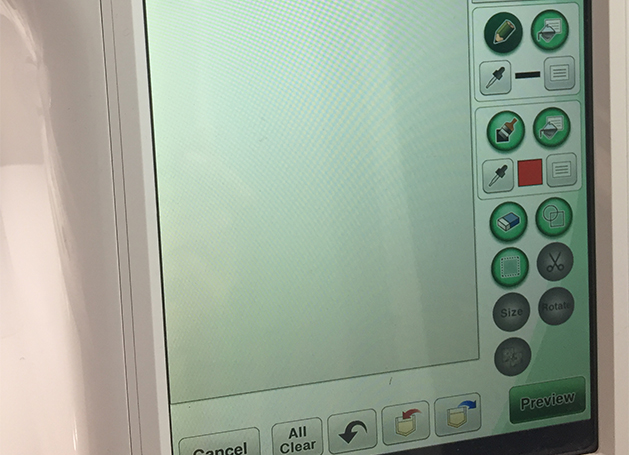
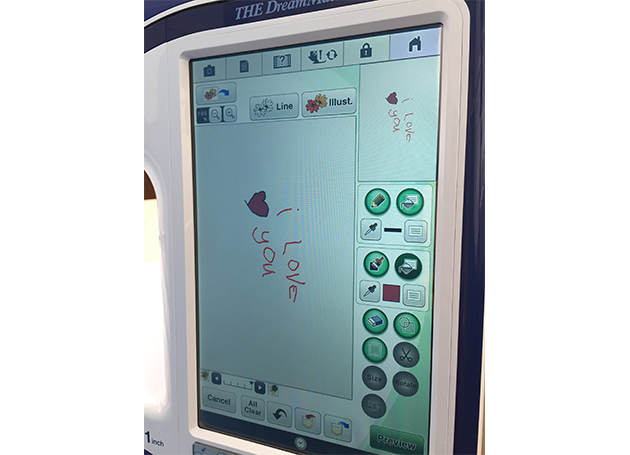
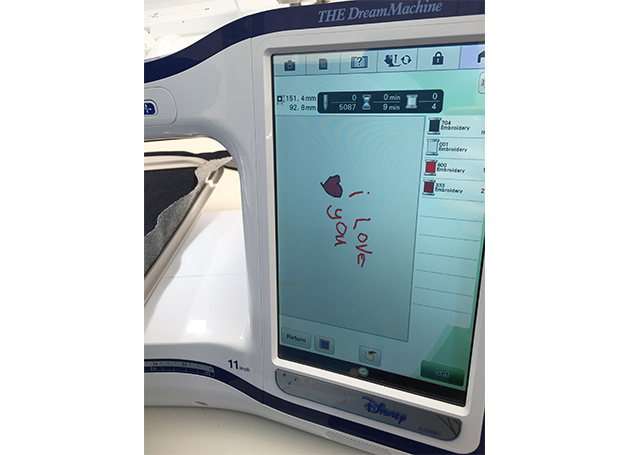
Select the paintbrush fill tool and the colour you want, then fill each area of your message individually. (Although I will embroider the heart border in white, I’ve shown it black here so it’s easy to identify in these photos.)

Select “Preview” then make fine adjustments as desired. Select “OK” when ready. You’ll now see a preview of the thread colours and embroidery duration.
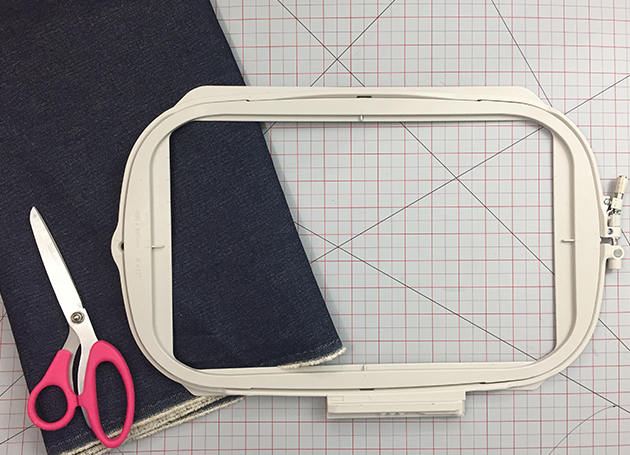
Hoop your denim (I’ve used an 8” x 12” hoop),
Change your presser foot to an embroidery foot.
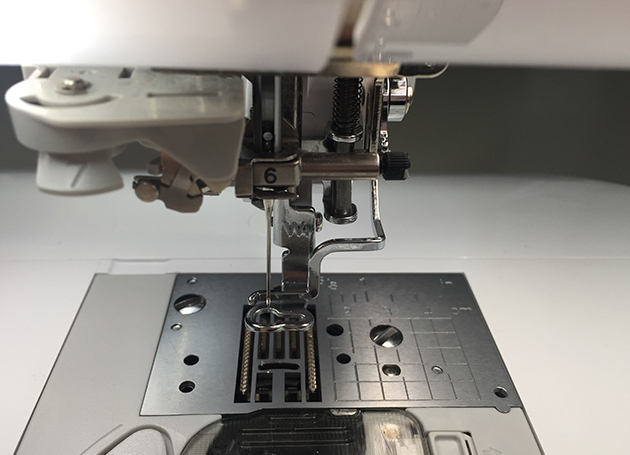
Put the hoop in the machine and load your machine with the first thread colour.
Select “Set” then select “OK”. Select “Embroidery” and the machine may adjust to prepare.
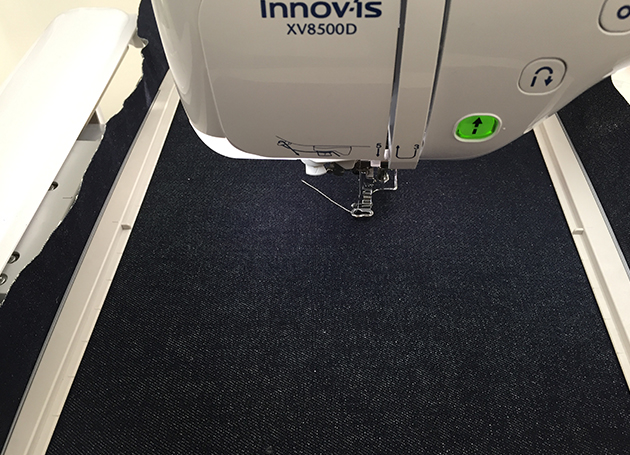
Lower the presser foot, and the start/stop arrow will turn green indicating you’re all set.
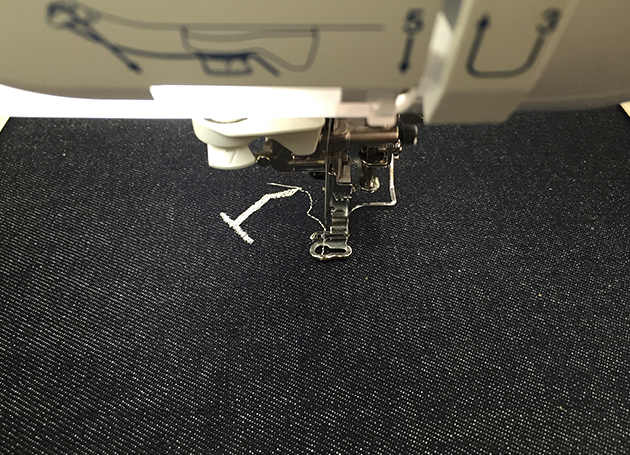
Press the green arrow to begin embroidering your first colour. The machine will embroider until it’s time to change threads.
If you want to skip some of the steps that the machine is dictating (mine, for example, wants to fill the two “o” letters with white), select the needle image with the plus and minus signs. Then select the down double-arrows to advance to the stiches you want.

When the machine stops after Step 17, load your next thread, lower the presser foot, and press the green arrow again.
Repeat Step 19 until you’ve completed your entire design.
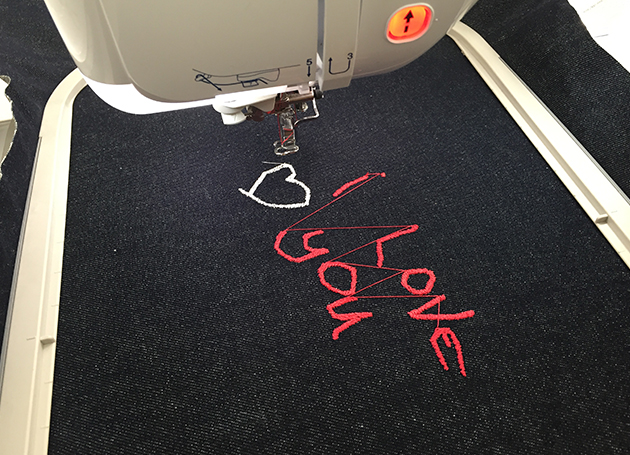
Remove the hoop from the machine and trim all of your jump threads.
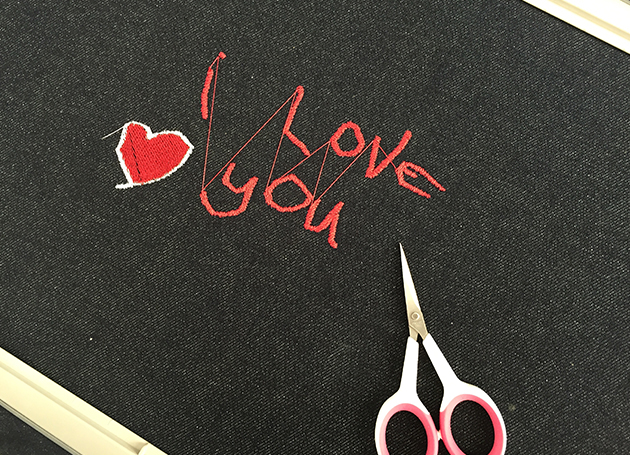
Cut the denim so it’s the perfect size for the inside of your frame.
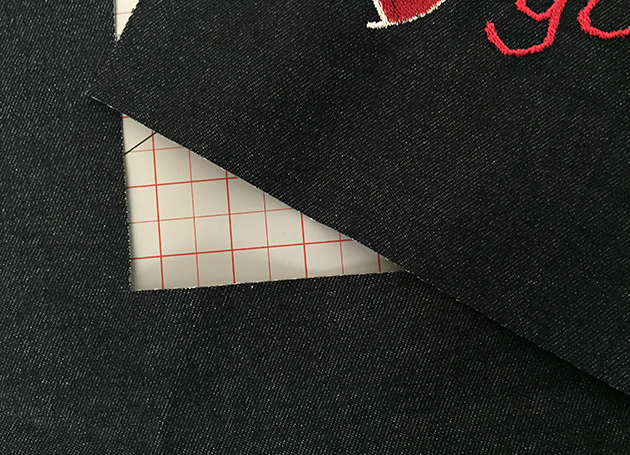
Place the message inside your frame, face down.
Leave your loving message somewhere it will be found and enjoyed on Valentine’s Day.
Do you find yourself at your ironing station and missing something? Perhaps a pin or scissors to snip a thread or a lint roller to get rid of that nasty lint?
Then this quick and easy-to-sew Ironing Board Caddy is for you.

Materials and supplies
- Brother Sewing Machine
- Walking foot
- Binding foot (optional)
- .25 metre of fabric for centre piece
- .5 metre of fabric for pocket and pin cushion
- .25 metre fabric for lining
- .25 metre fabric (that grips, or shelf grip fabric)
- .25 metre of batting
- Thread
- 1 cup of crushed walnut shells or rice (to fill pin cushion)
- Ruler/Cutting Mat and Cutter
Time required: 1 hour
This fun-to-make tea towel project is a great way to celebrate National Embroidery Month! Using just a few supplies and your Brother Sewing & Embroidery Machine, you’ll have these pretty towels stitched up in no time!

Materials and supplies
- Brother Sewing and Embroidery Machine
- Store-bought tea towels
- 1/8 yard of assorted decorative fabrics
- Tear-away stabilizer
- Embroidery file (download included)

Tip:
- Pre-wash and iron tea towels and fabric. It’s also helpful to use spray starch on your tea towels and fabric after washing.
- ¼” seam used throughout
Instructions
- Measure width of washed tea towel to determine width of trim fabric (some shrinkage may have occurred during washing).
- Cut strip of decorative fabric 9 1/2″ x width of tea towel plus 1”.
- Cut strip of decorative trim fabric 2 ½” x width of tea towel + 1”.
- Fold trim fabric in half lengthwise, wrong sides together.
- Fold decorative fabric in half, lengthwise, right sides together.
- Slip folded trim fabric between the long sides of the decorative fabric with raw edges even and pin.
- Stitch long edges of fabric together.
- Turn fabric tube right side out.
- Place long edge of fabric tube even with the wrong side of the bottom edge of the tea towel. Pin in place.
- Stitch the long edge. Backstitch at each end of the seam.
- Fold the fabric strip over the bottom edge and align with the edges on the left and right front side of the towel.
- Fold in each of the two side edges even with the tea towel and press, pin in place, keeping edges smooth and flat.
- Using coordinating thread, sew the fabric tube along the top edge and side edges of the front side of the tea towel.
- Determine desired placement of embroidery design.
- Hoop stabilized tea towel.
- Use your embroidery machine’s built-in fonts to create the words or use the included PE Design file.
- Embroider design.
- Carefully remove tear-away stabilizer.

And that’s it! Make these one-of-a-kind tea towels for yourself and some for gifts to bring style and function to any kitchen.
Time Required: 2.5 hours
Stay warm in style with a double-sided infinity scarf. This version features faux leather closure detailing plus two different fabrics for added interest.

Materials and supplies
- Brother sewing machine (this project was made on the NQ900)
- Thread, black and clear
- Cotton, lightweight, black: 39” long (1 m)
- Cotton, lightweight, plaid: 39” long (1 m)
- 2 leather-look closures
Time required: 1.5 hours
Snuggle up with a pillow that takes you from day to night with ease. This fun-to-squeeze double-sided pillow has a wide-eyed expression on one side, and flips over to reveal a sleepy face on the other side. Since felt doesn’t fray, its raw edges can be left unfinished, making this a great project for beginners and for kids.


Materials
- Brother Sewing Machine (this project was made on The Dream Machine)
- Yellow thread
- Purple, medium-weight felt
- White, medium-weight felt
- Yellow, medium-weight felt
- Teal, medium-weight felt
- Polyester fill batting
- Fabric scissors


Instructions
1. Cut the purple felt into two rectangles, each 16” w x 21” l (41 cm x 53 cm).

2. Sketch character faces until you find two expressions you’re happy with.
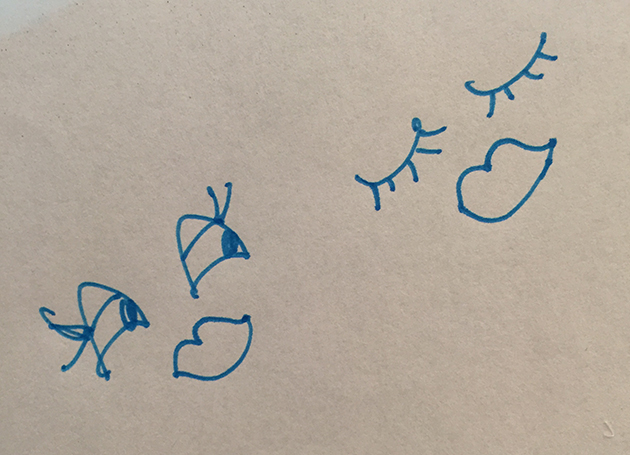
3. Cut the different felt colours into the shapes you’ve drawn.
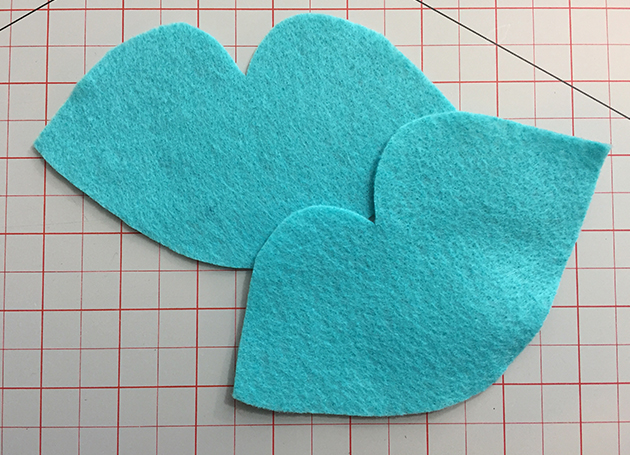


4. Place the felt shapes onto each piece of purple fabric, positioning them where you want them.

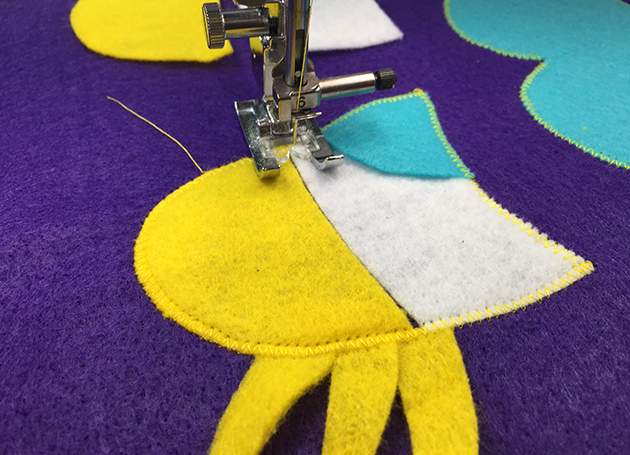
5. Topstitch the felt shapes in place using an over edge zigzag. (I left the eyelash ends unsewn to give it a fluttery effect.)
6. With wrong sides together, sew the two purple rectangles together using a zigzag stitch 2” (5 cm) away from the fabric raw edge, leaving an 8” (20 cm) opening for inserting the batting.

7. Stuff the pillow with batting until your desired density has been achieved, then sew the remaining edge closed.

8. Using your fabric scissors, cut the raw edges of the felt in a wave shape for added interest.

You’re done! Lay back and count some sheep while cuddling your new, felt friend.

An invisible zipper is the perfect blend of beauty and function. You get the utilitarian benefits of a zipper without the bulk or visible details that can often distract from a project’s clean lines. Whether used in home décor or garment sewing, an invisible zipper appears nearly invisible (hence the name) from the project right side, so it’s ideal for formal pieces and high-end fabrics.

Instructions
Invisible zippers aren’t hard to install. In fact, they require fewer steps than a regular zipper, so many sewers find them easier to install than a standard zipper. They do take some getting used to, though. With practice and the tips below, you’ll be on your way to sewing an invisible zipper with confidence.
An invisible zipper
A regular zipper is different than an invisible zipper. So how can you spot the difference? Pay attention to a zipper’s details to determine if you’ve got a true invisible zipper. Here are two things you want to look for:
- The easiest way to spot an invisible zipper is to look at the pull tab. The pull tab on an invisible zipper is delicate, narrow, and pointed, whereas a regular zipper pull tab is usually flat, rectangular, and comparatively bulky.
- The teeth on an invisible zipper are on the wrong side of the zipper, the opposite of the pull tab. Think of it as the teeth being on the “back” of the zipper.
[IMG_7106.jpeg]
An invisible zipper foot
When sewing an invisible zipper, you can’t use a regular presser foot or even a regular zipper foot. Both won’t allow you to get close enough to the zipper teeth while sewing, which will result in a zipper that can be seen from the project right side. Instead, look for a proper invisible zipper foot, which has grooves or tunnels on the underside. Those grooves hold the zipper teeth out of the way, allowing your sewing machine’s needle and thread to get close to the zipper teeth. I prefer to sew my invisible zippers using a piping and cording foot. It doesn’t hold the teeth back (you have to do that with your fingers, so it requires more skill to use), but I find that I can sew even closer than with an invisible zipper foot.
[IMG_7115.jpeg, IMG_7117.jpeg]
Prepping for installation
Before you install an invisible zipper, there are a few things to do that will make it easier.
- Finish your fabric raw edges if you plan on finishing them. It’s easier to do this before the zipper is installed, rather than after.
- Iron your zipper on low heat in order to flatten the fold at the teeth. I don’t like to do this because I prefer to see where my groove is, but I know some people swear by this and feel that it makes things easier.
- Sew the seam of your project below the zipper before installing an invisible zipper.
[IMG_7108.jpg]
Invisible zipper installation
[IMG_7126.jpeg]
- Open the zipper.
- Lay one side of the zipper tape on top of your fabric, right sides together. Make sure the raw edge of the fabric is on the same side as the edge of the fabric tape, and align your zipper tape so the groove next to the teeth is at your seam allowance. Pin the zipper tape and fabric together.
- Switch to an invisible zipper foot.
- Baste the zipper tape in place.
- Sew the one side of the zipper tape in place, ensuring the stitches go directly in the groove next to the teeth. Sew from the top of the zipper tape to as far as you can go while staying in the groove.
- Repeat Steps 2 to 5 on the other side of the fabric with the other side of the zipper. For Step 3, instead of changing presser feet, adjust your invisible zipper foot for the opposite side.
Whether you’ve sewn invisible zippers before or you’re about to for the first time, the tips above will help make the process easier.
Time required: 1.5 hours
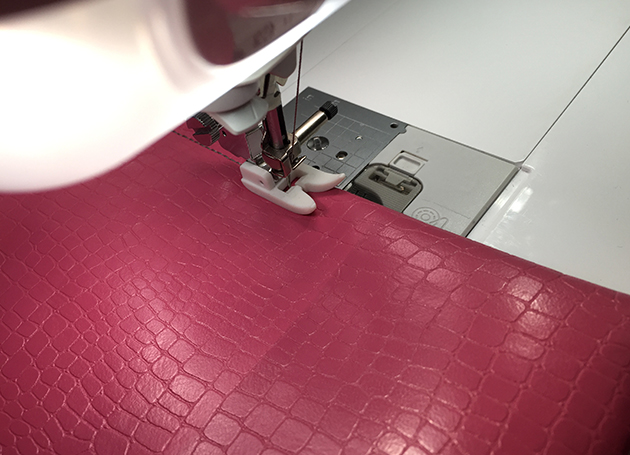
Sew a simple leather clutch that goes with any outfit. Add interest by choosing a standout fabric colour, cutting an asymmetrical flap and sewing contrast topstitch detailing. This clutch was sewn from faux leather, and I used a Teflon foot to ensure the fabric fed through the machine easily while sewing.

Materials
- Brother sewing machine (This was sewn on The Dream Machine)
- Pink all-purpose thread
- Grey topstitching thread
- Topstitching needle
- 5 m pleather
- Teflon presser foot
- Snaps and snap tool
- Scissors

Instructions
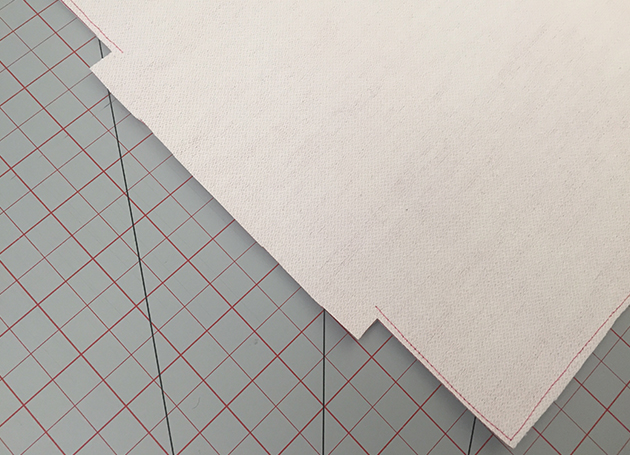
1. Cut two pieces of pleather 21” (53 cm) x 15” (38 cm), then trim one short edge into an asymmetrical triangle.
2. Change your sewing machine presser foot to a Teflon foot.
3. Sew the two pieces of pleather together, right sides together, leaving an opening about 6” (15 cm) opening on the straight, short edge.
4. Trim down the excess seam allowance around the entire clutch, leaving it long at the opening.
5. Cut the seam allowance down even more across the corners.
[IMG_6688.JPEG, IMG_6690.JPEG]
6. Flip the bag right side out, tucking in the seam allowance at the opening and finger pressing at the seams to keep them flat.

7. Thread your sewing machine with topstitching thread (keeping the bobbin loaded with all-purpose thread), and change your needle to a topstitching needle.
8. Topstitch across the straight, short edge of the bag.
9. Turn up the bottom third of the bag, then flip the bag over.
10. Topstitch around the perimeter of the bag except for across the fold at the bottom, then flip the bag back again.
11. Turn down the flap to determine the snap placement.
12. Use the snap tool to attach the snaps to the clutch base and the flap.
Fill your new stylish clutch with your favourite necessities.
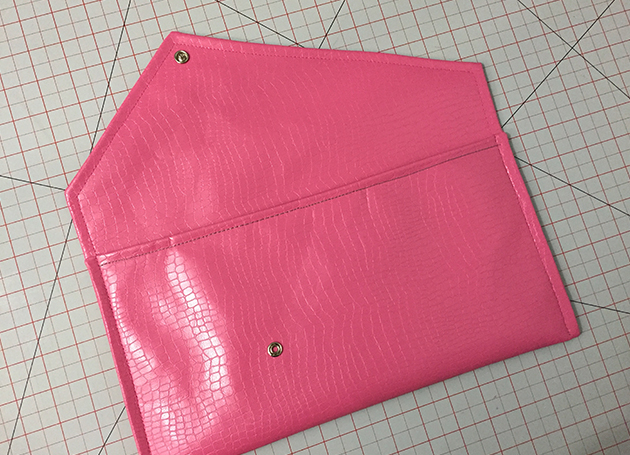
Time required: 30 minutes
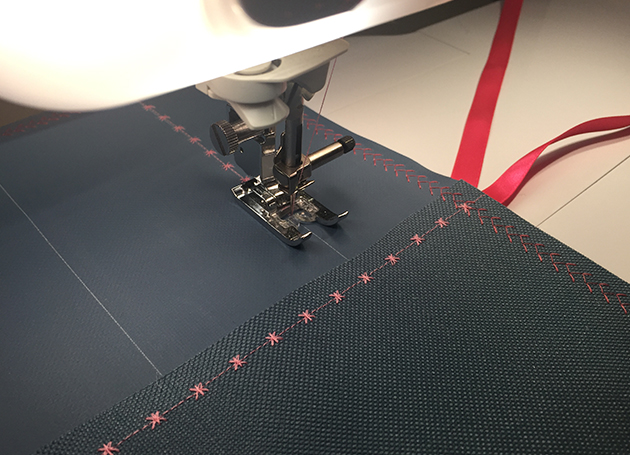
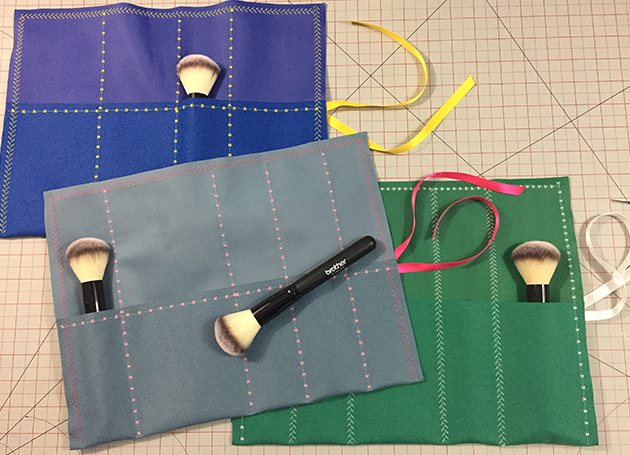
This simple roll-up case — fit for makeup brushes, pencils and markers, knitting tools, and so much more — was Brother’s make-and-take project at the fall Creativ Festival in Toronto this year. Show guests stopped by the Brother booth to discover the NQ900 sewing machine while completing a beautiful project and walking away with a free blush brush. Because you’re working with a material that doesn’t fray, the fabric edges can be left raw, keeping the focus of the project on achieving beautiful decorative stitching.

Materials
- Brother sewing machine (this project was made on The Dream Machine, and Creativ Festival guests sewed theirs on the NQ900)
- Thread, pink
- Fabric-backed vinyl, medium-weight, blue: 13.5” (34 cm) x 16” (41 cm)
- Ribbon, 18” (46 cm long)
Instructions
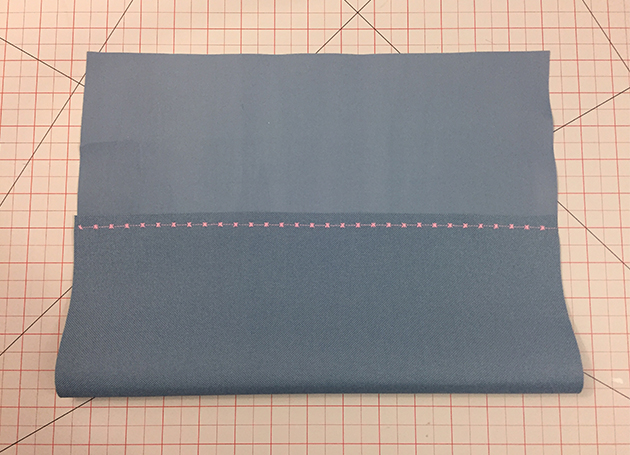
1. Fold the bottom short edge of the fabric one third of the way up to create the main pocket.

2. Sew a decorative stitch across that bottom short edge of the fabric.
3. Find the mid-point of the ribbon and lay that under both thicknesses of the fabric, lined up with the top of the pocket edge.
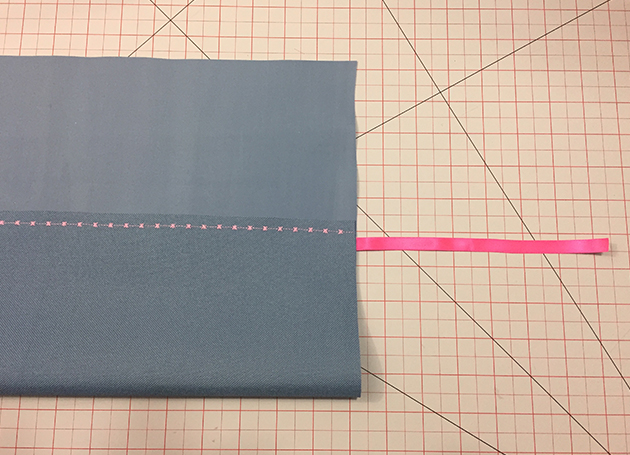
4. Sew a decorative stitch around the perimeter of the project, excluding the fold. Be sure to catch the ribbon as you sew down the final side.

5. Using a ruler and a closed pair of scissors, score a series of vertical lines down the centre of the case. Choose a distance between the lines based on what you plan on carrying.
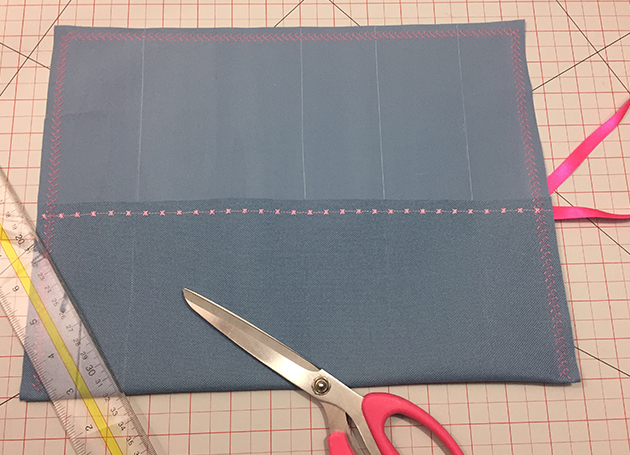
6. Sew down the scored lines. You can use the same decorative stitch or choose a new one.
7. Use a pair of scissors to cut the ends of the ribbon at an angle.

8. Fill your roll-up case and toss it in your overnight bag or sewing kit.

Time required: 20 minutes
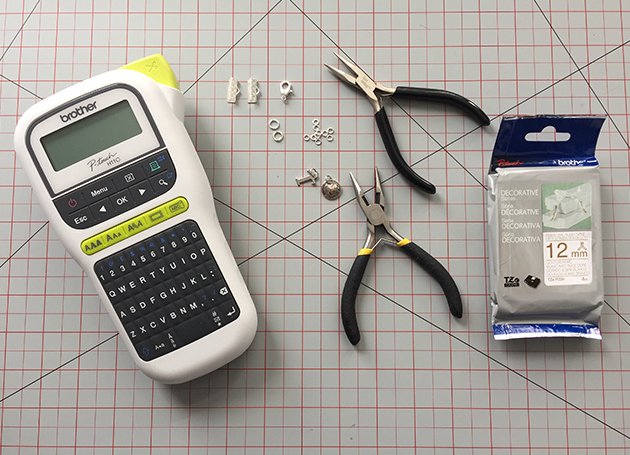
Personalize a made-by-me bracelet for your flower girl to wear on your special day. Modify the length of the ribbon and the text to create something unique for your bridesmaids, your mother, your mother-in-law to-be, or for yourself.

Materials
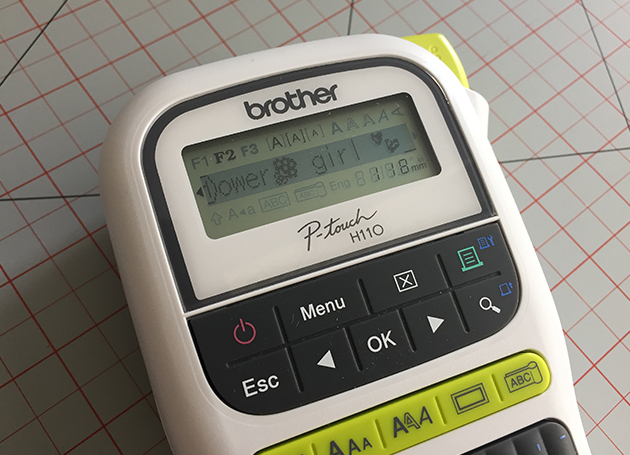
- Brother P-touch (this project was made on the PT-H110)
- 2 x chain nose pliers
- 2 x ribbon clamps
- 1 x lobster clasp
- 2 x 7 mm jump rings
- 7 x 4 mm jump rings
- 1 x letter charm
- 1 x heart charm
- Brother TZ Tape Decorative Series 12 mm Ribbon Tape in Gold on White
Instructions
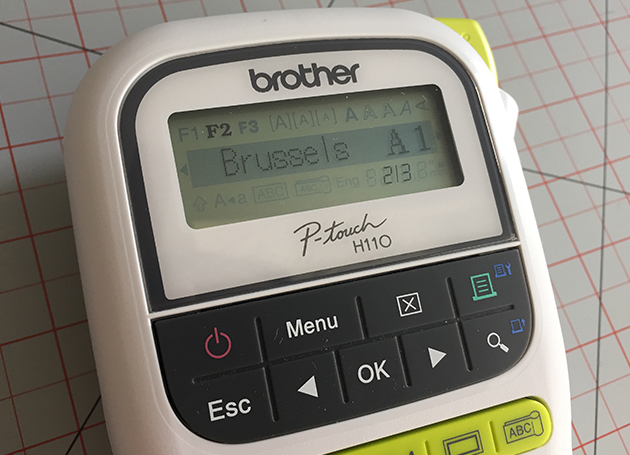
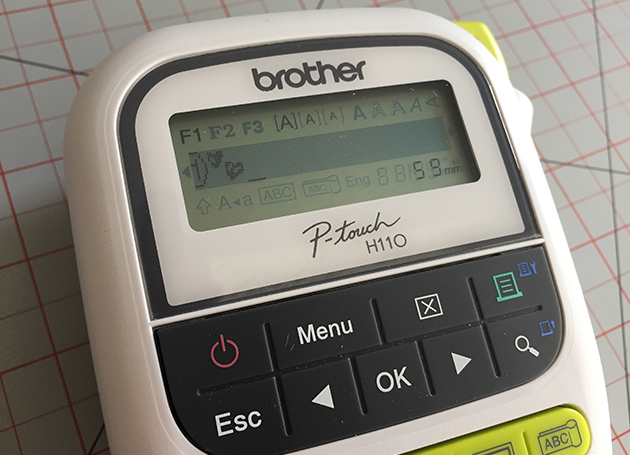
1. Press the left-most “AAA” button to select a font.
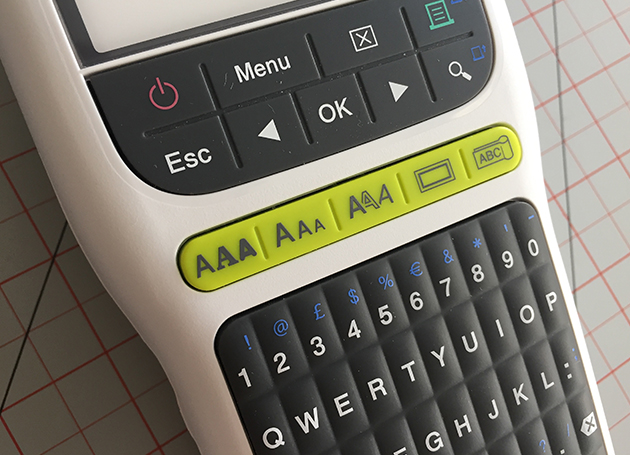
2. Continue pressing it until “Brussels” appears. Press “OK”.
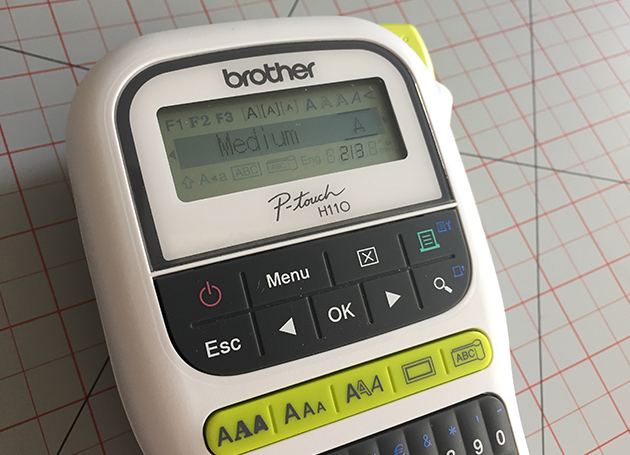
3. Select the second-to-left “AAA” to choose a width. Click it until “Medium” appears. Press “OK”.
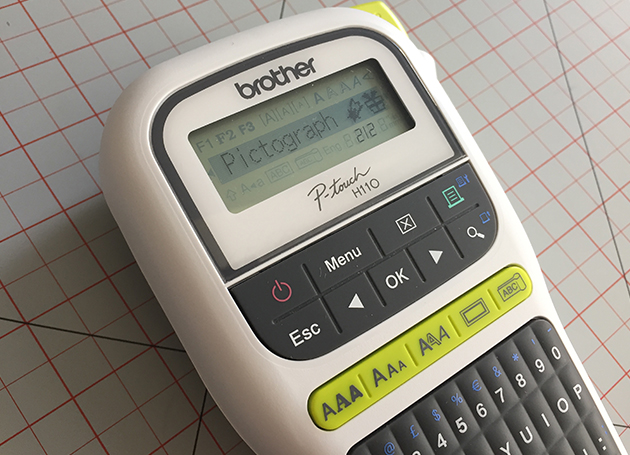
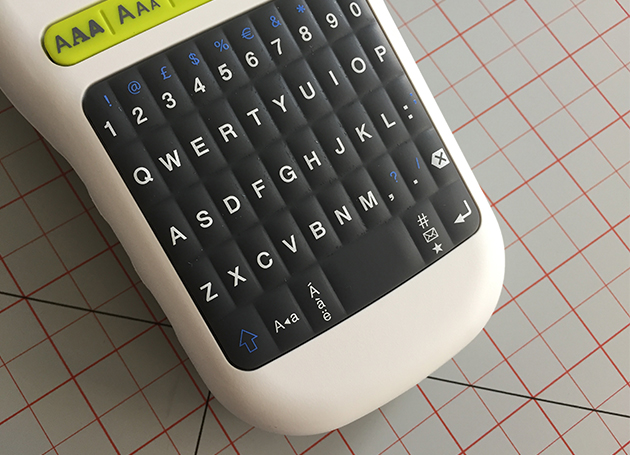
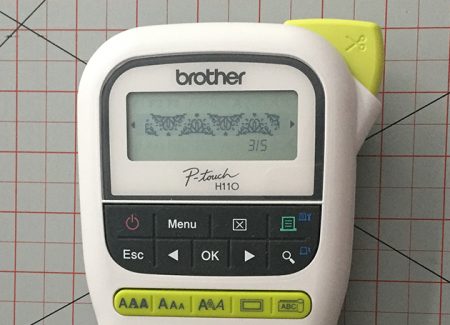
4. Press the #, mail, star key in the bottom right corner until “Pictograph” appears. Press “OK”
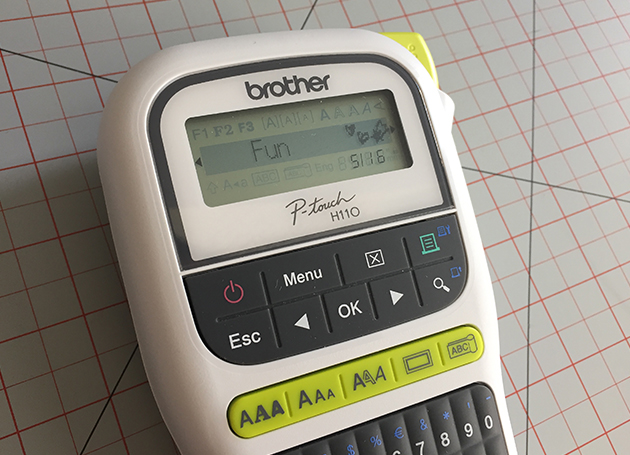
5. Press the right arrow until you see “Fun”. Press “OK”.
6. Press “OK” to select the double heart.
7. Type a space, then type “our flower”.

8. Press the #, mail, star key until “Pictograph” appears. Press “OK”.
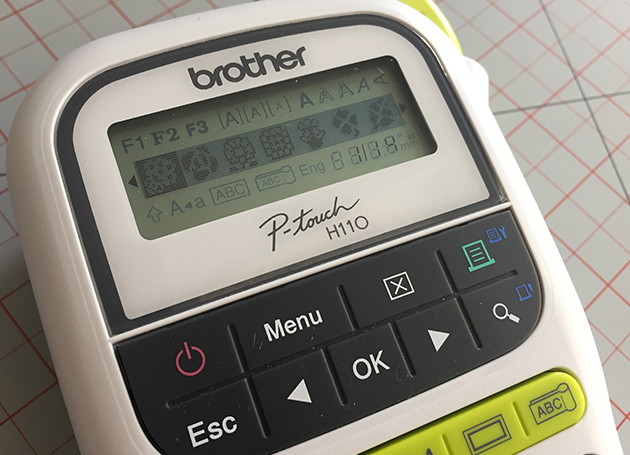
9. Click the right arrow until “Garden” appears.
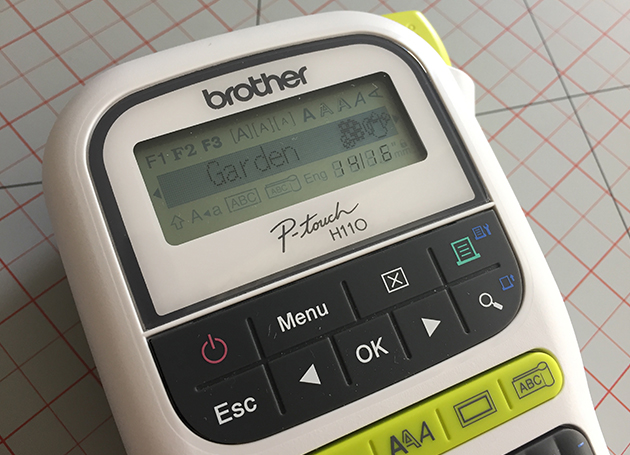
10. Click “OK” and click “OK” again to select the first bouquet of flowers.
11. Type space “girl” space.

12. Press the #, mail, star key in the bottom right corner until “Pictograph” appears. Press “OK”
13. Press the right arrow until you see “Fun”. Press “OK”.
14. Press “OK” to select the double heart.
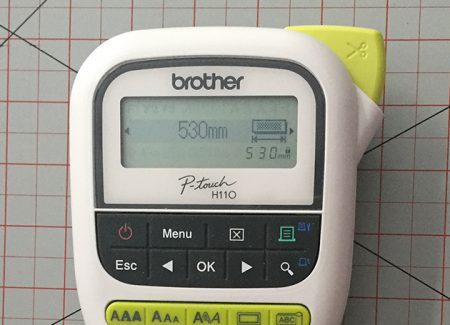
15. Press the green print button in the top right corner of the machine then press “OK” to select one copy.
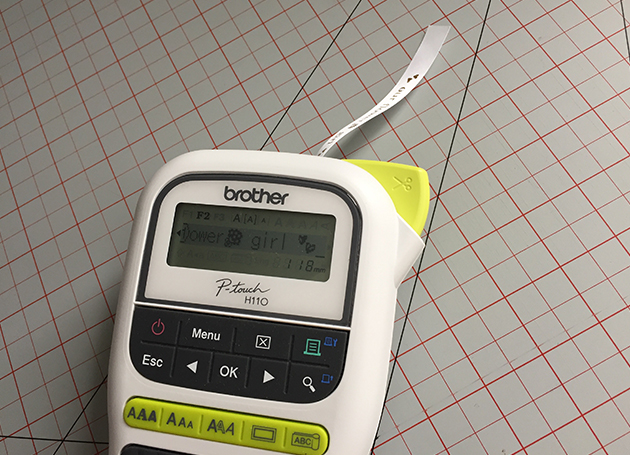
16. Depress the green button to cut the ribbon.
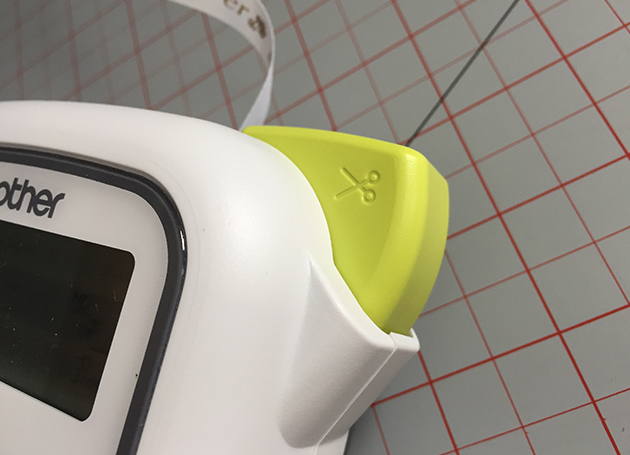
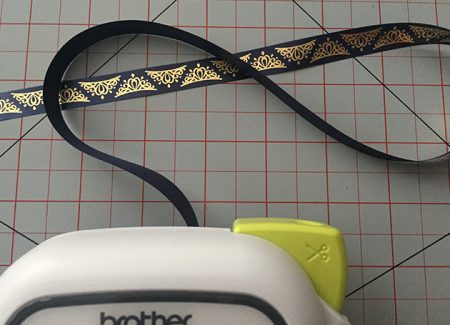
17. Taper the ribbon ends on both sides.
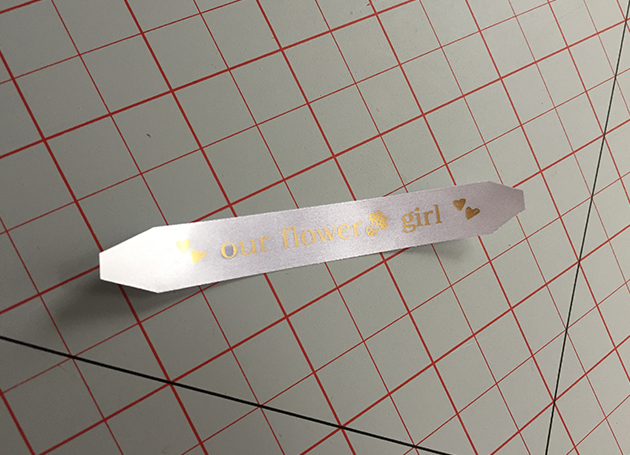
18. Use the chain nose pliers to open all of the jump rings.
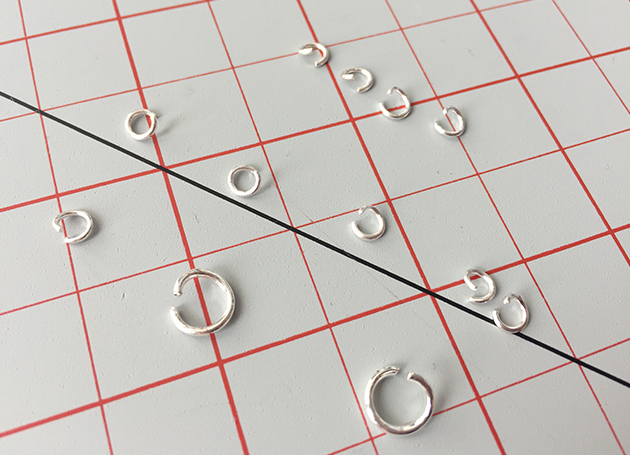 19.
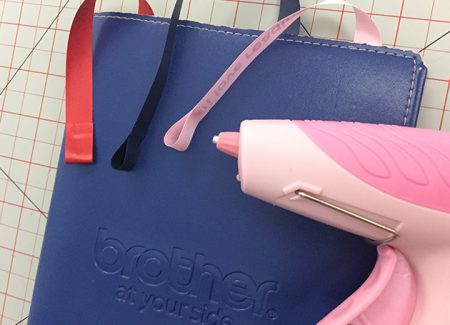
19. 19. Add a 4 mm jump ring and then a 7 mm jump ring to one of the ribbon clamps. To the other ribbon clamp, add three 4 mm jump rings and then the lobster clasp. Connect the two charms with a 7 mm jump ring and then add three 4 mm jump rings, connecting the third jump ring to the ribbon clamp that has the lobster clamp attached. Close all of the jump rings once connected.
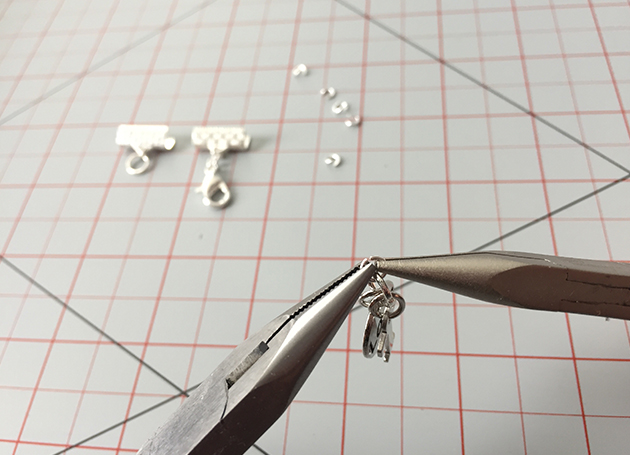
 20.
20. 19. Use the pliers to close the ribbon clamps around each ribbon end.

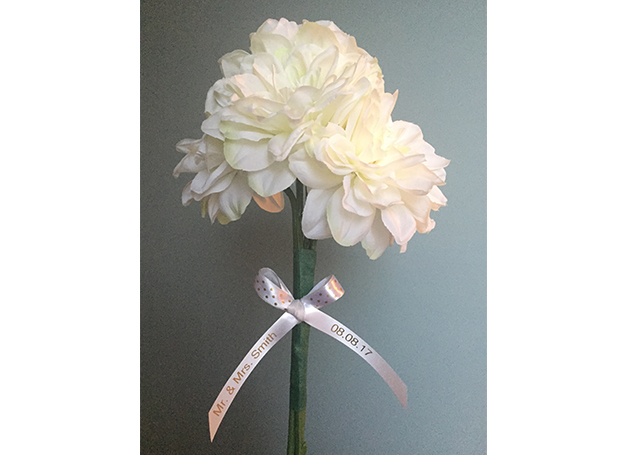
Inspiration
Use the P-touch ribbon printer to customize every part of your wedding from your flowers and bridesmaids’ gifts to your guest favours and table decor. Print decorative patterns, heartfelt messages, your initials, or your wedding date. Money-saving tip: Create an upscale faux bouquet that will preserve perfectly in a box frame.
Interfacing is a type of fabric that’s used to give body or stability to a garment, craft project or accessory. It’s an additional layer that’s hidden inside your project, attached to the fabric, facing or lining that can be the full size of your pattern piece or only a portion of it.

Interfacing gives more durability to your fabric and prevents your project from stretching or distorting in certain areas. You’ll often find interfacing in garment facings, waistbands, pocket edges, collars, cuffs, purses and curtains.
See the types of interfacing listed below to understand how to choose it based on your fabric choice. The amount of stretch in your interfacing should match the stretch of your project fabric. Additionally, the weight of your interfacing should be lighter than or equal to the weight of the fabric you’re using, unless your project dictates something specific, such as a heavyweight interfacing added to a purse.
Types of Interfacing:
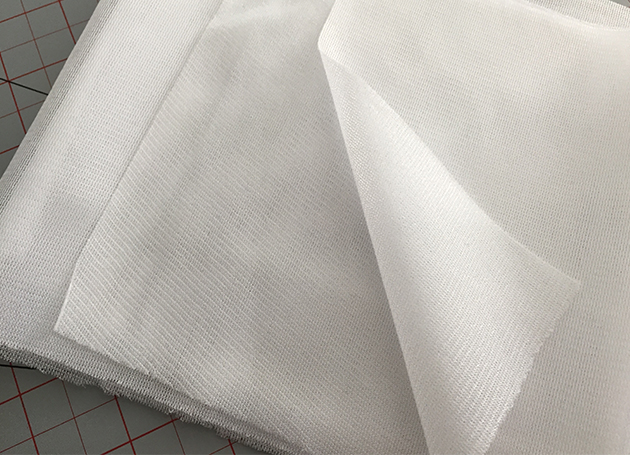
Woven interfacings can be made of synthetic fibres, natural fibres or a blend of fibres and are available in a variety of weights and structures. Woven interfacings tend to be the strongest and longest lasting.
Non-woven interfacing is made of synthetic fibres bonded together in weights ranging from sheer to heavy. It has no grain line, making it the easiest to work with because you don’t have to cut the pieces on-grain.

Knit interfacing (also known as tricot interfacing) has a bit of give and stretch and provides flexibility, making it ideal for use with lightweight knits and woven fabrics.
Interfacing Applications:
In addition to choosing an interfacing type, you’ll also need to choose between iron-on or sew-in applications.
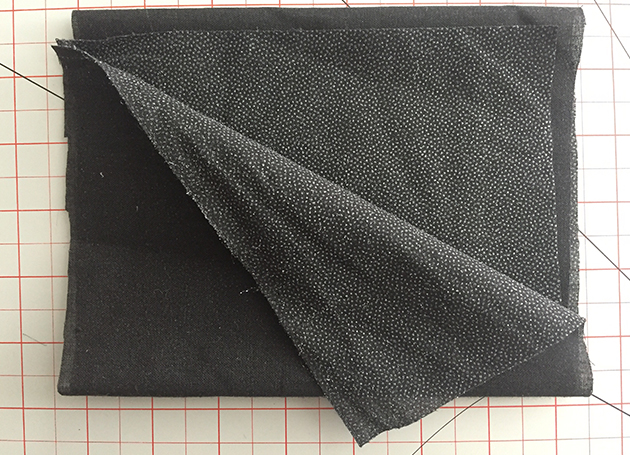
Non-fusible interfacing must be sewn into the garment. This type is permanently basted in place, either by hand or by machine.
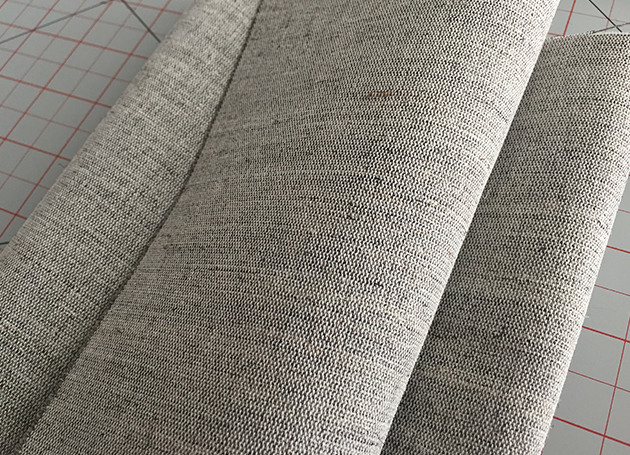
Fusible interfacing features an adhesive coating on the wrong side of the interfacing (the little white dots shown in the image below) that will be heat-sealed and adhered to the fabric using an iron.
Sometimes a fusible interfacing won’t bond well with a particular fabric. Other times, a sew-in interfacing may seem a bit too bulky. It’s best to test a scrap of fabric with your interfacing before committing to using it for your project in case you want to make adjustments based on the results.
Interfacing Tips:
- When cutting woven or tricot interfacing, follow the same grain line rules as when you’re cutting fabric.
- Trim interfacings to reduce bulk, ensuring the edges of sew-in interfacings will still be caught when sewn.
- Cut down interfacing corners to further reduce bulk.
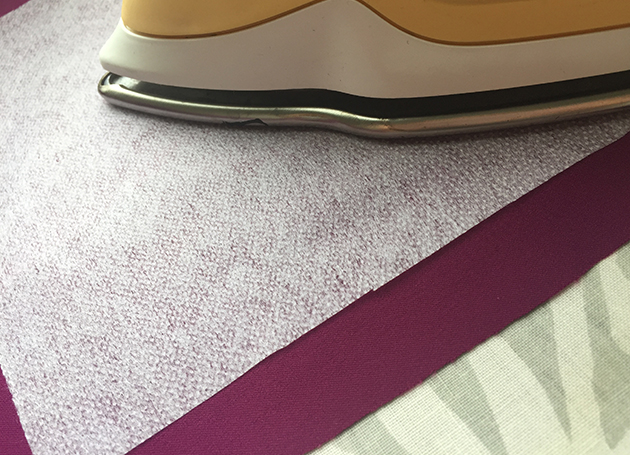
- When attaching fusible interfacing, adhere it (glue-side down) to the wrong side of your fabric.
- Apply direct pressure from your iron for 10-15 seconds to attach fusible interfacing. If the interfacing doesn’t adhere, adjust the heat and steam settings, slightly.
- Allow the fabric and fusible interfacing to cool completely before sewing.
Time required: 2 hours
When faced with all the options available, picking out a new sewing machine can seem like a daunting task. Denise Wild is here with a few helpful tips that’ll take the guesswork out of buying the perfect sewing machine for your needs. In this video she explains the different features and functions found in entry level, advanced and top-of-the-line models. Whether you need a machine only a few times a year for basic mending and sewing, or plan on using it much more often for highly detailed sewing, embroidery and quilting projects, she’s got the info to help you buy your ideal machine. Watch the video now. >>>
Time required: 2 hours
Find out how easy it is to take an already adorable jacket and elevate it to new heights of cuteness with the simple addition of decorative stitches. This video featuring Denise Wild shows you just how quick it is to do when you’ve got Brother’s THE Dream Machine Innov-is XV8500D Sewing, Quilting & Embroidery Machine at your service. Denise walks you through all the user-friendly features you need to add a personalized touch to any of your projects. You’ll see how to navigate the many stitch options, edit, combine and flip stitches and preview stitch placement before you sew a single stitch. Check out the video. >>>
Time required: 2 hours
Join Denise Wild as she walks us through the simple steps to make a stylish, monogrammed pencil case. Using the Brother NQ900 Stylist Sewing & Quilting Machine, she demonstrates how to choose font styles, program letters and mark the monogram’s placement. Denise then shows us how to stitch up the case and add the Velcro-closure to complete this quick and easy personalized project that’s perfect for your own use or to give as gifts. Watch the video. >>>
Time required: 2 hours
Incredibly popular, Brother’s Q-Series Sewing Machines are loved in part for their diverse offering of stitches. From functional to decorative to fonts and more, the variety of stitches is vast and inspiring. Denise is using her NQ900 to demonstrate how to access the seemingly endless stitch options and how to make adjustments to them to suit your needs. The pointers shown in this tutorial also apply to most Brother sewing machines. And if the huge stitch selection wasn’t enough, the Q-Series also offers the ‘My Custom Stitch’ for creating your own stitches that you can save and reuse again and again. Watch the video. >>>
Time required: 2 hours
Whether you’re new to quilting or you’re a seasoned pro looking for a new model, Denise Wild has a few pointers on what to look for in a sewing machine and accessories. Check out her video to learn the difference between the two types of machine quilting: straight line (sewing pieces together) and free-motion (like drawing, only using stitches instead of a pencil). She also walks you through the different things to consider when looking for a sewing machine and sewing machine accessories best suited to quilting. Learn about the Q-Series here. >>>
Time required: 2 hours
We can never have enough makeup bags so it’s a good thing they’re quick and easy to stitch up. Luckily, with Denise Wild’s video showing how to sew zippered cosmetic cases, we can make as many as we want! Follow her simple steps and with just a few materials – a zipper, some fabric, a little thread and your sewing machine – you’ll complete this fun and fashionable project in no time. Great for toting around your beauty essentials and more, these personalized pouches are also perfect for gift giving so be sure to whip up some extras! Watch the tutorial. >>>
Time required: 2 hours
Think you need a serger to sew stretchy materials? Think again. Denise Wild has a few tips and tricks to show you in this simple how-to video. Watch Denise use her Brother NQ900, a ballpoint sewing machine needle and a walking foot to make an easy and adorable dress for her daughter. You’ll learn how a zigzag stitch lets you sew on stretchy fabrics and how when your material stretches, the zigzag does too – something a straight stitch just can’t do. With Denise’s tutorial, you’ll soon be able to transfer your new skills to create your own stylish pieces. Get inspired. >>>
Time required: 2 hours
No pattern? No zipper? No problem! That’s how Denise Wild made the adorable skirt in this easy sewing tutorial. Using her Brother NQ900 Sewing Machine and a serger, Denise demonstrates the techniques used to create the elastic waistband on the zipper-free skirt she created for her little girl. Follow the step-by-step instructions and use your own machines to sew something stylish for the little fashionista in your life. Watch the video. >>>
Time required: 2 hours
Changing the look of your decor doesn’t have to be hard. Adding a new pillow or two is a simple and inexpensive way to revive any room. This step-by-step tutorial from Denise Wild shows us how fun and easy it is to make a stylish cushion cover featuring a button closure instead of a zipper. With her Brother NQ900 Sewing Machine, Denise demonstrates the simple-to-use one-step buttonhole function found on most of the Q-Series machines. She also shows us how to add piping and a contrast edge as special finishing touches. To update the look of your decor, watch here.
It’s great that sewing machines can sew backwards and forwards but sometimes you need a little help getting into smaller spaces. All of Brother’s Q-Series machines have feed dogs that move from left to right and right to left so you can sew sideways. Yes, you heard right – sideways! This unique feature comes in handy in tight spots where it’s tough to move your fabric around. In this video, Denise demos sideways sewing on her Brother NQ900 Sewing Machine to sew adorable patches onto her daughter’s teeny tiny denim jacket. Watch how easy it can be with this awesome feature!
In this video, Denise shows us how to create one-of-a-kind stitch designs using the Brother Q-Series ‘My Custom Stitch’ feature. You’ll see detailed instructions on sketching your design and then programming your machine to create completely unique stitches. Watch Denise use her Brother NQ900 to demo a fun step-by-step tutorial for making a stylish faux leather clutch and see her custom stitch brought to life as a fun peekaboo detail! Watch it here.
Congrats on the purchase of your new Q-Series Sewing Machine! If you’re like a lot of people, getting your machine up and running can seem like a daunting task. That’s why Denise Wild has made this easy step-by-step video to take the guesswork out of the process and help you get your machine out of the box and ready to sew! This video shows setup tips and tricks on the Brother NQ900 Sewing Machine but the steps pretty much apply to any Q-Series machine (and any other home sewing machines, really!). Watch now!
Check out this video where Denise Wild shares what she loves about our ever-popular Brother Q-Series Sewing & Quilting Machines. Loaded with great features like an impressive array of built-in stitches, buttonholes and fonts, a large arm-to-needle workspace, variable speed control and tons of other amazing functions, it’s no wonder these machines have got her under their spell. Watch Denise walk us through the Brother NQ900 and dish about her favourite features of this machine and the Q-Series in general. One look and you’ll be hooked, too!
Time required: 20 minutes
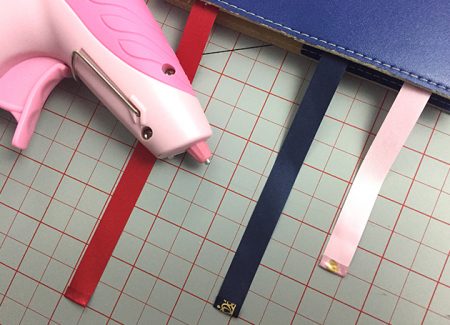
Looking for a fun, simple project? Create a fun and functional customized ribbon bookmark with just a glue gun, a button and corded elastic. Brother’s P-touch labeller has the ability to print directly onto ribbon, so you can personalize any pattern or message.

Materials and supplies
- Brother P-touch label maker
- Ribbon cartridge(s)
- Decorative button(s) with a shank
- Coloured corded elastic
- Glue gun
- Scissors
Instructions
Personalize The Ribbon
Choose decorative shapes, a font, and any phrase to your liking.
- On your P-touch label maker, press the star button once until you see “Basic”, then press “OK”. Click the right arrow until you see “Shape”, then press “OK”.
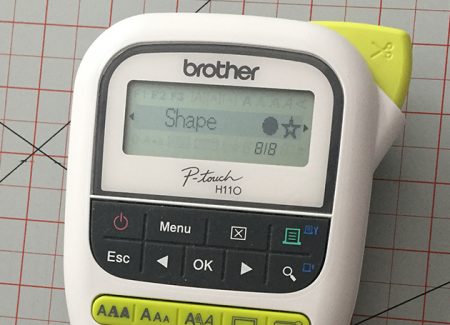
- Press the right arrow until you reach the full heart, then press “OK”.
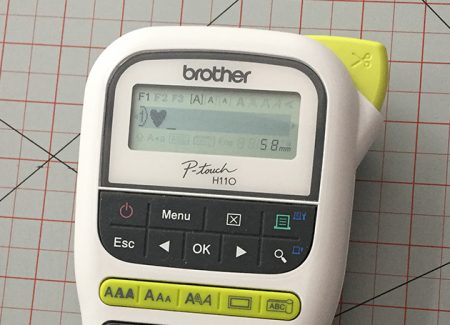
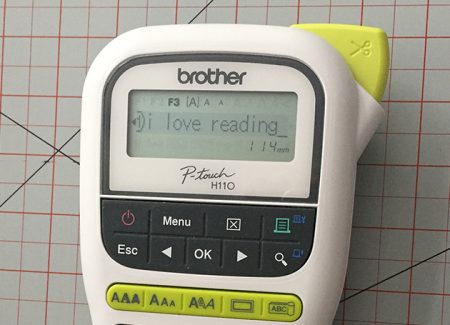
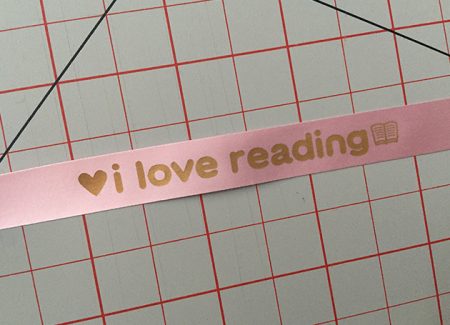
- Press the left-most “AAA” until you see “Florida”, then press “OK”. Type in “i love reading”.
- Press the star button twice until you see “Pictograph”, then press “OK”. Click the right arrow until you see “School”, then press “OK”.
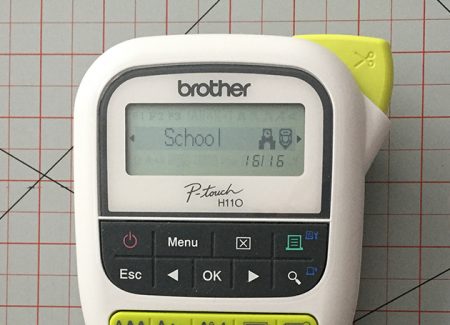
- Press the right arrow until you reach the book, then press “OK”.
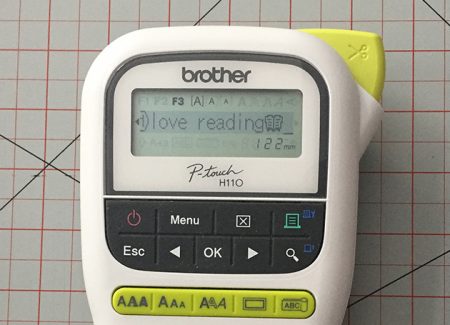
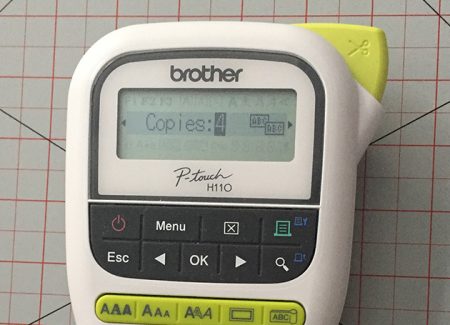
- Press the green print button, then use the arrow to scroll the number of copies to “4”, then press “OK”. (Adjust the number of copies printed based on the circumference of your book and the phrase you’re printing.)
- Depress the green scissor button to cut the ribbon.
Make A Decorative Ribbon
Instead of a phrase, print a decorative pattern on your ribbon.
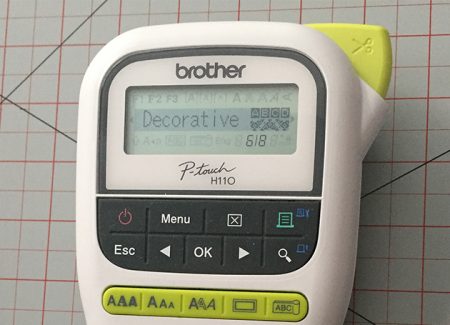
- Press “Menu”, then click the right arrow until you see “Decorative”, then press “OK”.
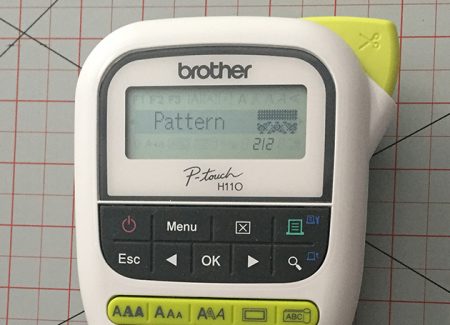
- Press the right arrow until you reach “Pattern”, then press “OK”.
- Use the right arrow to scroll until you reach a pattern you like, then press “OK”.
- Choose a “label length” using the right arrow based on the circumference of your book, then press “OK”.
- Press the green print button, then press “OK”. Depress the green scissor button to cut the ribbon.
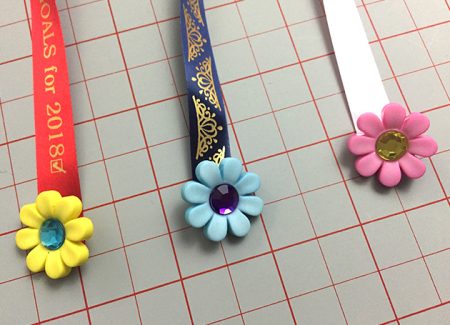
Create the Bookmark
With some creative gluing, turn your ribbon into a bookmark.
- Wrap your ribbon around the circumference of your book, and trim it down to leave yourself anywhere from one to three inches between ends.

- Glue the top end of the ribbon back onto itself, creating a small loop for the elastic to feed through.
- Fold back the bottom end of the ribbon and glue it onto itself to prevent it from unraveling.
- Glue the button onto the bottom ribbon end. Because you’re using a button with a shank, it leaves space for the elastic to fit comfortably around.
- Cut the elastic to size, depending on the space between the two ribbon ends. Your elastic needs to circle through the top ribbon loop and around the button on the bottom ribbon end.

- Thread the elastic through the top ribbon loop, and glue it to itself, creating a circular elastic piece.
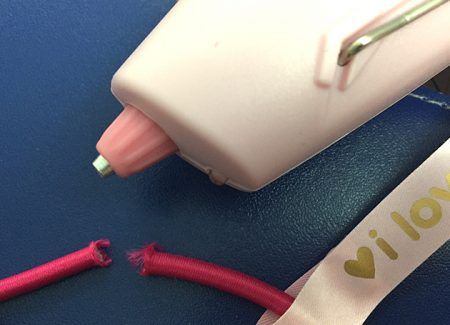
- Loop the elastic over the bottom to complete your bookmark.
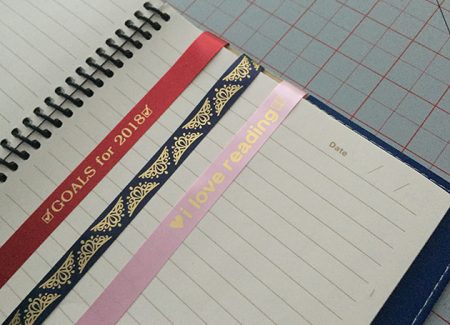
With your newly created bookmark, you’ll never lose your page again! Make one for yourself and a bunch to give to all the book lovers in your life.
Time Required: 1 hour
Know a little kid who would love this adorable Mickey Mouse birthday tee? Customize it with their name and age, and watch your little Disney fan’s face light up with glee when they open your gift! The easy step-by-step instructions are all right here!

Materials and supplies
- Plain T-shirt (suggest using one size larger than desired completed size)
- One 10 x 10 inch piece of fabric
- One 10 x 10 inch piece of Brother iron-on fabric appliqué contact sheet (CASTBL1)
- Sticky-back stabilizer (the size required to fit the embroidery hoop you are using)
- Embroidery and sewing thread
- Brother sewing and embroidery machine with built-in Disney embroidery designs and embroidery hoop to accommodate the size of appliqué (I used Brother’s
THE Dream Machine® 2 XV8550D) - Brother ScanNCut, cutting blade and cutting mat
- Iron and ironing board
There’s nothing like a well-loved jean jacket. It’s timeless. But sometimes even timeless items need a little refreshing. In this project, I’ll teach you an affordable way to give a second life to an old jean jacket.

This project uses the Brother Innov-is NQ3500D. I’ll provide instructions for reproducing the design shown here. But your creativity is virtually limitless—the NQ3500D is programmed with so many embroidery designs, you can customize your creation any way you want. Let this serve as a guide to help you discover your own machine.
Skill Level: Easy
Finished Measurements: 17cm x 17cm
Cutting & Sewing Time: 2 hours
Material and Supplies
- Brother Innov-is NQ3500D
- ScanNCut (optional)
- Jean jacket
- Embroidery backing “peel and stick”
- Brother embroidery thread
- 1 piece of fabric 17cm x 17cm
- Brother iron-on fabric appliqué contact sheet (CASTBL1) 17cm x 17cm
- Scissors
- Fabric Marker
- Ruler
- Iron
Time required: 45 minutes
Turn a blanket into a beautiful part of your decor with this quick-sew, zipper-free, fringed pillow project. Whether it’s a blanket you just bought, something that was passed down to you from a loved one or something you found at a thrift shop, the end result will be fabulous.

Supplies:
- Brother Sewing Machine and Serger (optional). This project was made on The Dream Machine and the 4234DT Serger.
- White thread
- Fringed blanket
- Square pillow insert
- Flexible measuring tape
- Fabric scissors
- Painter’s tape or masking tape
Tip:
When working with a loose weave, put tape on your cut line before cutting to ensure the blanket’s threads don’t unravel.
Instructions:
1. Measure the pillow width from seam to seam and write down the following dimensions:
- The pillow width (w)
- 5 x that measurement (l)
![]()
2. Use painter’s tape to outline the dimensions from step 1 directly on the blanket, keeping the tape to the right of those dimensions. Be sure to include the fringed side of the blanket as one of the short ends.
![]()
3. Cut the blanket piece directly through the painter’s tape; this keeps the blanket’s weave intact. Cut around the entire outline.
![]()
4. Serge the perimeter of the blanket piece, cutting off the painter’s tape as you serge. If you don’t have a serger, use your sewing machine to sew a wide zigzag instead, then cut off the painter’s tape. (The zigzag stitch will prevent the blanket’s threads from unraveling.)
![]()
5. Fold the short, fringed end toward the centre of the blanket piece, approximately half of the width of the pillow insert.
![]()
6. Fold the other short end of the blanket piece in until the total width of the blanket piece is reduced to the width of the pillow insert.
![]()
7. Sew the two unfolded sides of the pillow through all thicknesses using a wide zigzag stitch.
![]()
8. Flip the blanket pillowcase right side out, making sure you poke out the corners.
![]()
9. Stuff the pillow insert into the cover.
Enjoy snuggling up in comfort and style with your new, fringed blanket pillow!
![]()
Time required: 2 hours
In this video, Denise Wild shows us how to make a super cute Disney embroidered upcycled denim purse. Watch her tutorial to see how to hoop the fabric and stabilizer and set everything up to embroider and sew this fun and simple fringed bag. From editing, resizing, rotating and repositioning your Disney design, Denise demonstrates all you need to know about using Brother’s THE Dream Machine Innov-is XV8500D Sewing, Quilting & Embroidery Machine for this and other creative projects. Have fun making these sweet purses for the little girls in your life. >>>
Time Required: 1 hour per bag
Be the best guest this holiday season! A bottle of wine makes the perfect hostess gift and there’s no better way to add a festive touch than with a stylish cloth wine bag!

Materials and supplies
- Brother Sewing Machine
- Brother ScanNCut CM650W with cutting blade and mat
- Rotary cutter and mat
- Rhinestone Kit CARSKIT1 (optional)
- Felted wool (each piece 36” x 8”)
- Stabilizer scraps
- Decorative thread
- Heat sensitive vinyl
- Iron
Starting to think about winter and holiday decorating for your home? Here’s a fun and fast sewing project that’ll spruce up your space and get you into a festive mood.

Materials and supplies
- Assorted colours of felted wool and/or fabric (approximately 1 yard in total of different colours/prints)
- Assorted buttons (including some snowflake or star-shaped buttons)
- Iron on fabric appliqué material (CASTBL1)
- Thread
- Brother ScanNCut (CM650W), cutting mat and blade
- Brother Sewing Machine
- Button Stitching Foot
- Twine and/or ribbon as long as your desired garland length
- Mini clothespins
- Stabilizer
- Spray starch (optional)
- Coloured holiday card stock (if making paper garlands)
- Small amount of polyester stuffing
Roar! Make dress-up time loads of fun with this quick and easy costume that’s got a lot of bite.

Materials and supplies
- Brother sewing machine (this project was made on THE Dream Machine 2 – XV8550D)
- Yellow thread
- Medium weight, teal cotton poplin
- Heavy-weight, yellow felt
- 2 packages of extra-wide double-fold yellow bias tape
If your child is taller than 3 feet, you may want to increase the size of the teal triangles. You’ll also need a third package of bias tape.
Time Required: 2 hours (per apron)
Cook up Thanksgiving dinner in style with this fun turkey apron for adults and kids.

Materials and supplies
- Brother Sewing and Embroidery Machine
- Brother ScanNCut CM650W
- Brother Middle Tack Adhesive Mat CAMATM12
- Brother Standard Cut Blade CABLDP1
- 2 meters of fabric for the aprons (excluding turkey appliqués and ruffle trim)
- Assorted fabric scraps for the turkey appliqués and ruffle trim
- Brother Iron-on Stabilizer SA519
- Brother Embroidery Thread and Bobbin Thread
- 2 D-rings for each apron
- Iron-on Fabric Appliqué CASTBL1
- Brother Ruffler Foot SA565C
Note: This apron is lined so there’s no need to add binding or hem the edges. Lining also gives the reverse side a clean finish. If you like, you can always make this apron with a single layer or fabric and finish its edges with a hem or binding. Remember to adjust your fabric
measurements accordingly.
Time required: 1 hour
Is it time for a new make-up bag? This quick and easy box bag is perfect for make-up or other stashes. Make it in a fun floral cotton for the ladies or a cotton duck for a masculine look. If you want a waterproof bag, use vinyl or a coated fabric.
We have provided dimensions for two different sizes – but you can adjust the size to your liking.

Materials and supplies
- Brother sewing machine
- Zipper foot
- Thread
- Wonder clips or pins
Small bag
- 2 10” x 7 ½” rectangles of exterior fabric
- 2 10” x 7 ½” rectangles of lining fabric
- 2 10” x 7 ½” rectangles of fusible batting
- 1 2” x 3” rectangle of coordinating fabric for zipper pull or handle
- 1 14” zipper with plastic teeth
Large bag
- 2 12” x 16” rectangles of exterior fabric
- 2 12” x 16” rectangles of lining fabric
- 2 12” x 16” rectangles of fusible batting
- 1 4” x 5” rectangle of coordinating fabric for zipper pull or handle
- 1 18” zipper with plastic teeth
Time Required: 1 hour (or less)
Welcome Spring and Easter with these cute door hangers. Hide sweet treats in the handy pocket on the back of the door hanger. This is a quick and easy project using your Brother ScanNCut and your Brother Sewing Machine.

Materials and supplies
- 2 pieces of felt 8.5” x 11” (for each door hanger)
2 pieces of co-ordinating fabric for the back pocket
Assorted fabric and felt scraps
Assorted buttons and other trim, as desired
Coloured thread • Decorative ribbon
Stabilizer
Iron-on fabric appliqué contact sheet – CASTBL1
Brother ScanNCut CM650CW
Brother Sewing Machine
Time Required: 2.5 hours
Keep your favorite nighttime accessories at your fingertips with these bright, bold bedside pockets that can be made in an afternoon. Customize the number and width of the pockets to suit your needs, or make a mini version to lay over the arm of your couch as a remote control holder.

Materials and supplies
- Brother sewing machine (this project was made on the NQ900)
- Thread, white
- Denim, medium weight: 32” (81 cm) x 32” (81 cm)
- Cotton, light weight, yellow: 8 5/8” (22 cm) x 32” (81 cm)
- Cotton, light weight, yellow polka-dot: 16” (40 cm) x 12 2/8” (31 cm)
- Cotton, light weight, pink: 16” (40 cm) x 11 5/8” (29.5 cm)
- Cotton, light weight, white with pink hearts: 16” (40 cm) x 11 5/8” (29.5 cm)
- Cotton, light weight, blue with pink hearts: 16” (40 cm) x 16 2/8” (41 cm)
- Double-fold bias tape, white: 173” (439 cm)
Time Required: 2 hours
Welcome spring with this cheerful banner featuring wildflowers and happiness. Make a single flag or quickly make a series of flags to complete your banner!

Materials and Supplies
• ScanNCut machine and accessories
• Assorted fabric scraps (ie 2 shades of pink, green, black)
• Iron-on fabric appliqué contact sheet
• Pearl with adhesive back
• 2 yards of ribbon
• Brother sewing machine
• Thread
Time Required: 2 hours
Onesies are a mom’s and a baby’s best friend! Appliqué one (or two!) of these Valentine’s onesies for your favourite little boy or girl!

Equipment
- Brother Entrepreneur® Pro X PR1050X Embroidery Machine
- Brother ScanNCut CM650W (optional)
- Embroidery Frame (5” x 7” – Included with PR1050X)
- Iron
Supplies
- Onesie
- Medium-weight (2.5 ounce) cutaway stabilizer – 6” x 8” piece
- Iron-on stabilizer – 5” x 7” piece
- Fusible stabilizer – for back of appliqué fabric
- Temporary spray adhesive
- Fabric for Heart and Tie appliqué
- (scraps can be used) (total 6” x 6” pieces)
- Matching or coordinating embroidery thread and bobbin threadClips (optional)