
Ribbon Bookmark
Time required: 20 minutes
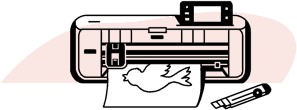
Looking for a fun, simple project? Create a fun and functional customized ribbon bookmark with just a glue gun, a button and corded elastic. Brother’s P-touch labeller has the ability to print directly onto ribbon, so you can personalize any pattern or message.

Materials and supplies
- Brother P-touch label maker
- Ribbon cartridge(s)
- Decorative button(s) with a shank
- Coloured corded elastic
- Glue gun
- Scissors
Instructions
Personalize The Ribbon
Choose decorative shapes, a font, and any phrase to your liking.
- On your P-touch label maker, press the star button once until you see “Basic”, then press “OK”. Click the right arrow until you see “Shape”, then press “OK”.
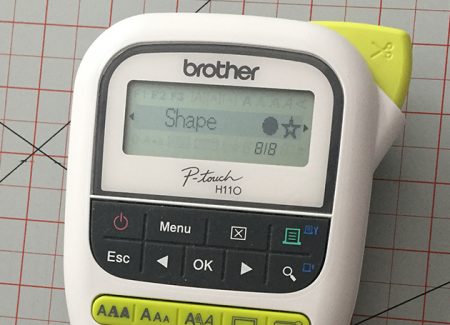
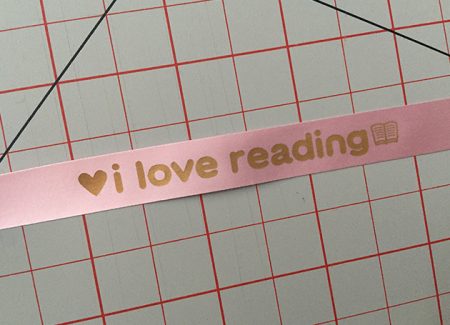
- Press the right arrow until you reach the full heart, then press “OK”.
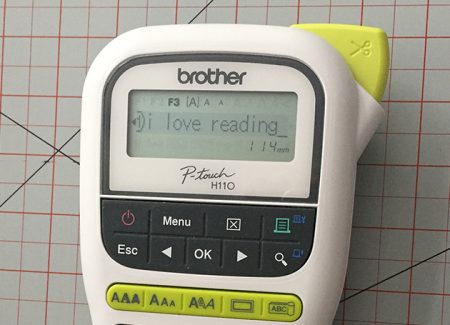
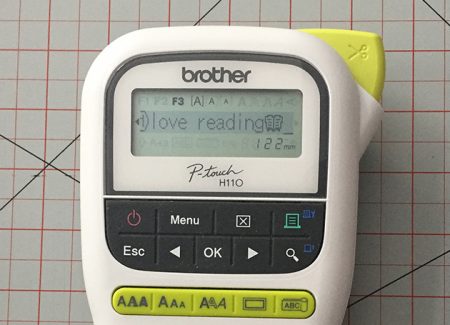
- Press the left-most “AAA” until you see “Florida”, then press “OK”. Type in “i love reading”.
- Press the star button twice until you see “Pictograph”, then press “OK”. Click the right arrow until you see “School”, then press “OK”.
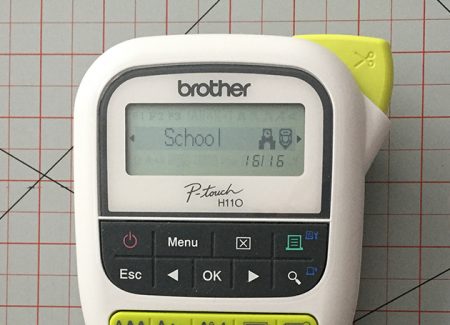
- Press the right arrow until you reach the book, then press “OK”.
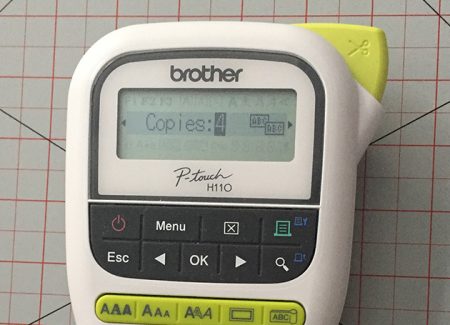
- Press the green print button, then use the arrow to scroll the number of copies to “4”, then press “OK”. (Adjust the number of copies printed based on the circumference of your book and the phrase you’re printing.)
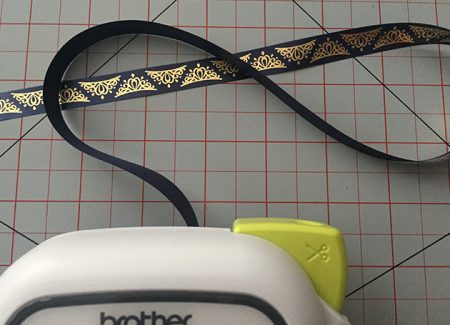
- Depress the green scissor button to cut the ribbon.
Make A Decorative Ribbon
Instead of a phrase, print a decorative pattern on your ribbon.
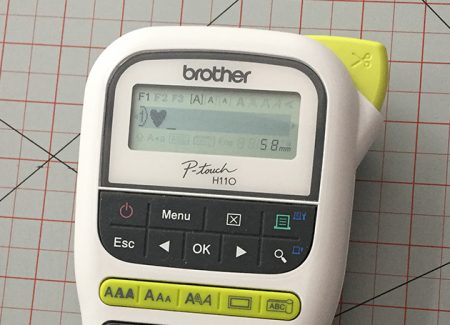
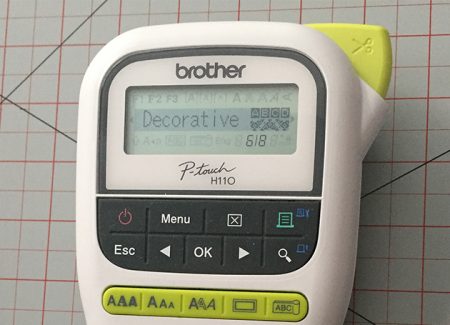
- Press “Menu”, then click the right arrow until you see “Decorative”, then press “OK”.
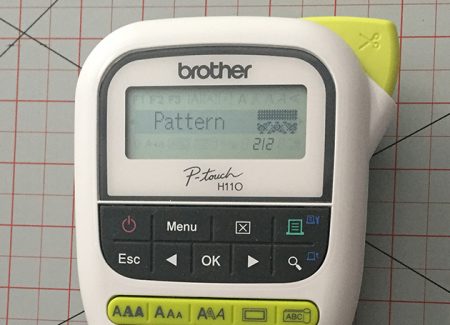
- Press the right arrow until you reach “Pattern”, then press “OK”.
- Use the right arrow to scroll until you reach a pattern you like, then press “OK”.
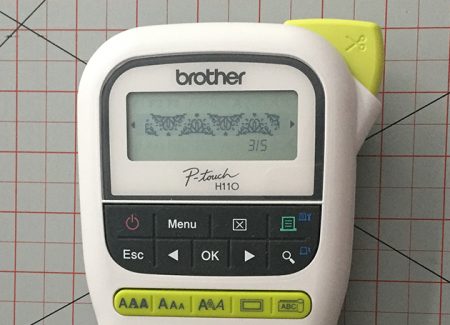
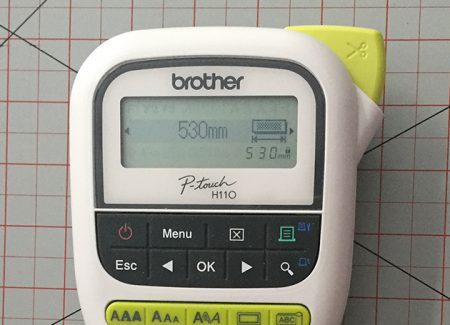
- Choose a “label length” using the right arrow based on the circumference of your book, then press “OK”.
- Press the green print button, then press “OK”. Depress the green scissor button to cut the ribbon.
Create the Bookmark
With some creative gluing, turn your ribbon into a bookmark.
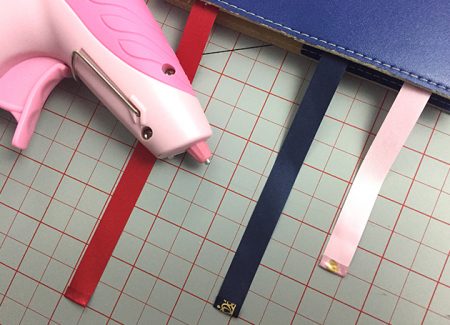
- Wrap your ribbon around the circumference of your book, and trim it down to leave yourself anywhere from one to three inches between ends.

- Glue the top end of the ribbon back onto itself, creating a small loop for the elastic to feed through.
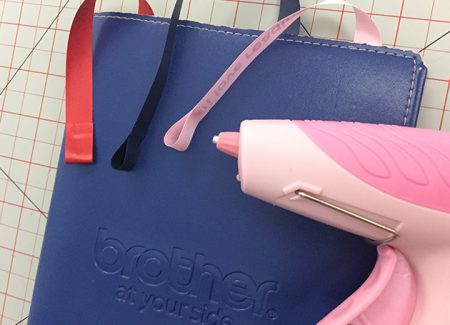
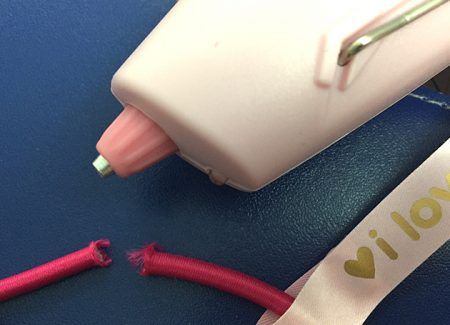
- Fold back the bottom end of the ribbon and glue it onto itself to prevent it from unraveling.
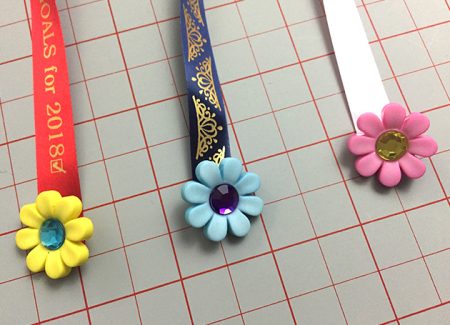
- Glue the button onto the bottom ribbon end. Because you’re using a button with a shank, it leaves space for the elastic to fit comfortably around.
- Cut the elastic to size, depending on the space between the two ribbon ends. Your elastic needs to circle through the top ribbon loop and around the button on the bottom ribbon end.

- Thread the elastic through the top ribbon loop, and glue it to itself, creating a circular elastic piece.
- Loop the elastic over the bottom to complete your bookmark.
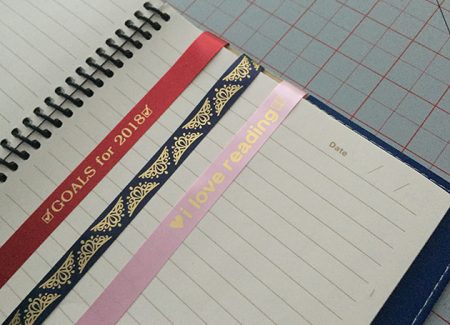
With your newly created bookmark, you’ll never lose your page again! Make one for yourself and a bunch to give to all the book lovers in your life.
About Brother
Brother shares your passion, so, we’ve created this blog as a place where you can find inspiration from our many exciting sewing, quilting, embroidery, cutting and crafting projects. We develop tutorials that range from beginner to expert so there’s something for everyone’s specific interests and skills. Try something new, today!You Might Also Like

Tips & Tricks:How to Personalize A Kid’s Jacket With Decorative Stitches
Find out how easy it is to take an already adorable jacket and elevate it to new heights of cuteness with the simple addition of decorative stitches.
learn more >>
Tips & Tricks:Setting Up Your Brother Q-Series Sewing Machine
Denise Wild has made this easy step-by-step video to take the guesswork out of the process and help you get your machine out of the box and ready to sew!
learn more >>