Pochette en cuir

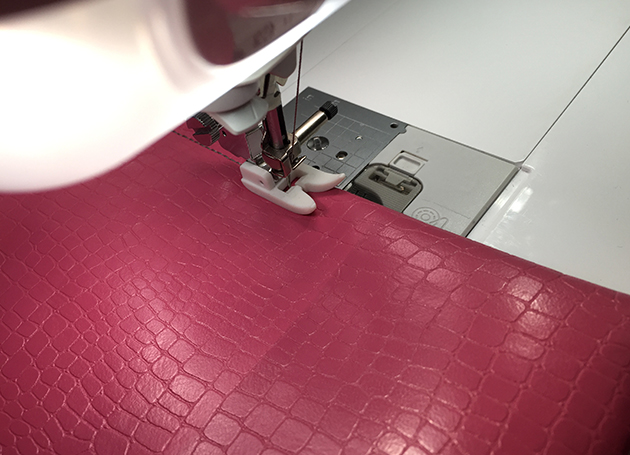
[vc_row][vc_column][vc_column_text]Temps requis :      1,5 heures[/vc_column_text][vc_column_text]Cousez une pochette en cuir simple qui s’agencera à n’importe quelle tenue. Ajoutez de l’intérêt en choisissant un tissu en couleur qui se démarque, en découpant un rabat asymétrique et en cousant des détails de surpiqûres contrastés. Cette pochette a été cousue avec du simili-cuir et j’ai utilisé un pied en téflon pour m’assurer que le tissu serait entraîné dans la machine facilement pendant la couture.[/vc_column_text][/vc_column][/vc_row][vc_row][vc_column][vc_single_image image=”9190″ img_size=”full”][/vc_column][/vc_row][vc_row][vc_column][vc_column_text]

Matériaux

  • Machine à coudre Brother (ce projet a été cousu sur la Machine de Rêve)
  • Fil tout usage : rose
  • Fil pour surpiqûre : gris
  • Aiguille pour surpiqûre
  • Simili-cuir : 0,5 m
  • Pied-de-biche en téflon
  • Boutons-pression et outil à bouton-pression
  • Ciseaux

[/vc_column_text][/vc_column][/vc_row][vc_row][vc_column width=”1/2″][vc_single_image image=”9297″ img_size=”full”][/vc_column][/vc_row][vc_row][vc_column][vc_column_text]

Instructions

1. Découpez deux morceaux de simili-cuir de 21 po (53 cm) x 15 po (38 cm), puis coupez un côté court dans un triangle asymétrique.

2. Remplacez le pied-de-biche de votre machine à coudre par un pied en téflon.

3. Cousez les deux morceaux de simili-cuir ensemble, endroit contre endroit, en laissant une ouverture d’environ 6 po (15 cm) s’ouvrant sur le côté court et droit.

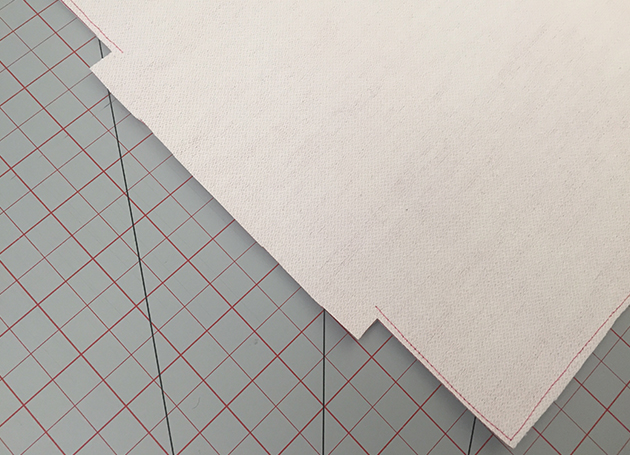
4. Élaguez l’excès de la marge de couture autour de toute la pochette, en la laissant longue à l’ouverture.

5. Coupez la marge de couture encore plus aux coins.

6. Retournez le sac à l’endroit, en rentrant la marge de couture à l’ouverture et en pressant les coutures avec vos doigts pour les maintenir à plat.

7. Enfilez votre machine à coudre avec du fil pour surpiqûre (en gardant la canette chargée de fil tout usage), et remplacez votre aiguille par une aiguille pour surpiqûre.

8. Faites une surpiqûre le long du côté court et droit du sac.

9. Retournez le tiers inférieur du sac, puis retournez le sac.

10. Faites une surpiqûre le long du périmètre du sac sauf par-dessus le pli dans le bas, puis retournez le sac à nouveau.

11. Baissez le rabat pour déterminer l’emplacement du bouton-pression.

12. Utilisez l’outil pour fixer les boutons-pression à la base de la pochette et au rabat.
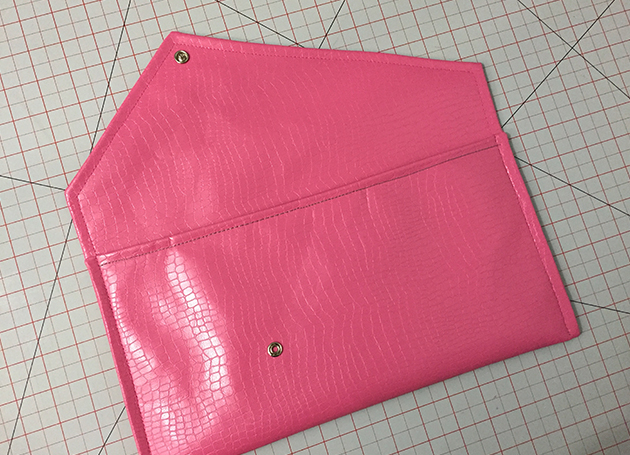


Remplissez la pochette de vos articles préférés.

[/vc_column_text][/vc_column][/vc_row][vc_row][vc_column width=”1/2″][/vc_column][vc_column width=”1/2″][/vc_column][/vc_row][vc_row][vc_column width=”1/2″][/vc_column][vc_column width=”1/2″][/vc_column][/vc_row][vc_row][vc_column width=”1/2″][/vc_column][vc_column width=”1/2″][/vc_column][/vc_row][vc_row][vc_column][download_button text_link=”url:http%3A%2F%2Finspiration.brother.ca|title:Download%20PDF%20Project||”][/vc_column][/vc_row]

Couture | 0 (s)
About Denise Wild

Experte de la couture et de l’artisanat, Denise Wild met à profit son enthousiasme et son savoir-faire pour préparer des tutoriels faciles pleins de trucs et astuces pour la réalisation de projets simples et élégants. Fondatrice du magazine LoveSewing, elle en est la rédactrice en chef, en plus d’être porte-parole de marque, animatrice télé et auteure. Elle souhaite vous inspirer à créer vos propres projets et à y mettre votre touche personnelle. Vous trouverez le site Web de Denise à denisewild.com; sur les réseaux sociaux @medenisewild.

Leather Clutch

[vc_row][vc_column][vc_column_text]Time required: 1.5 hours[/vc_column_text][vc_column_text el_class=”greytext”]Sew a simple leather clutch that goes with any outfit. Add interest by choosing a standout fabric colour, cutting an asymmetrical flap and sewing contrast topstitch detailing. This clutch was sewn from faux leather, and I used a Teflon foot to ensure the fabric fed through the machine easily while sewing.[/vc_column_text][/vc_column][/vc_row][vc_row][vc_column][vc_single_image image=”9190″ img_size=”full”][/vc_column][/vc_row][vc_row][vc_column][vc_column_text]

Materials

  • Brother sewing machine (This was sewn on The Dream Machine)
  • Pink all-purpose thread
  • Grey topstitching thread
  • Topstitching needle
  • 5 m pleather
  • Teflon presser foot
  • Snaps and snap tool
  • Scissors

[/vc_column_text][/vc_column][/vc_row][vc_row][vc_column width=”1/2″][vc_single_image image=”9297″ img_size=”full”][/vc_column][/vc_row][vc_row][vc_column][vc_column_text]

Instructions

1. Cut two pieces of pleather 21” (53 cm) x 15” (38 cm), then trim one short edge into an asymmetrical triangle.

2. Change your sewing machine presser foot to a Teflon foot.

3. Sew the two pieces of pleather together, right sides together, leaving an opening about 6” (15 cm) opening on the straight, short edge.

4. Trim down the excess seam allowance around the entire clutch, leaving it long at the opening.

5. Cut the seam allowance down even more across the corners.

[IMG_6688.JPEG, IMG_6690.JPEG]

6. Flip the bag right side out, tucking in the seam allowance at the opening and finger pressing at the seams to keep them flat.

7. Thread your sewing machine with topstitching thread (keeping the bobbin loaded with all-purpose thread), and change your needle to a topstitching needle.

8. Topstitch across the straight, short edge of the bag.

9. Turn up the bottom third of the bag, then flip the bag over.

10. Topstitch around the perimeter of the bag except for across the fold at the bottom, then flip the bag back again.

11. Turn down the flap to determine the snap placement.

12. Use the snap tool to attach the snaps to the clutch base and the flap.

Fill your new stylish clutch with your favourite necessities.[/vc_column_text][/vc_column][/vc_row][vc_row][vc_column width=”1/2″][/vc_column][vc_column width=”1/2″][/vc_column][/vc_row][vc_row][vc_column width=”1/2″][/vc_column][vc_column width=”1/2″][/vc_column][/vc_row][vc_row][vc_column width=”1/2″][/vc_column][vc_column width=”1/2″][/vc_column][/vc_row][vc_row][vc_column][download_button text_link=”url:http%3A%2F%2Finspiration.brother.ca%2Fwp-content%2Fuploads%2F2018%2F01%2F18_0009-HAD_Blog-Post_Sewing-project_Leather-Clutch_EN.pdf|title:Download%20PDF%20Project||”][/vc_column][/vc_row]

Sewing | 0 (s)

About Denise Wild

Sewing, crafting and DIY expert, Denise Wild combines her enthusiasm and expertise to create easy-to-follow tutorials for simple, stylish projects that showcase valuable tips and tricks. Founder of LoveSewing magazine, Denise is also a brand spokesperson, TV host, author and magazine editor. Get inspired to create your very own projects with personalized style. Learn more about Denise at denisewild.com or follow her on Facebook at @medenisewild.