

How To Install An Invisible Zipper
An invisible zipper is the perfect blend of beauty and function. You get the utilitarian benefits of a zipper without the bulk or visible details that can often distract from a project’s clean lines. Whether used in home décor or garment sewing, an invisible zipper appears nearly invisible (hence the name) from the project right side, so it’s ideal for formal pieces and high-end fabrics.

Instructions
Invisible zippers aren’t hard to install. In fact, they require fewer steps than a regular zipper, so many sewers find them easier to install than a standard zipper. They do take some getting used to, though. With practice and the tips below, you’ll be on your way to sewing an invisible zipper with confidence.
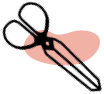
An invisible zipper
A regular zipper is different than an invisible zipper. So how can you spot the difference? Pay attention to a zipper’s details to determine if you’ve got a true invisible zipper. Here are two things you want to look for:
- The easiest way to spot an invisible zipper is to look at the pull tab. The pull tab on an invisible zipper is delicate, narrow, and pointed, whereas a regular zipper pull tab is usually flat, rectangular, and comparatively bulky.
- The teeth on an invisible zipper are on the wrong side of the zipper, the opposite of the pull tab. Think of it as the teeth being on the “back” of the zipper.
[IMG_7106.jpeg]
An invisible zipper foot
When sewing an invisible zipper, you can’t use a regular presser foot or even a regular zipper foot. Both won’t allow you to get close enough to the zipper teeth while sewing, which will result in a zipper that can be seen from the project right side. Instead, look for a proper invisible zipper foot, which has grooves or tunnels on the underside. Those grooves hold the zipper teeth out of the way, allowing your sewing machine’s needle and thread to get close to the zipper teeth. I prefer to sew my invisible zippers using a piping and cording foot. It doesn’t hold the teeth back (you have to do that with your fingers, so it requires more skill to use), but I find that I can sew even closer than with an invisible zipper foot.
[IMG_7115.jpeg, IMG_7117.jpeg]
Prepping for installation
Before you install an invisible zipper, there are a few things to do that will make it easier.
- Finish your fabric raw edges if you plan on finishing them. It’s easier to do this before the zipper is installed, rather than after.
- Iron your zipper on low heat in order to flatten the fold at the teeth. I don’t like to do this because I prefer to see where my groove is, but I know some people swear by this and feel that it makes things easier.
- Sew the seam of your project below the zipper before installing an invisible zipper.
[IMG_7108.jpg]
Invisible zipper installation
[IMG_7126.jpeg]
- Open the zipper.
- Lay one side of the zipper tape on top of your fabric, right sides together. Make sure the raw edge of the fabric is on the same side as the edge of the fabric tape, and align your zipper tape so the groove next to the teeth is at your seam allowance. Pin the zipper tape and fabric together.
- Switch to an invisible zipper foot.
- Baste the zipper tape in place.
- Sew the one side of the zipper tape in place, ensuring the stitches go directly in the groove next to the teeth. Sew from the top of the zipper tape to as far as you can go while staying in the groove.
- Repeat Steps 2 to 5 on the other side of the fabric with the other side of the zipper. For Step 3, instead of changing presser feet, adjust your invisible zipper foot for the opposite side.
Whether you’ve sewn invisible zippers before or you’re about to for the first time, the tips above will help make the process easier.
About Denise Wild
Sewing, crafting and DIY expert, Denise Wild combines her enthusiasm and expertise to create easy-to-follow tutorials for simple, stylish projects that showcase valuable tips and tricks. Founder of LoveSewing magazine, Denise is also a brand spokesperson, TV host, author and magazine editor. Get inspired to create your very own projects with personalized style. Learn more about Denise at denisewild.com or follow her on Facebook at @medenisewild.You Might Also Like
Crafting:Gift boxes
Crafting:Avent Calendar