
Avent Calendar
Time required: 2-3 hours
Start a new family tradition with this quick and easy customizable advent calendar project. Our simple step-by-step tutorial will help you create something fun that delivers good cheer to your home as you count down to the holidays in style.

Materials and supplies
- Brother Sewing Machine
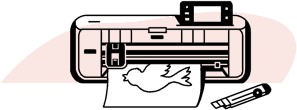
- Brother ScanNCut (cutting blade and cutting mat)
- 1 yard of fabric for base of advent calendar and backing
- 36” x 20” piece of quilt batting
- Total of 1 yard of assorted fabric for advent calendar pockets
- 12” x 12” piece of heat activated vinyl for numbers on pockets
- Thread to coordinate with calendar fabric
- Rotary cutter, mat and ruler
- Iron
- Pressing cloth

Cutting Instructions:
- Cut fabric for base of calendar – 36” x 20”
- Cut fabric for backing of calendar – 36” x 20”
- Cut 6 pieces of fabric for hanging tabs – each 4” x 8”
- From assorted coordinating fabric, cut a total of 48 squares in assorted sizes for pockets; you’ll need 2 pieces of the same size for each pocket. Suggested sizes: 3” x 3”, 3” x 4.5”, etc.
Sewing Instructions:
Note: ¼” seams are used throughout this project
- For pockets – place same-sized squares right sides together and stitch around all four sides. Leave a small area unstitched to turn stitched square right side out. Press, making sure the unstitched portion is tucked in; press it closed. Do this for all 24 pockets.
- Position the pockets onto the calendar base fabric however you like and pin them in place. Stitch around 3 sides of each pocket, leaving the top of the pocket opeLayer the pieces in the following order to create a quilt sandwich: batting, base of calendar facing up; backing of calendar right side towards calendar base.Stitch around all 4 sides of quilt sandwich, leaving a 4” area unstitched at the bottom edge. Turn the calendar right side out and press.
- With the right sides together, stitch around the outside edge of each of the hanging tabs leaving a small unstitched opening to turn. Turn the hanging tabs right side out and press. Stitch ¼” from the edge around each of the hang tabs. Fold each tab in half and stitch the unfinished (raw) edge together.
Pocket numbers:
- At your ScanNCut, select a font and type in numbers 1 through 24, sizing up or down as desired. Flip the design so the numbers are facing the wrong way on the ScanNCut display.
- Place the heat activated vinyl on the ScanNCut mat with the wrong side of the vinyl up.
- Do a test cut to check blade depth and blade pressure.
- Cut.
- Remove the numbers from the vinyl.
- Position the numbers on the pockets and press in place using a pressing cloth.
Finishing:
- Position the hang tabs on the top edge of the advent calendar, one in each of the upper corners and one in the middle.
- Topstitch ¼” around all four sides of the advent calendar, making sure to tuck in the seam allowance that was left open for turning purposes.
That’s it! All that’s left now is filling the pockets with treats like movie tickets, candy, gift cards…anything that spreads joy for the holidays! I hope you enjoyed creating this quick and easy advent calendar and that it will fill your home with good times and fun memories year after year.

About Lynn Swanson
Bringing her undeniable passion to everything she does, Lynn Swanson is an enthusiastic quilter, sewer, embroiderer and crafter who explains her projects in a fun and easy way. Lynn’s eagerness to embrace new technology has made her a treasured resource for teaching crafting and sewing fanatics everything they need to know about Brother machines and design software as one of Brother’s educators. Check out her tutorials and catch her creativity bug!You Might Also Like

Crafting:Holiday Wine Bags
Be the best guest this holiday season! A bottle of wine makes the perfect hostess gift and there’s no better way to add a festive touch than with a stylish cloth wine bag!
learn more >>
Sewing:Fabric Flowers
Give her flowers that won’t wither away! Fabric flowers are easy to create and can be worn with a pin or glued to a headband or simple hair elastic. They add a burst of life to any outfit!
learn more >>
Crafting:Spring Door Hangers
Welcome Spring and Easter with these cute door hangers. Hide sweet treats in the handy pocket on the back of the door hanger.
learn more >>