
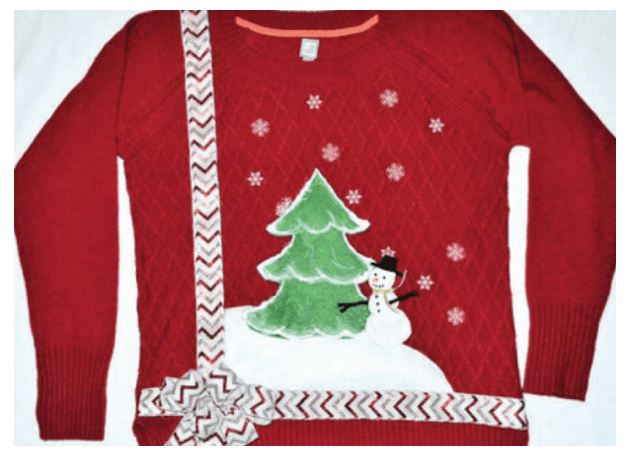
Over-The-Top Holiday Sweater!
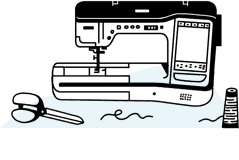
Win this year’s Ugly Holiday Sweater Contest at work—with your very own over-the-top creation! The craftier, the better. Bling out a plain red sweater using felt, ribbon, fabric paint and embroidery. A Brother sewing/ quilting machine is perfect to add appliqués and embroidered snowflakes.
Materials
• Brother Sewing/Quilting Machine
• White sewing thread
• Ribbon-1½” wide, length and width of sweater
• Fabric paint, white, orange, black, white glitter paint
• Plain purchased red sweater
• Felt squares-1 white glitter, 1 green, 1 black
• 1 gold ribbon, ¼” X 4”
Instructions
1. Lay the sweater on a flat surface, front facing up.
2. Measure the width of the sweater from side seam to side seam. Measure
the front length from near the neck opening to the bottom of the sweater.
Add two inches to each measurement. (See Figure #1)

Figure #1
3. Cut both measurements from the wide ribbon. If you purchased wired ribbon, remove the wires from both sides. Position the shortest length of ribbon 3 inches up from the bottom band on the sweater. Pin in place, folding over each end one inch. Do the same with the long length of ribbon overlapping the first. Follow Figure #1 for perfect placement. You can also use spray adhesive to temporarily hold the ribbon in place.
4. Set your machine up for sewing. Install matching sewing thread on top and in the bobbin. Choose a small zigzag stitch and sew the ribbon edges to the the sweater.
5. Remove from the machine and lay flat. Cut the white piece of felt square in half lengthwise. Set one piece aside for now.
Cut the snow mound out lengthwise starting high on one side and tapering down to the other side. Place on the sweater where the ribbon intersects. Pin in place. (See Figure #2)

Figure #2
7. Repeat Step 4 to adhere the snow mound to the sweater front.
8. Print the pattern for the tree and snowman below.
9. Cut out the tree from the green felt fabric and position it on the mount, centering the tree with the neck opening. Stitch in place. (See Figure #3)

Figure #3
10. Cut out the snowman from the remaining white felt fabric. Tack the head, middle and bottom of the body together. It’s easier to assemble the snowman before stitching him to the front of the sweater.
11. Continue to cut out the hat and arms, and tack them in place. Tie the small gold ribbon to the neck of the snowman. Position the snowman on the sweater next to the tree. Using matching sewing thread, stitch the snowman onto the sweater. (See Figure #4)

Figure #4
12. Hand-embroider snowflakes using white thread. (See Figure #5)

Figure #5
13. Using the black fabric paint, add two eyes, mouth and buttons to embellish your snowman.
14. Make a carrot nose with the orange fabric paint.
15. Change to white fabric paint and add snow to your tree. Add lines to define the body of the tree. Add some glitz using glitter paint to embellish the tree, snowman and snow mound. Make them sparkle! (See Figure #6)

Figure #6
16. To add the finishing touch to your sweater, cut a length of wide ribbon a yard long. Create a bow to add to the bottom of the sweater where the two ribbon strips meet. (See Figure #7)

Figure #7
17. Allow the fabric paint to dry for two days before you remove all watersoluble stabilizer.
Check out the actual size template on pages 4 and 5.
About Lynn Swanson
Bringing her undeniable passion to everything she does, Lynn Swanson is an enthusiastic quilter, sewer, embroiderer and crafter who explains her projects in a fun and easy way. Lynn’s eagerness to embrace new technology has made her a treasured resource for teaching crafting and sewing fanatics everything they need to know about Brother machines and design software as one of Brother’s educators. Check out her tutorials and catch her creativity bug!You Might Also Like
Sewing:Fabric Flowers

Crafting:Rockin’ T-Shirt