Finished Size: 20 x 20
Time Required: 2 Hours
Cozy up for wintery days with this easy-to-make snowflake pillow. It’s fun and fast, so you can add a touch of winter wonderland to any room in no time!

Equipment
- Brother Sewing Machine
- Brother ScanNCut
- 12” x 12” ScanNCut cutting mat (CAMATF12)
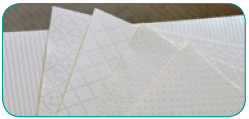
- ScanNCut iron-on appliqué sheet (CASTBL1)
- Button Stitching Foot
Notions
- 10” x 10” piece of white felted wool for snowflake
- Two 18” x 18” squares of red fabric
- Four strips of white fabric 2” x 20”
- Optional: four strips of red fabric 2” x 22”
- Pillow form (16” x 16”)
- Assorted buttons
- Thread to match
This bed scarf is a fantastic way to add some life and creativity to a modern, sparse bedroom. I just love the colour and warmth it brings. It fits perfectly with the décor without adding clutter.

Finished Size: 75” x 27” [190.5 x 68.5cm]
Time Required: 6 – 8 hours
This bed scarf was created using the advanced features of Brother’s THE Dream Machine (Brother Innov-is) and Brother’s ScanNCut home and hobby cutting machine. It’s designed to fit a king-size bed with no overhang, or a queen-size bed with overhang.
Equipment
- Brother’s THE Dream Machine
- Brother ScanNCut CM650W
- J foot
- MuVit Digital Dual Feed Foot
- Stitch-in-the-Ditch Foot (part# SA191)
- Embroidery Foot
- Brother ScanNCut, Standard Mat, Standard Cut Blade,Pen Holder and erasable black drawing pen
Size: 16” x 11”
Time Required: 1 hour approx.
Welcome trick-or-treaters with “Boo”, our happy Ghostly Ghost door hanger! Not only is he a super quick and easy project for beginning crafters, but he’s sure to delight trick-or-treaters of all ages.
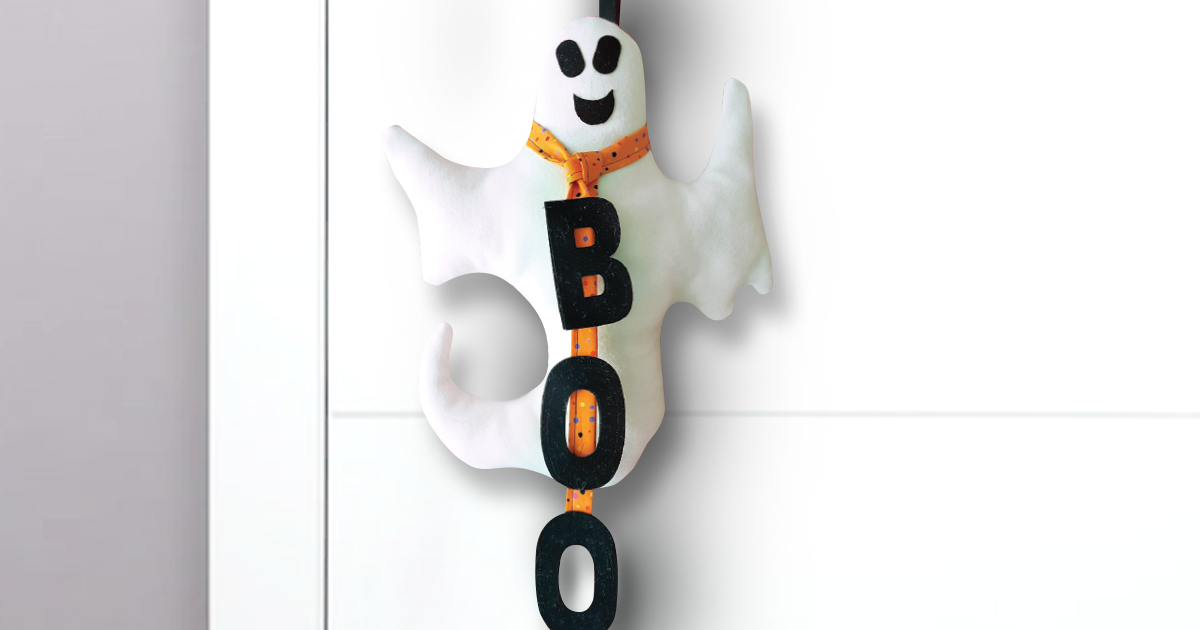
Cut all parts of Boo with the Brother ScanNCut CM650W and use the Brother Q-Series sewing machine to assemble. You’ll notice how the longer feed dogs and extended pressure foot make stitching around Boo’s ghostly curves a breeze.
Materials required
- Brother NQ700 Sewing Machine
- Brother ScanNCut CM650W
- Brother Scanning Mat CAMATS12
- Brother Medium Tack Mat CAMATM12
- ½ yard of felted wool or canvas weight fabric (white)
- ¼ yard of black fabric (cotton or felt)
- Strip of Halloween print fabric 36” by 2”
- ScanNCut High Tack Adhesive Fabric Support Sheet CASTBL2
- Stuffing (polyester stuffing)
- White and Black thread
- 1” plastic ring
Skill Level: Intermediate
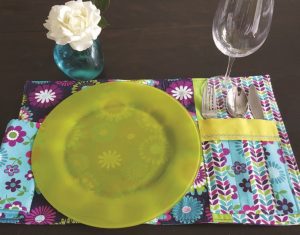
Finished Measurements: Placemat: 20” x 14”. Pocket 5” x 6”
Cutting & Sewing Time: 2 hours
This is a quick and easy project to practice your free-motion quilting—AND create awesome placemats that are perfect for outdoor summer dining. This project uses Brother’s new Free-Motion Kit for the PRS100 to create a colourful placemat with stipple stitching. In no time at all, you’ll stitch up a complete set of placemats and napkins.

Materials and Supplies
• THE Dream Machine—Brother XV8500D Combination Sewing, Quilting & Embroidery machine
• ¼” Brother Piecing Foot-Guide (model #SA185)
• Brother PRS100 with Free-Motion Kit (PRSFMK1C)
• Assorted coordinating fabric (1 yard)
• Batting (22” x 15” piece)
• Thread
• Ruler
• Fabric or marking pencil
• Rotary cutter and mat
• Scissors
• Iron/ironing board
Cutting of Fabric
Placemat Materials
From each fabric cut:
1 – 22” x 14” rectangle of fabric (back of placemat)
1 – 15” x 14” rectangle of fabric (part A of placemat) 1 – 6” x 14” rectangle of fabric (part B of placemat)
1 – 2” x 14” strip of fabric (part C of placemat)
4 – 1.5” x 16” strips of fabric (pocket of placemat)
1 – 3.5” x 6” strip for flap of pocket
1 – 22” x 15” rectangle of batting
Napkin Materials
18” square of fabric for the napkin (prewash and iron fabric)
Creating the Napkin
1. On the wrong side of napkin fabric square, use a disappearing fabric marker to mark each corner 1” up, and 1” in, from the edge. Place a dot. Mark a diagonal line from corner to corner.
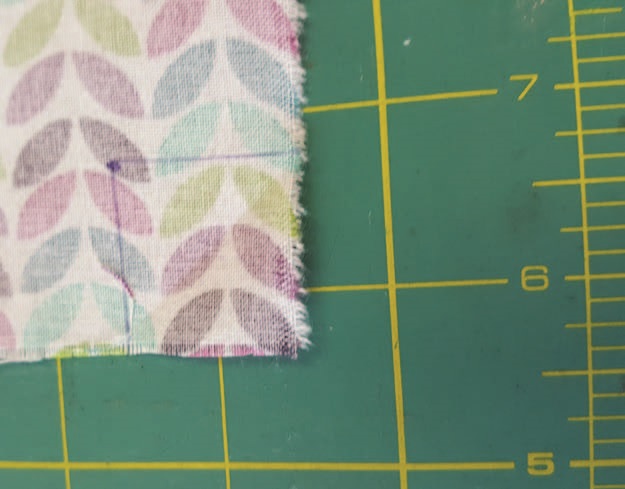
Place a dot 1” from the corner
2. Fold each corner into dot mark.
3. Fold each corner again, bringing the first fold line up to meet the dot mark.

Fold the corner.
4. Fold and press each side edge of the napkin about ½”.
5. Fold and press each edge of the napkin up another ½” so that the corner lines up at a diagonal.
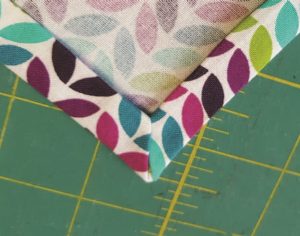
Align the corners.
6. Adjust the sides and press well, so the corners align (pin if desired).
7. From the right side of the napkin, stitch ¼” around the outside of the napkin.
8. Press.
Placemat
1. Refer to cutting instructions.
2. Stitch Part A fabric to Part C fabric.
3. Stitch Part A/C fabric to Part B fabric, creating the top of the placemat.
4. Layer placemat top and batting.
5. Select free-motion option on the PRS100.
6. Stipple stitch Part A of the placemat.
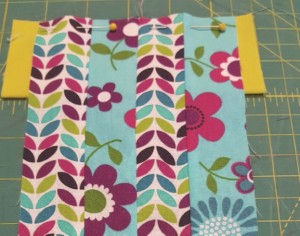
Prepare and place the pocket
1. Stitch the long sides of the 1.5” x 16” strips together to form a rectangle for the pocket.
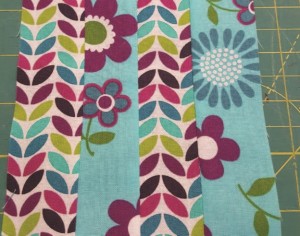
Stitch the long sides of the strips together.
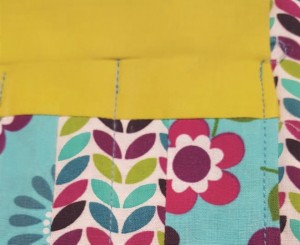
2. Layer wrong side of pocket on top of right side of pocket flap.
3. Stitch the top seam.
Stitch the top seam.
4. Fold bottom of pieced pocket in half, right sides together, to form a piece 6” x 8”.
5. Stitch the right and left sides of the pocket (leaving top open).
6. Turn right-side-out.
7. Fold in ¼” on each side of the flap.
8. Layer wrong side of pocket on top of the right side of the pocket flap.
9. Place the pocket on the right side of the placemat in the bottom right corner. Pocket should be placed 1½” up from the bottom raw edge and 1½” in from the right raw edge. Pin in place.
Be careful not to stitch through the flap!
10. Stitch along both sides and across the bottom, leaving the top open.
11. Fold pocket flap to the right side, press.
12. Select a decorative stitch and stitch ¼” from edge of pocket flap.
13. Position pocket on placemat.
14. Stitch in place on left, right and bottom side of pocket, 1/4” from edge of pocket.
15. Using a disappearing marker, draw a line 2” from left side of pocket and 2” from right side of pocket.
16. Stitch. Do not stitch through the flap.
Assemble the placemat layers to finish
1. Place the top and bottom layers of the placemat, right sides together.
2. Using a ½” seam allowance, stitch around all four sides. Leave a 4” opening along the bottom for turning.
3. Trim corners on the diagonal. Turn placemat right-side out.
4. Use a chopstick or pencil to gently push out the corners to be nice
and square.
5. Press well, pressing in the raw edges of the opening so they are flush with the sewn seam.
6. Pin the opening closed.
7. Topstitch around all four sides, using a ¼” seam allowance.
Set your table and ENJOY!
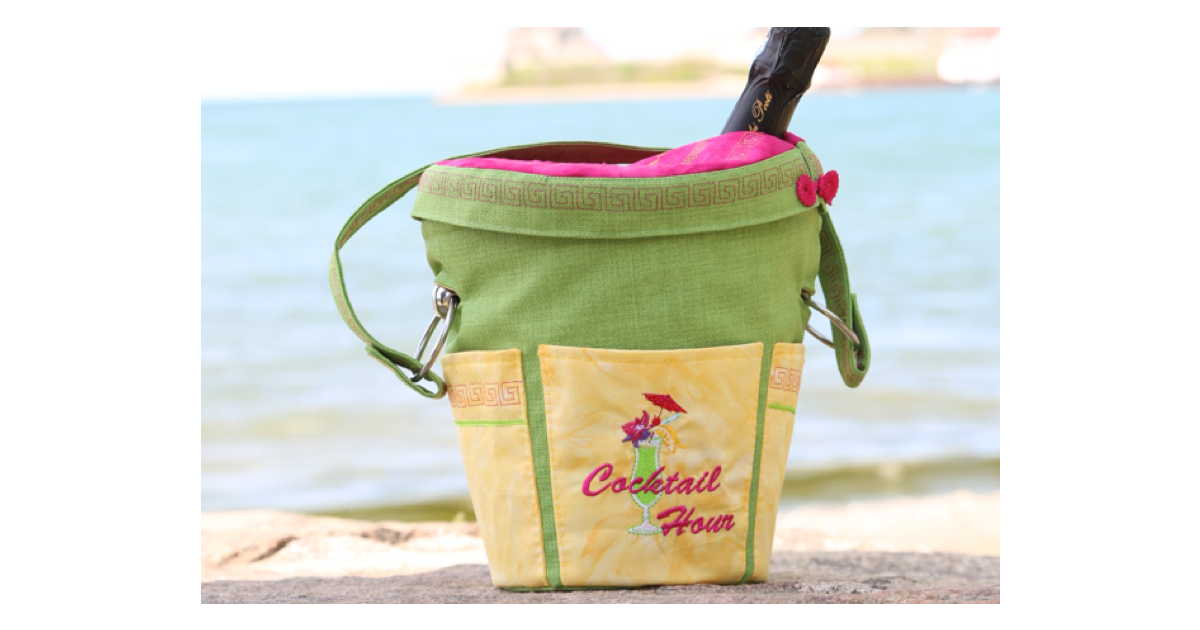
Skill Level: Intermediate
Finished Measurements: 9″ (top diameter) x 6″ (bottom diameter) x 8″ (height)
Cutting and Sewing Time: 2 hours
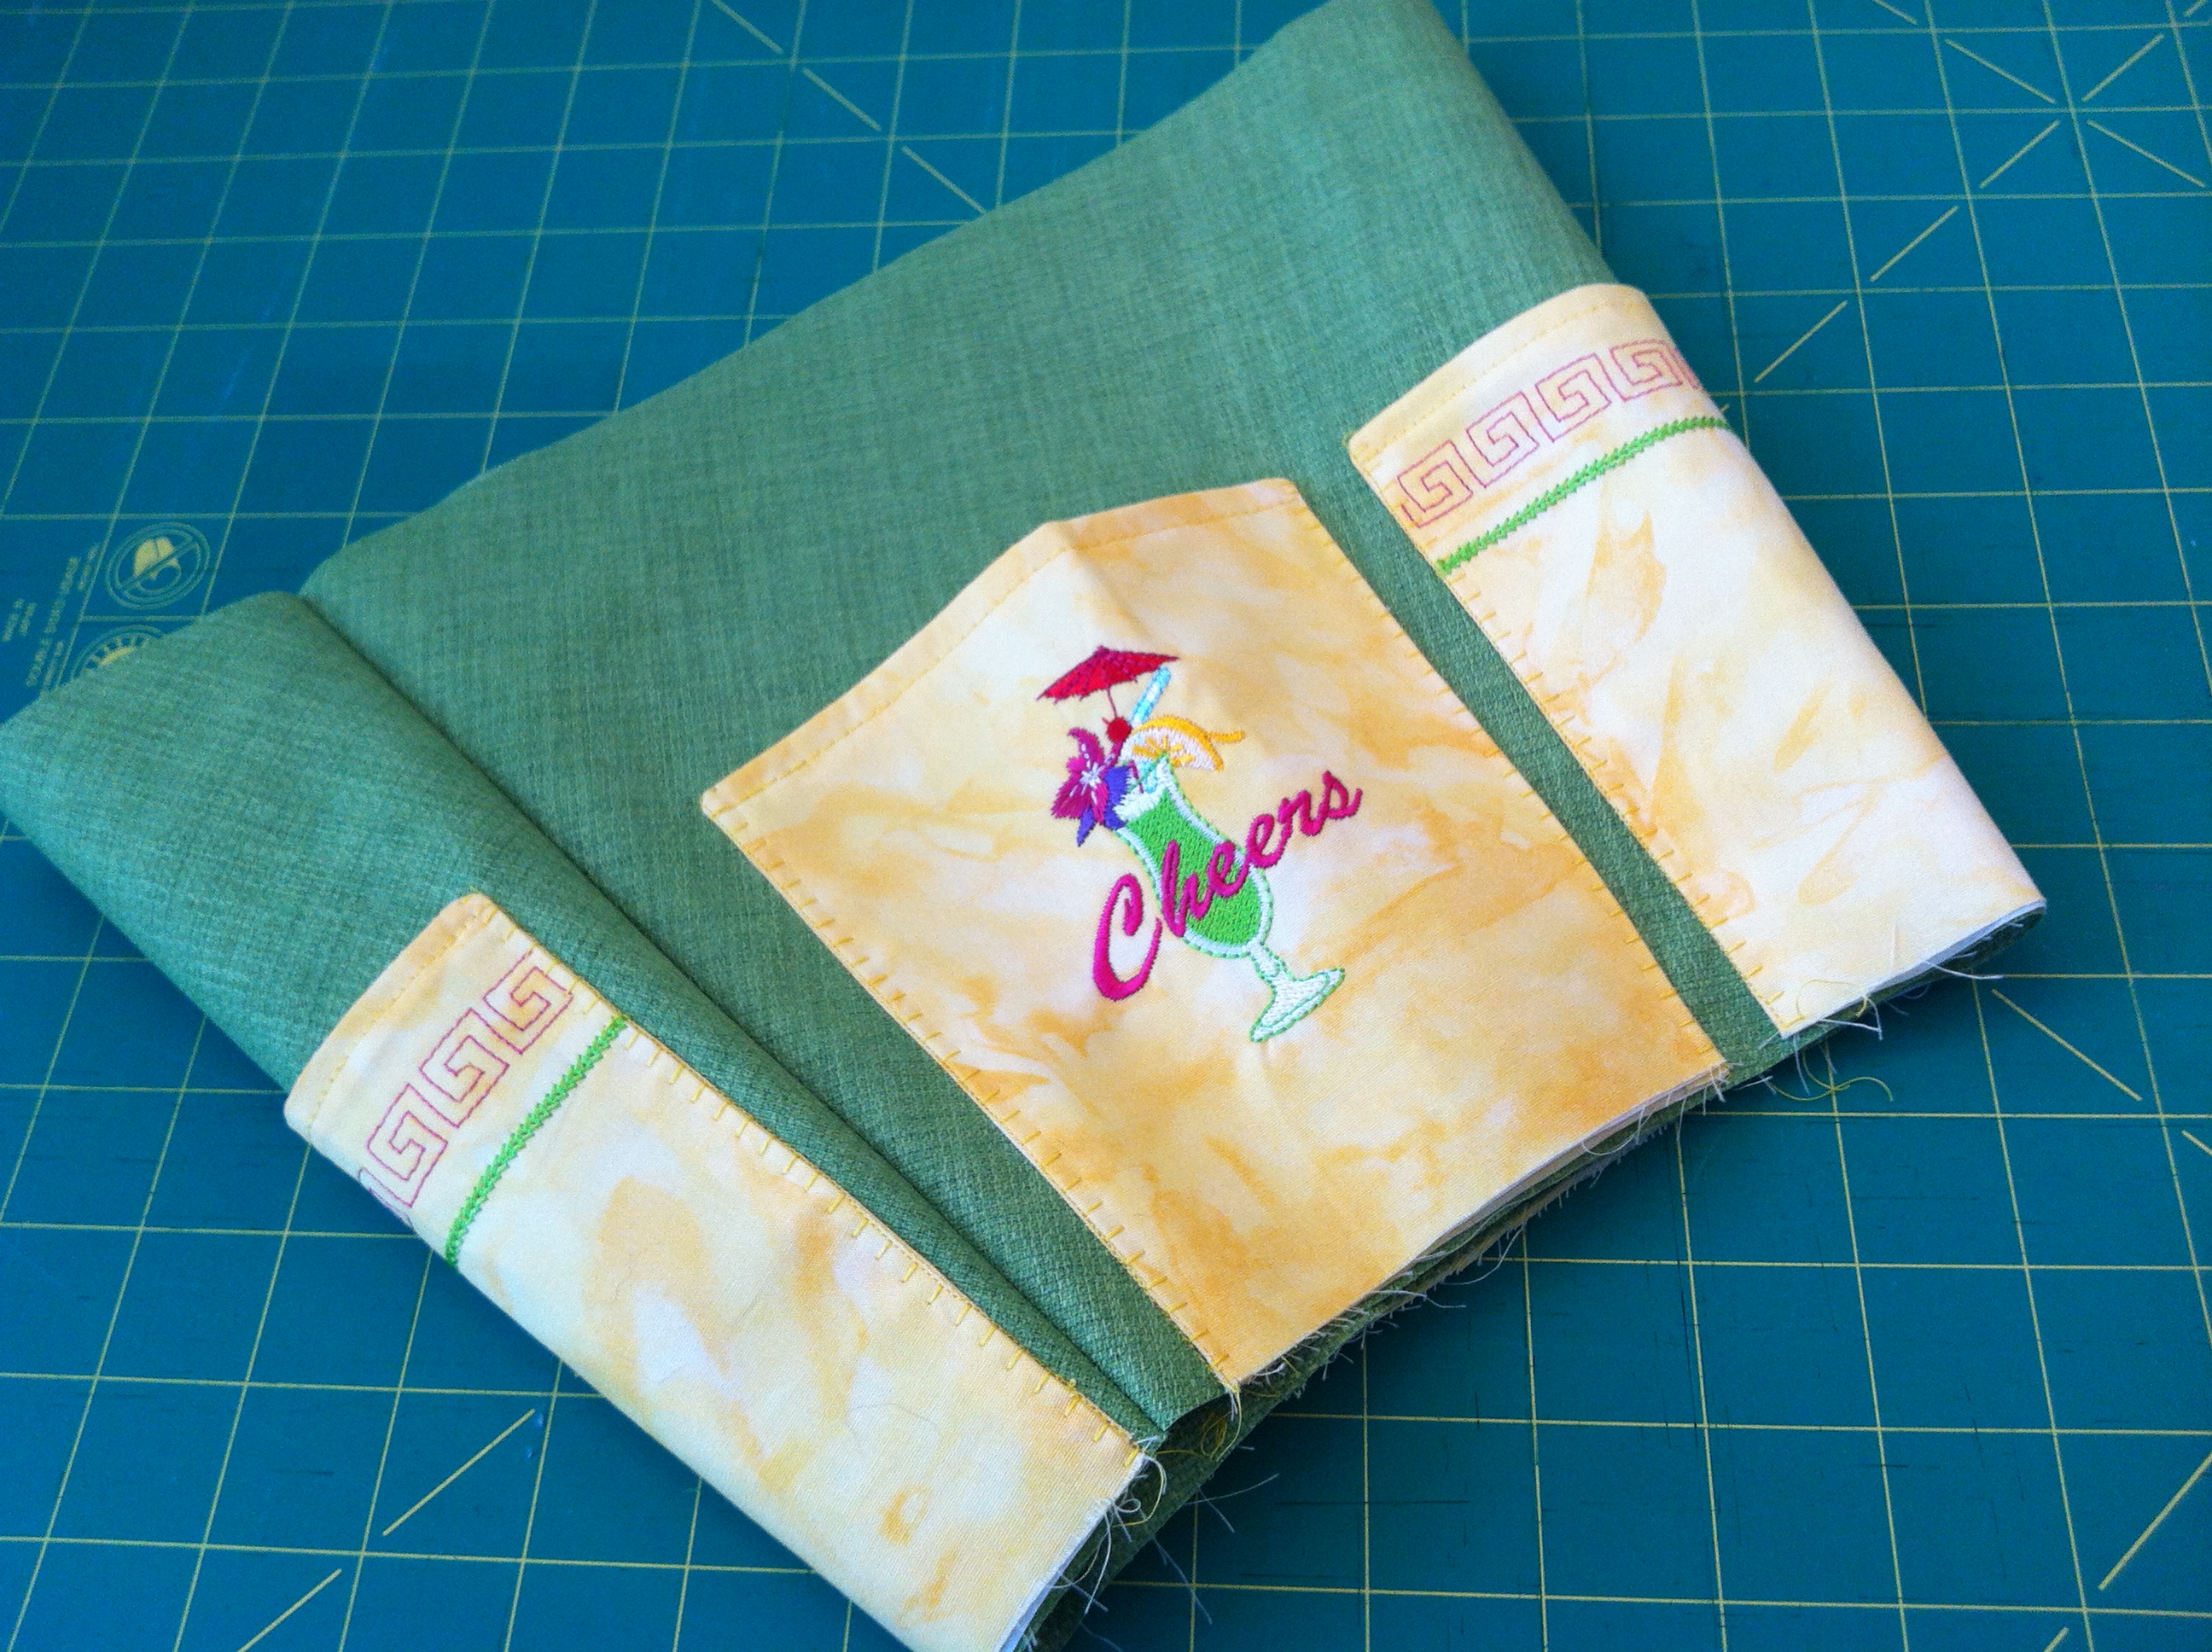
For those long hot summer days, this insulated ice bucket cover was designed to keep favourite drinks ready for hours of entertaining. The handy pockets provide secure storage for napkins, straws, and all the extras. The handle makes it easy to carry to the pool or beach—and the cover keeps the heat out, and the ice frozen, for hours. Flip the lid for access to your fave chilled wine or cooler bottles.
Supplies
• Brother Sewing and Embroidery Machine: DreamWeaver®XE VM6200D
• Circular Attachment (SACIRC1C)
• Embroidery Foot (included with the VM6200D)
• Zigzag Foot (included with the VM6200D)
• Monogramming foot (included with the VM6200D)
• Buttonhole Foot (included with the VM6200D)
• Brother 100% Polyester Embroidery and Bobbin Threads.
This machine features the patented Brother Sew Straight™ Laser Vision Guide, Droplight™ Embroidery Positioning Marker and V-Sonic™ Pen for sewing and embroidery.
Materials
Ice bucket
20″ [50cm] cover fabric
20″ [50cm] lining fabric
20″ [50cm] Thinsulate materials
4″ [10cm] Steam-a-Seam
26” x 1” [66 x 2.5cm] batting
39″ [1m] paper for pattern
39″ [1m] Brother SA520 tear-a-way stabilizer for embroidery and decorative stitching
Embroidery machine needles size 80 or 90
Sewing thread to match fabric
Embroidery/bobbin threads
Fray Check
Scissors
Marking tools
Pins
2 x 20mm buttons
Creating the pattern
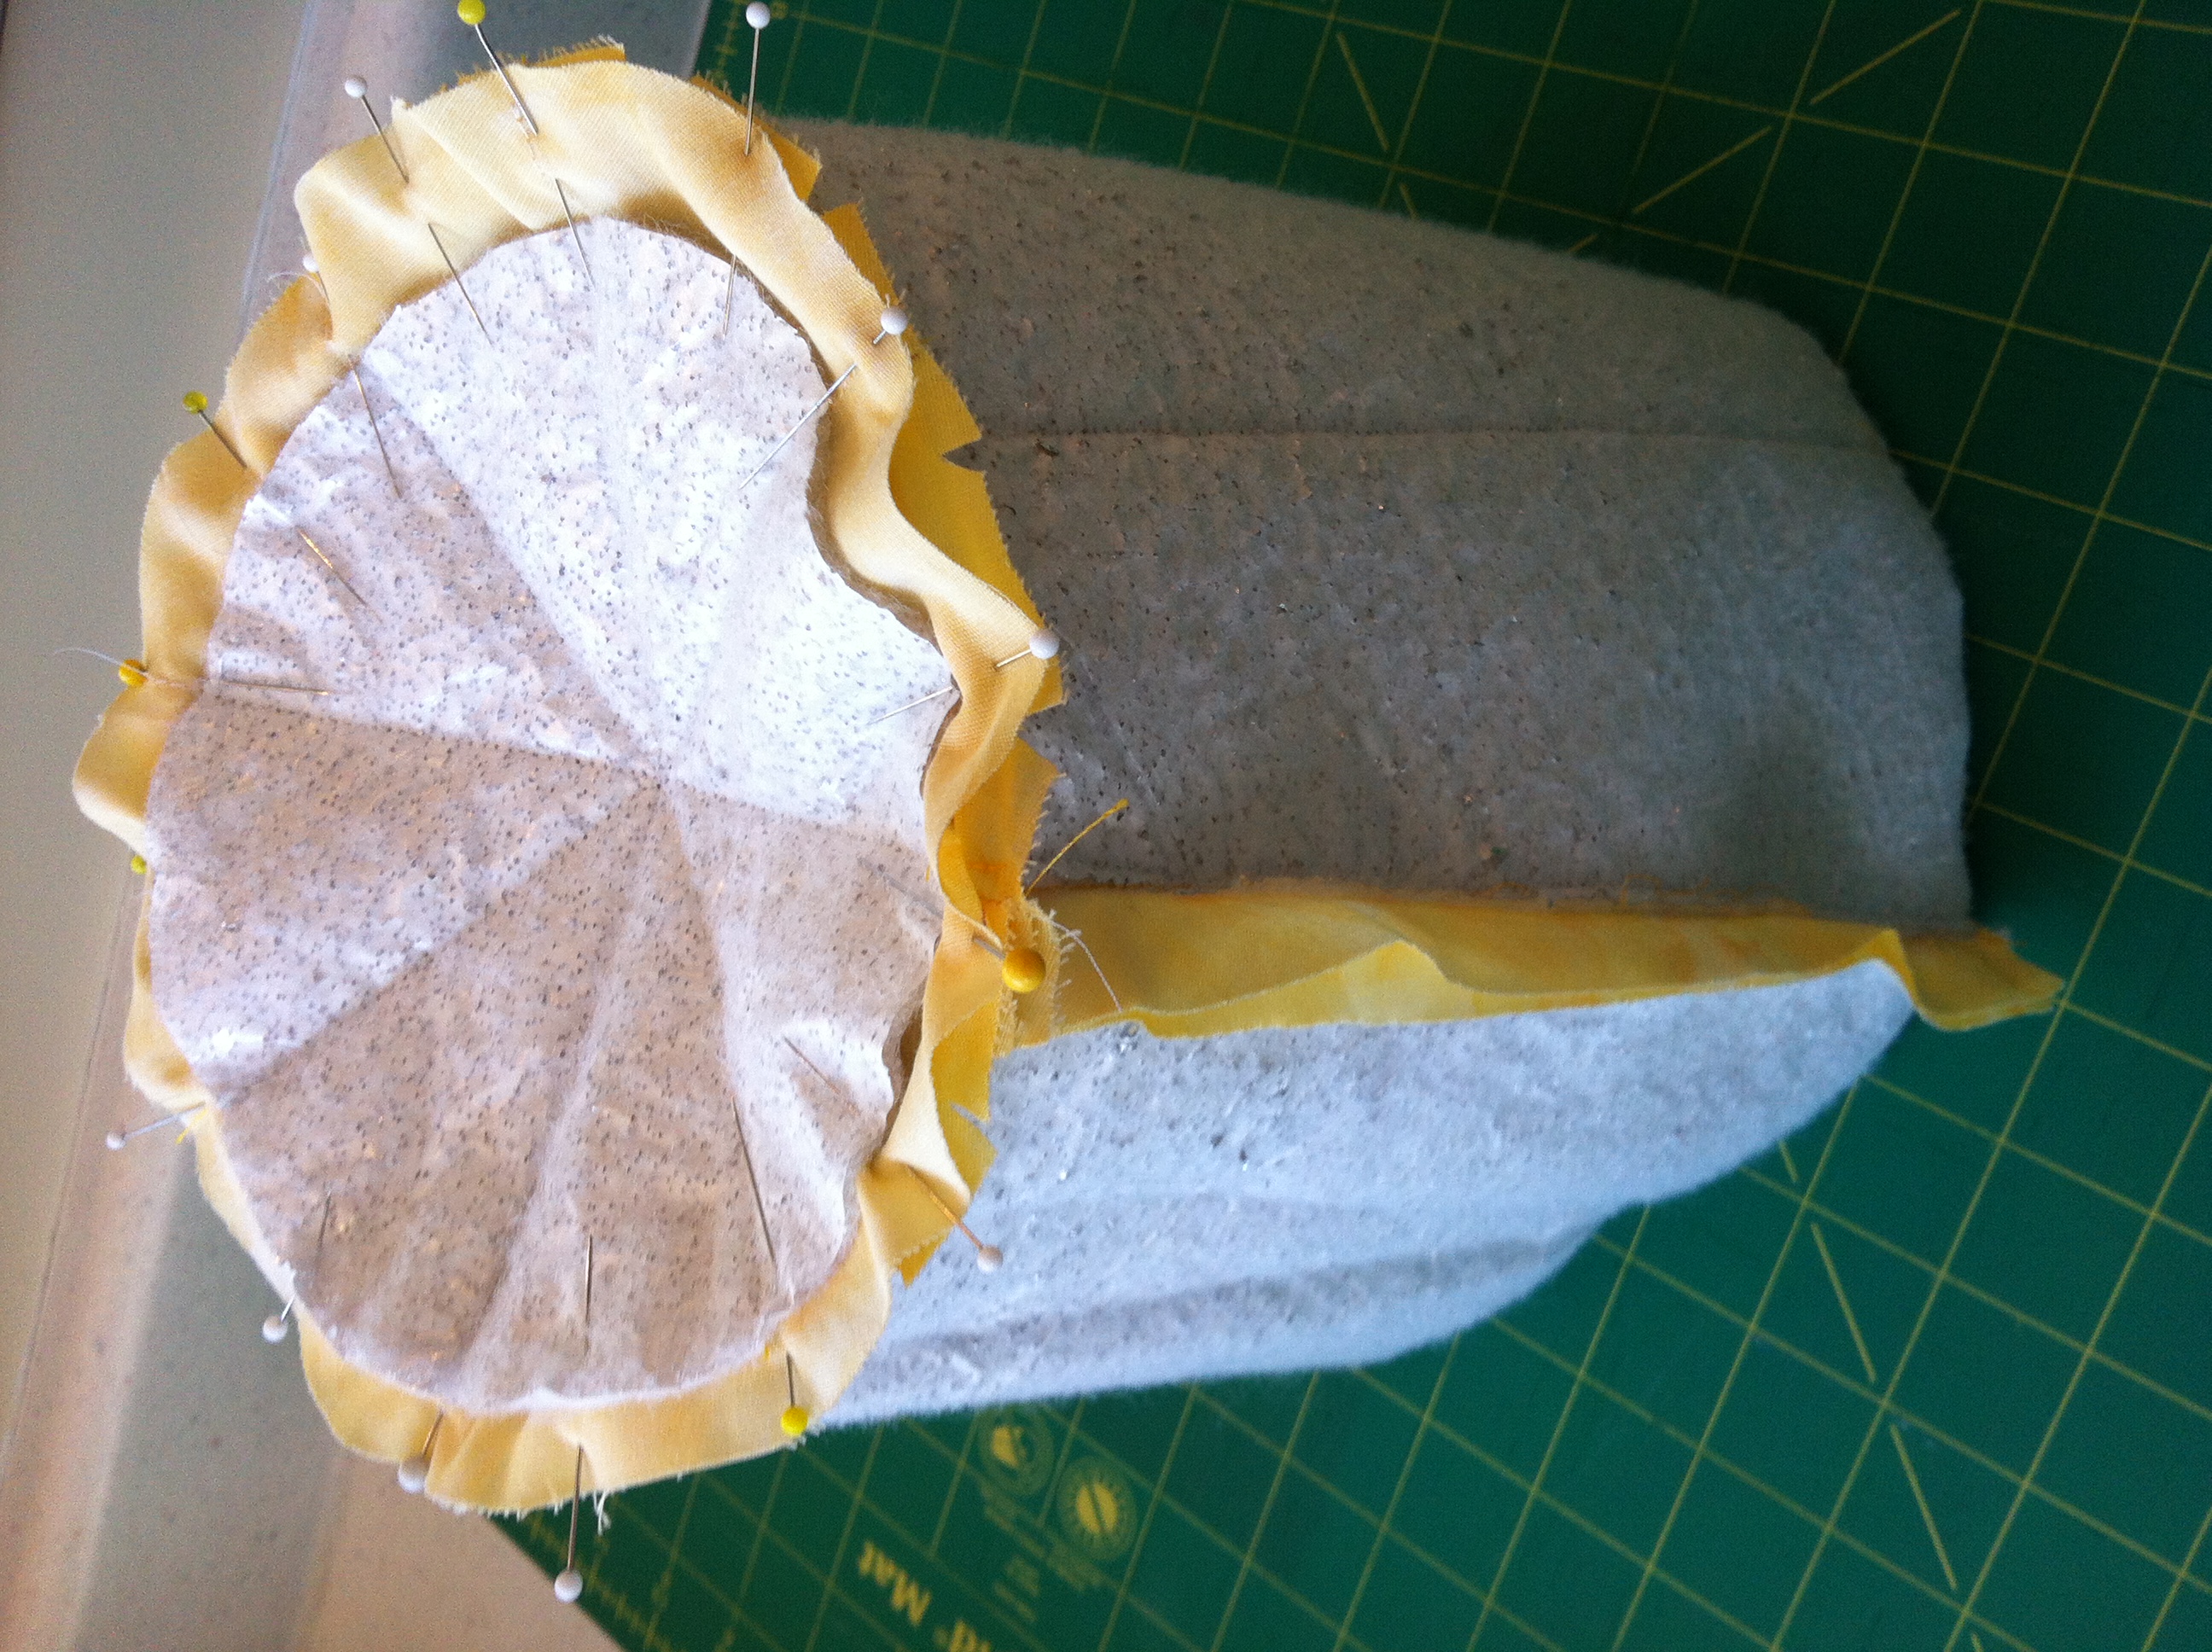
1. Position the top of the bucket upside down on paper and draw the circle. Repeat for the bottom. Add a seam allowance of ⅝″ [16mm] around the drawn circles.
2. If your bucket is like the one used for the sample, larger at the top, wrap paper once around the bucket and trim to size of bucket adding ⅝″ [16mm] seam allowance on all sides.
3. Use the bucket pattern piece to create pockets by reducing the height of pattern to the desired height (5″ [12.5cm] is the height of the pocket in the sample).
4. Divide the pattern piece into number of pockets desired, four were used for the sample. Cut two pieces of lining fabric for each pocket.
Cutting
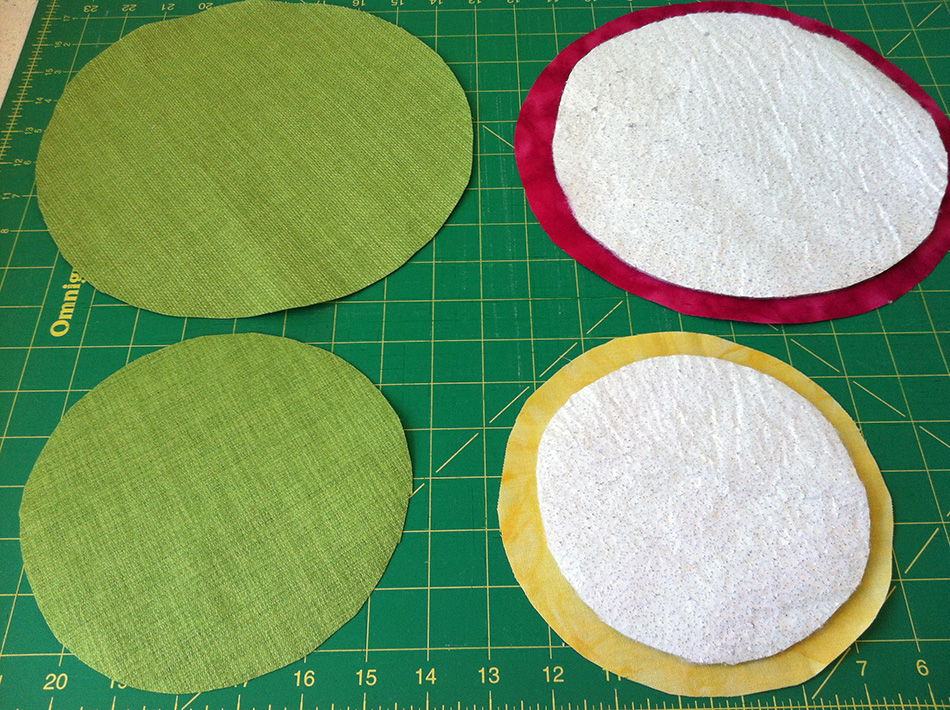
1. From cover fabric, cut:
• bucket cover
• large circle
• small circle
• handle band 3¾″ x 26″ [9.5 x 66cm]
• lid band 2¼″ x 29¾″ [5.5 x 75cm]
• outside fabric
• 4 pockets
2. Except for the lid band, cut the above pieces from lining fabric.
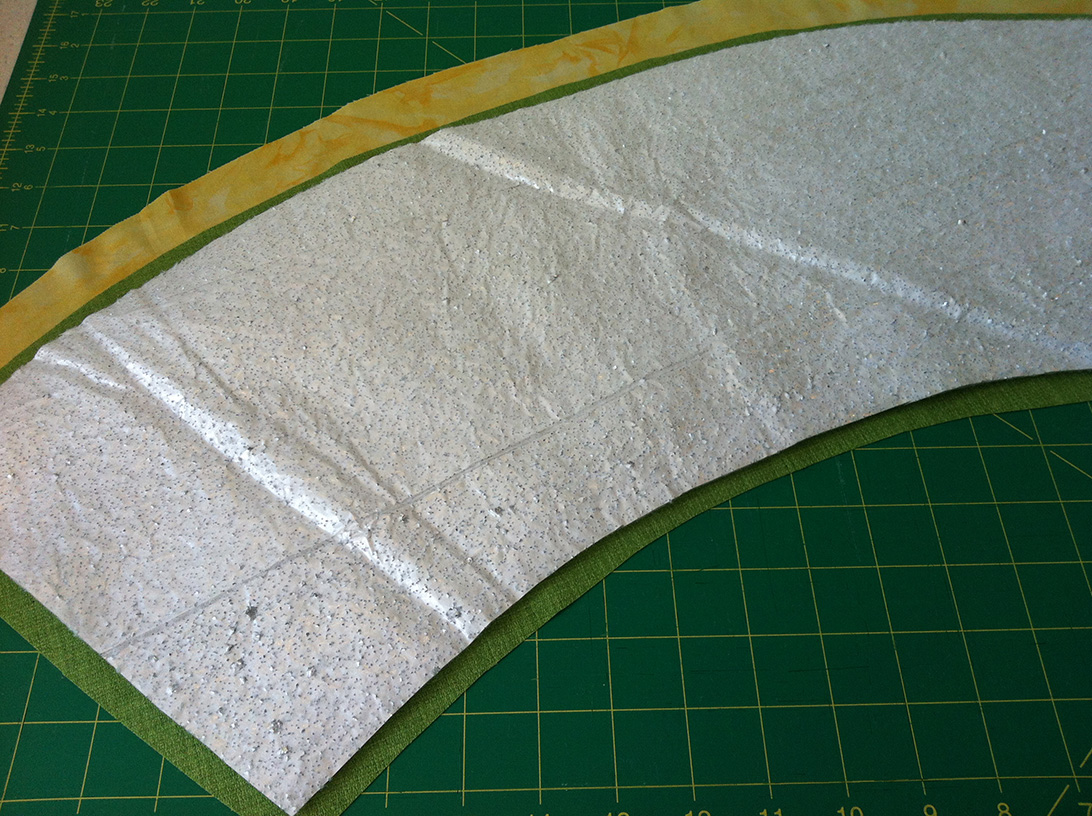
3. Cut bucket cover, large circle, small circle from Thinsulate fabric. Trim ½” [12mm] from all sides to reduce seam bulk.
Sewing
Bucket Lining
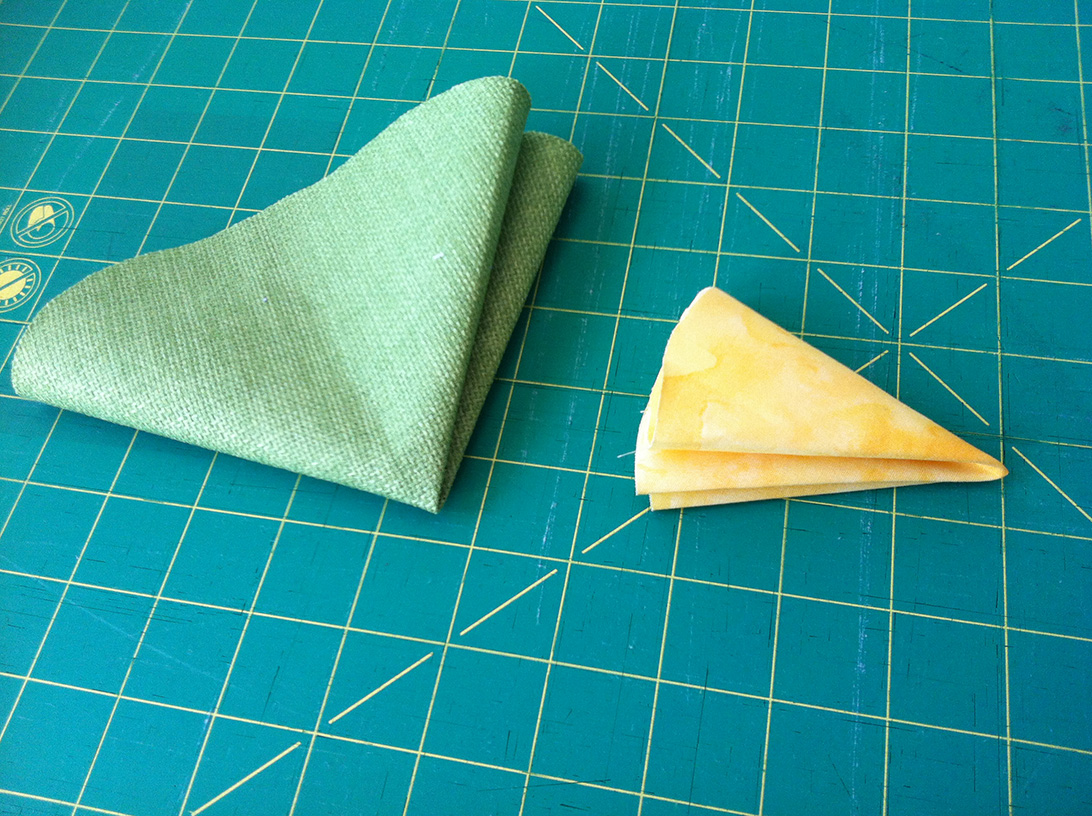
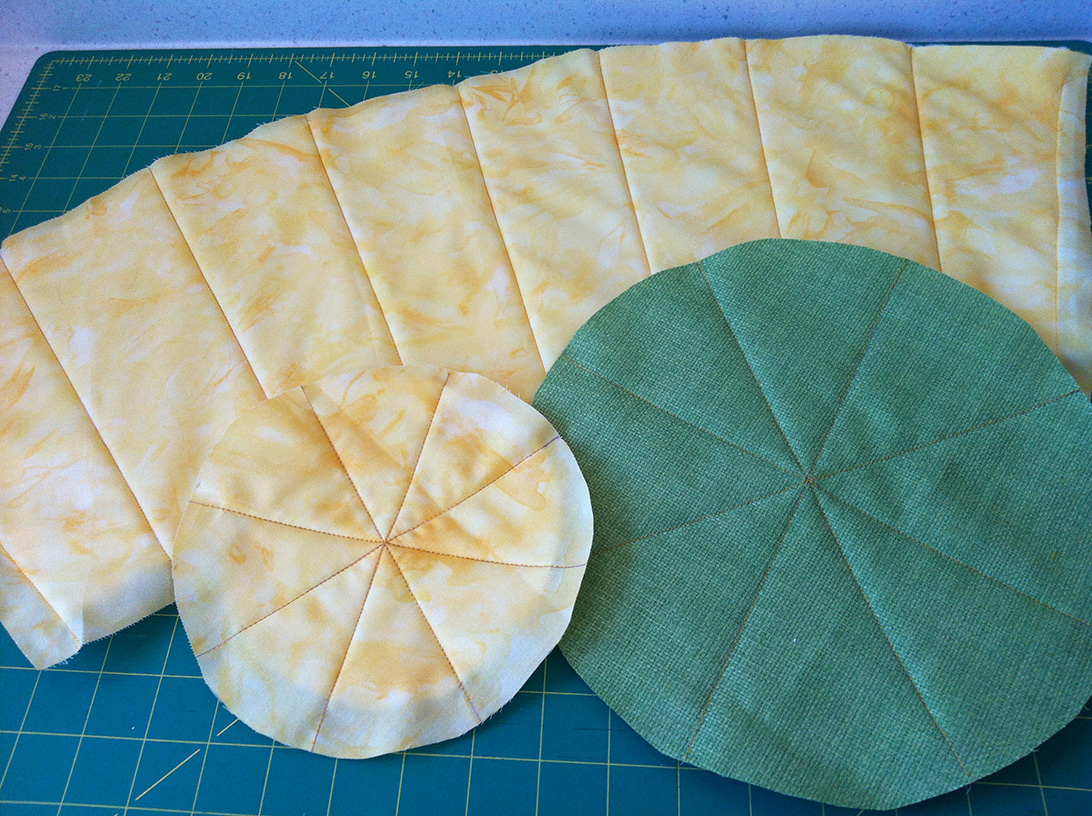
1. Fold circles and bucket lining in half 3 times to make 8 equal parts, excluding the seam allowance. Mark lines for sewing reference or use the laser sewing guide to follow creases.


2. Lay the Thinsulate fabric on the wrong side of lining, shiny side up. From the right side, sew the lining to the Thinsulate using the laser guide to follow the creases.

3. Stay-stitch lower edge of bucket lining ½” [12mm] from edge, with 2mm stitch.
4. With Right Slides of lining together, sew side seam of lining leaving 4” – 5” [10 – 12cm] opening for turning.
5. Right Sides together, use the stitch lines as a guide to pin the smaller circle to bottom of bucket lining, sew on using ½” [12mm] seam allowance. Snip to stitch line to ease in fullness on bucket lining. Left align the needle to ease sewing.

Pockets
1. Embroider designs on fabric before cutting out.
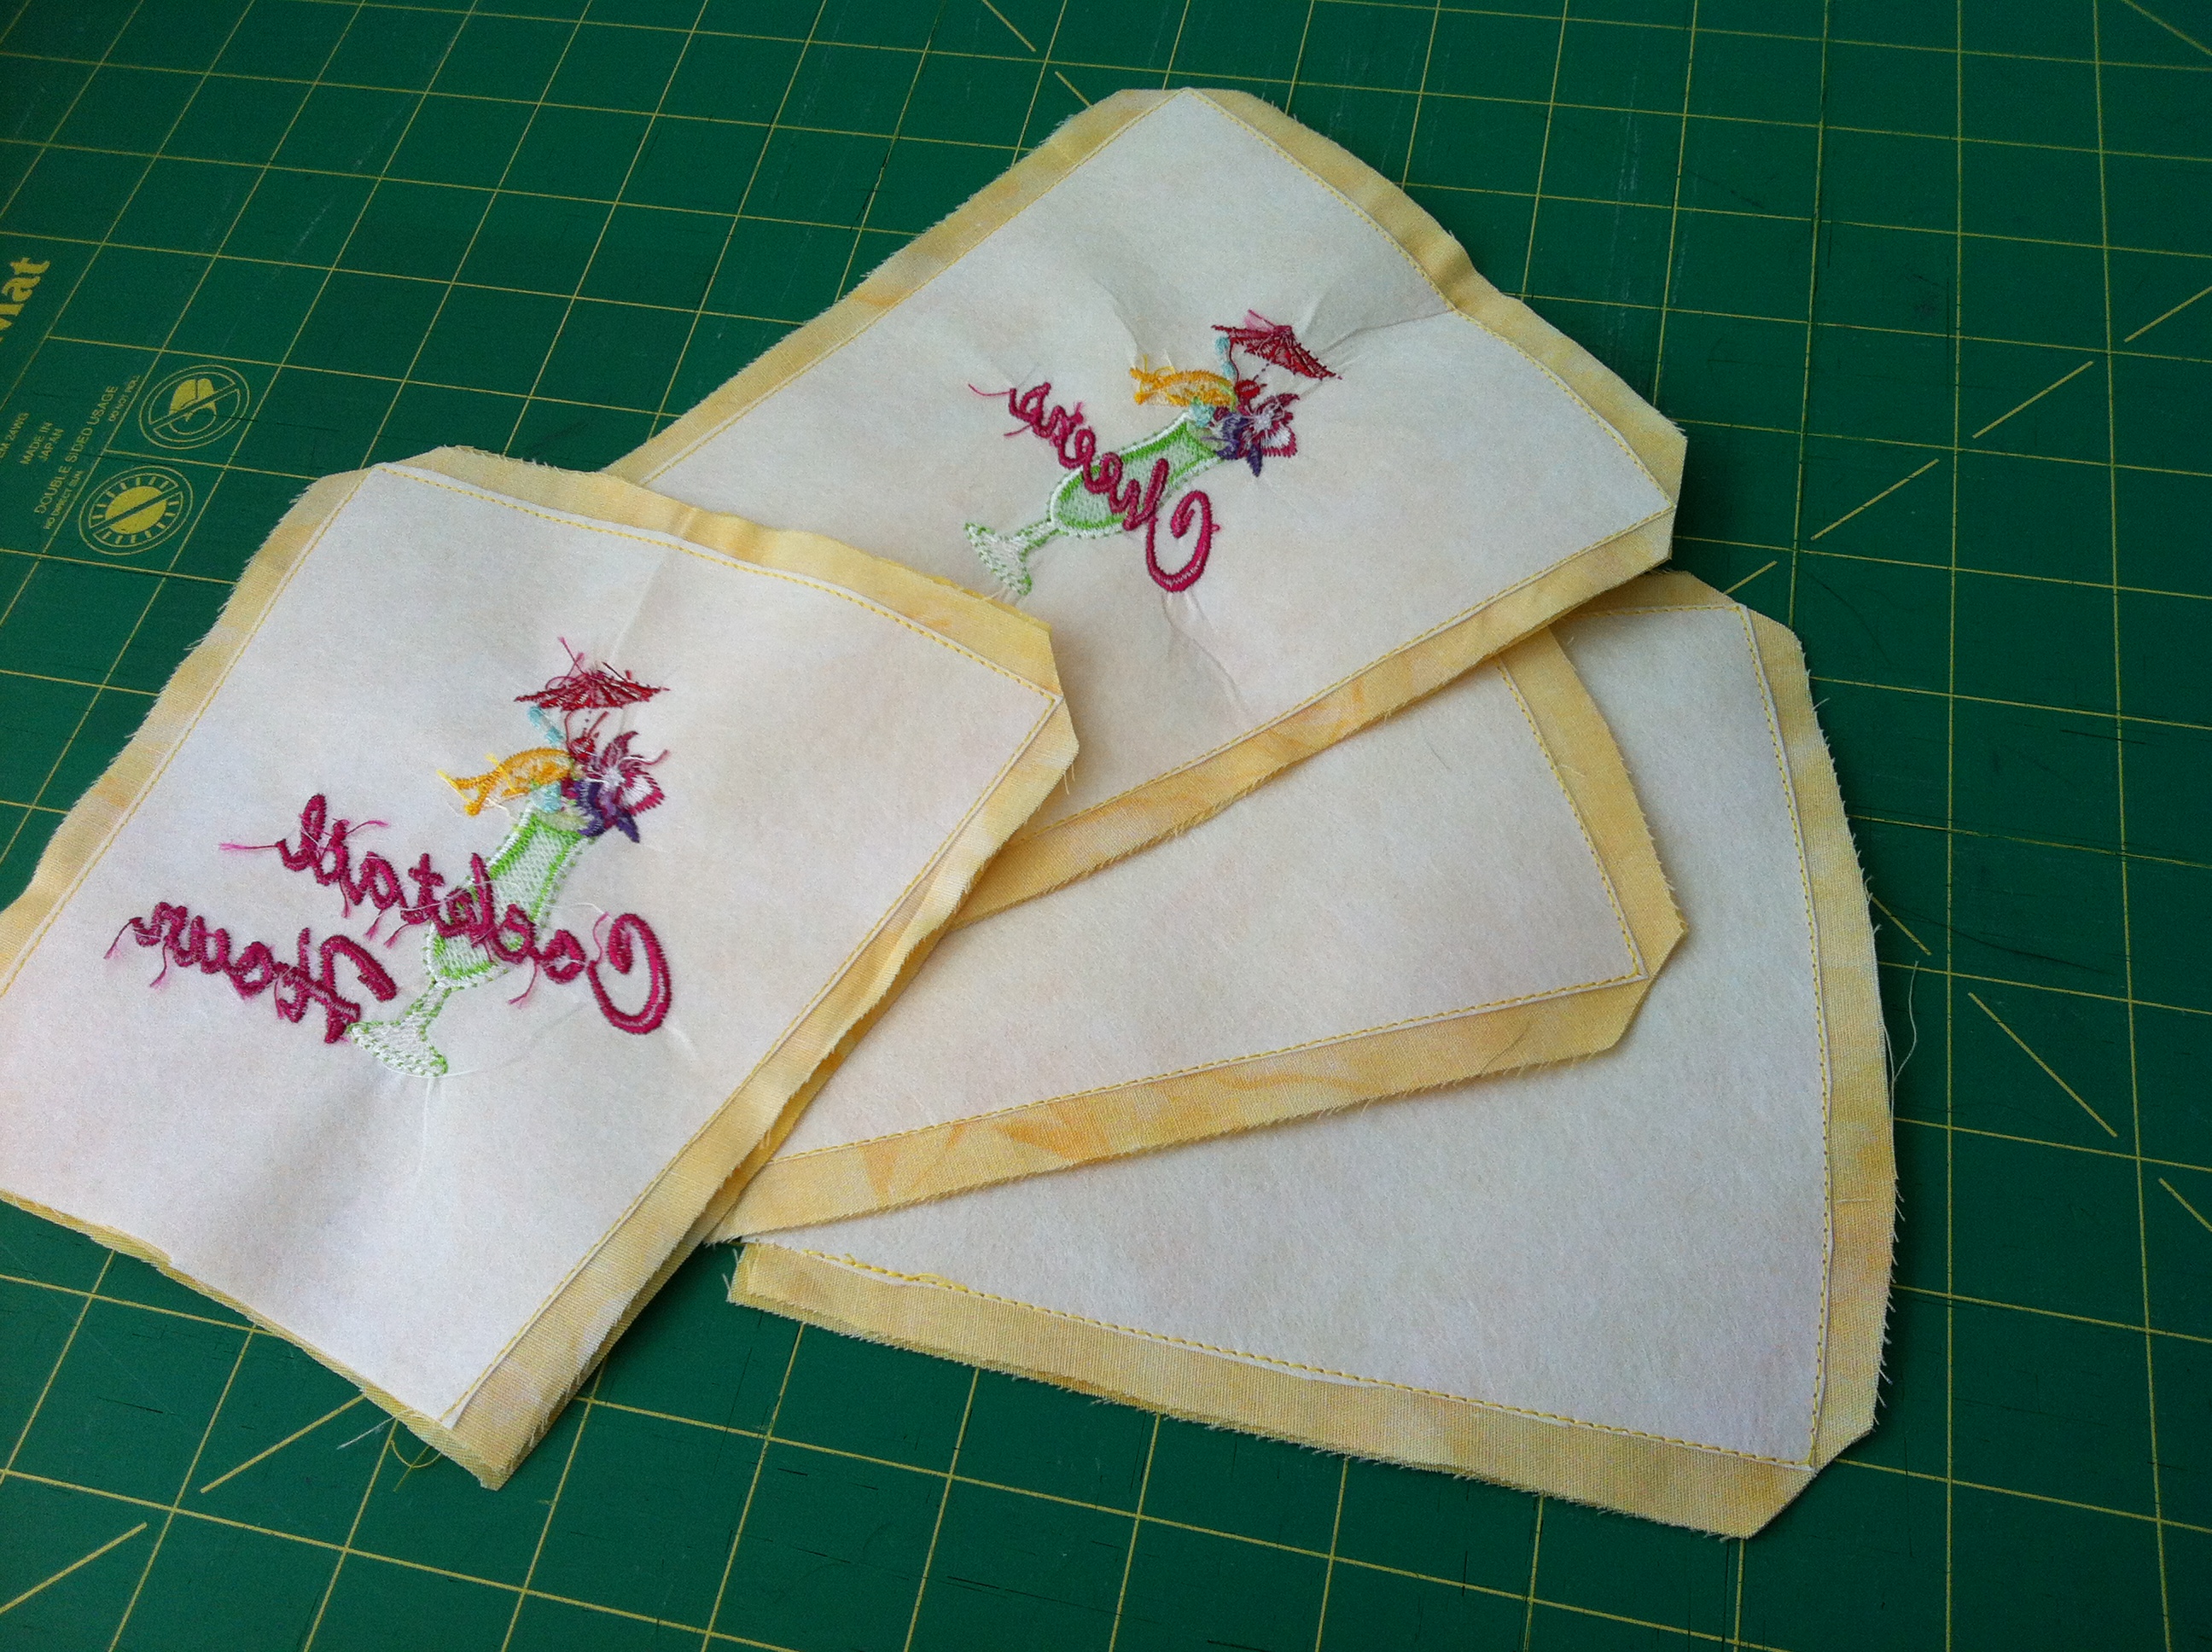
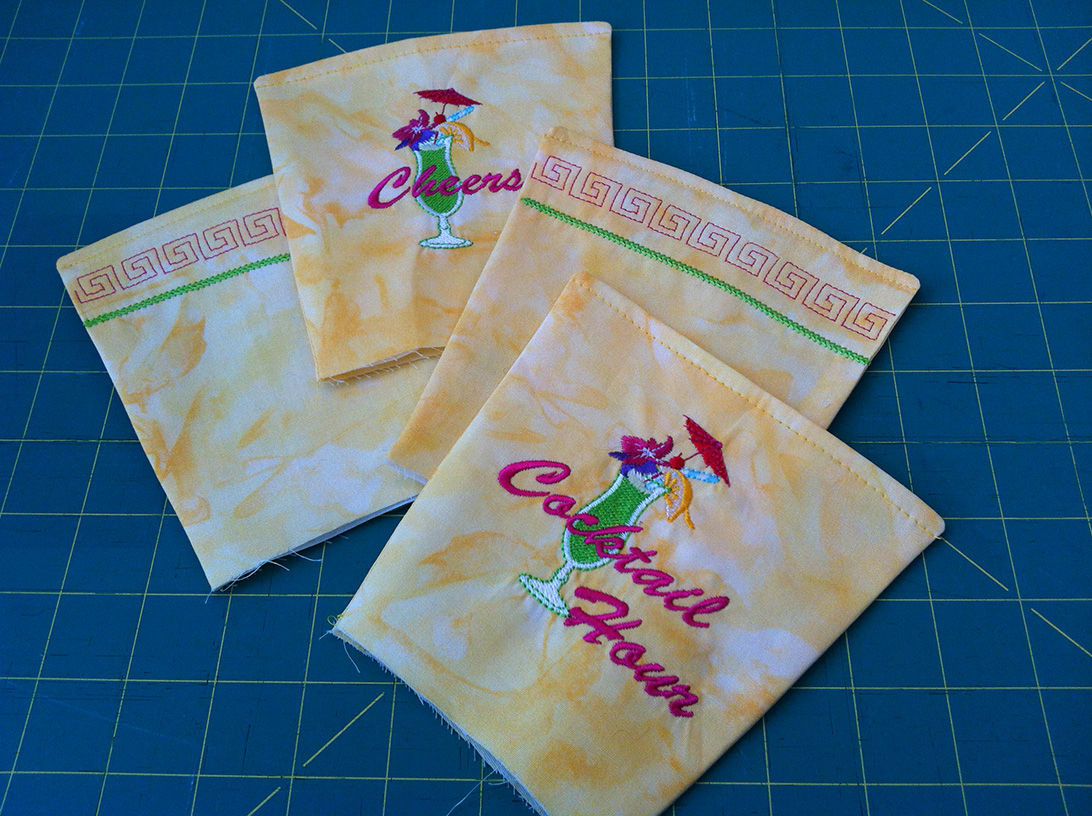
2. Right Sides together, sew both sides and top of pockets with ¼″ [6mm] seam. Leave small curve open on bottom. Clip corners diagonally, turn and press.
3. Topstitch top edge of pocket. Note: Take this opportunity to use decorative stitches from your sewing machine with embroidery thread or heavier threads for that personalized look. Create your own stitches with the Brother Create a Stitch. For the sample, designs #6-003 and #6-047 decorative stitches and cocktail glass embroidery from preloaded designs on the Dreamweaver XE. were used.
4. Pin pockets to lower edge of bucket cover aligning bottom edge. Pin top edges of pocket inward to create a little give for access to the pockets. Position pockets at least ½” [12mm] from sides to allow for the side seam of cover.
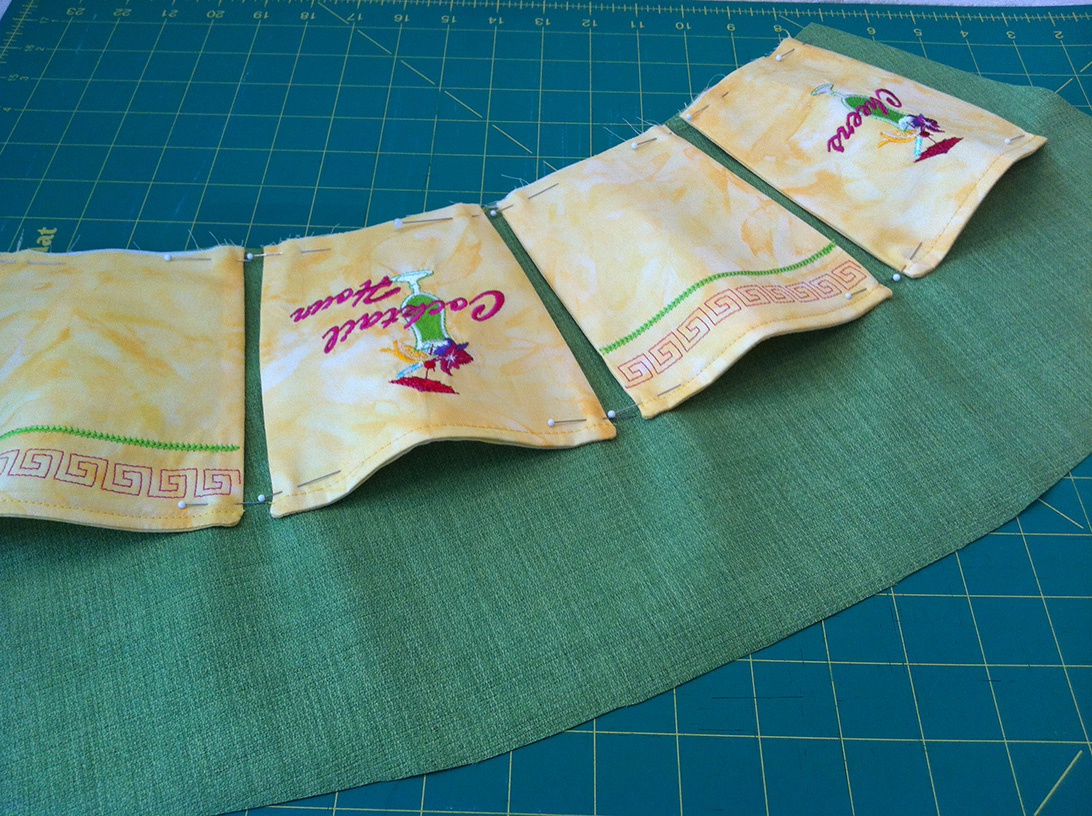
5. Stitch sides of pockets to bucket cover. The blanket stitch used for the sample is 3.5mm wide and 1.8mm long. If you have a mirror image, just flip the stitch to come down the other side.
6. Stay-stitch the bottom of the pockets to the bottom of the cover ¼″ [6mm] from edge.
Bucket Cover
1. Right sides together, stitch the side seam of the bucket cover.
2. Pin the bottom circle to the bottom of bucket cover. Stitch with ½” [12mm] seam, clipping the cover edge to fit.
3. With Right sides of lining together, stitch around top edge and turn inside-out through lining. Stitch opening closed. Push lining into bucket cover and topstitch upper edge.
For buckets with rings on the sides, follow the next steps to create openings. It’s recommended to make a sample first.
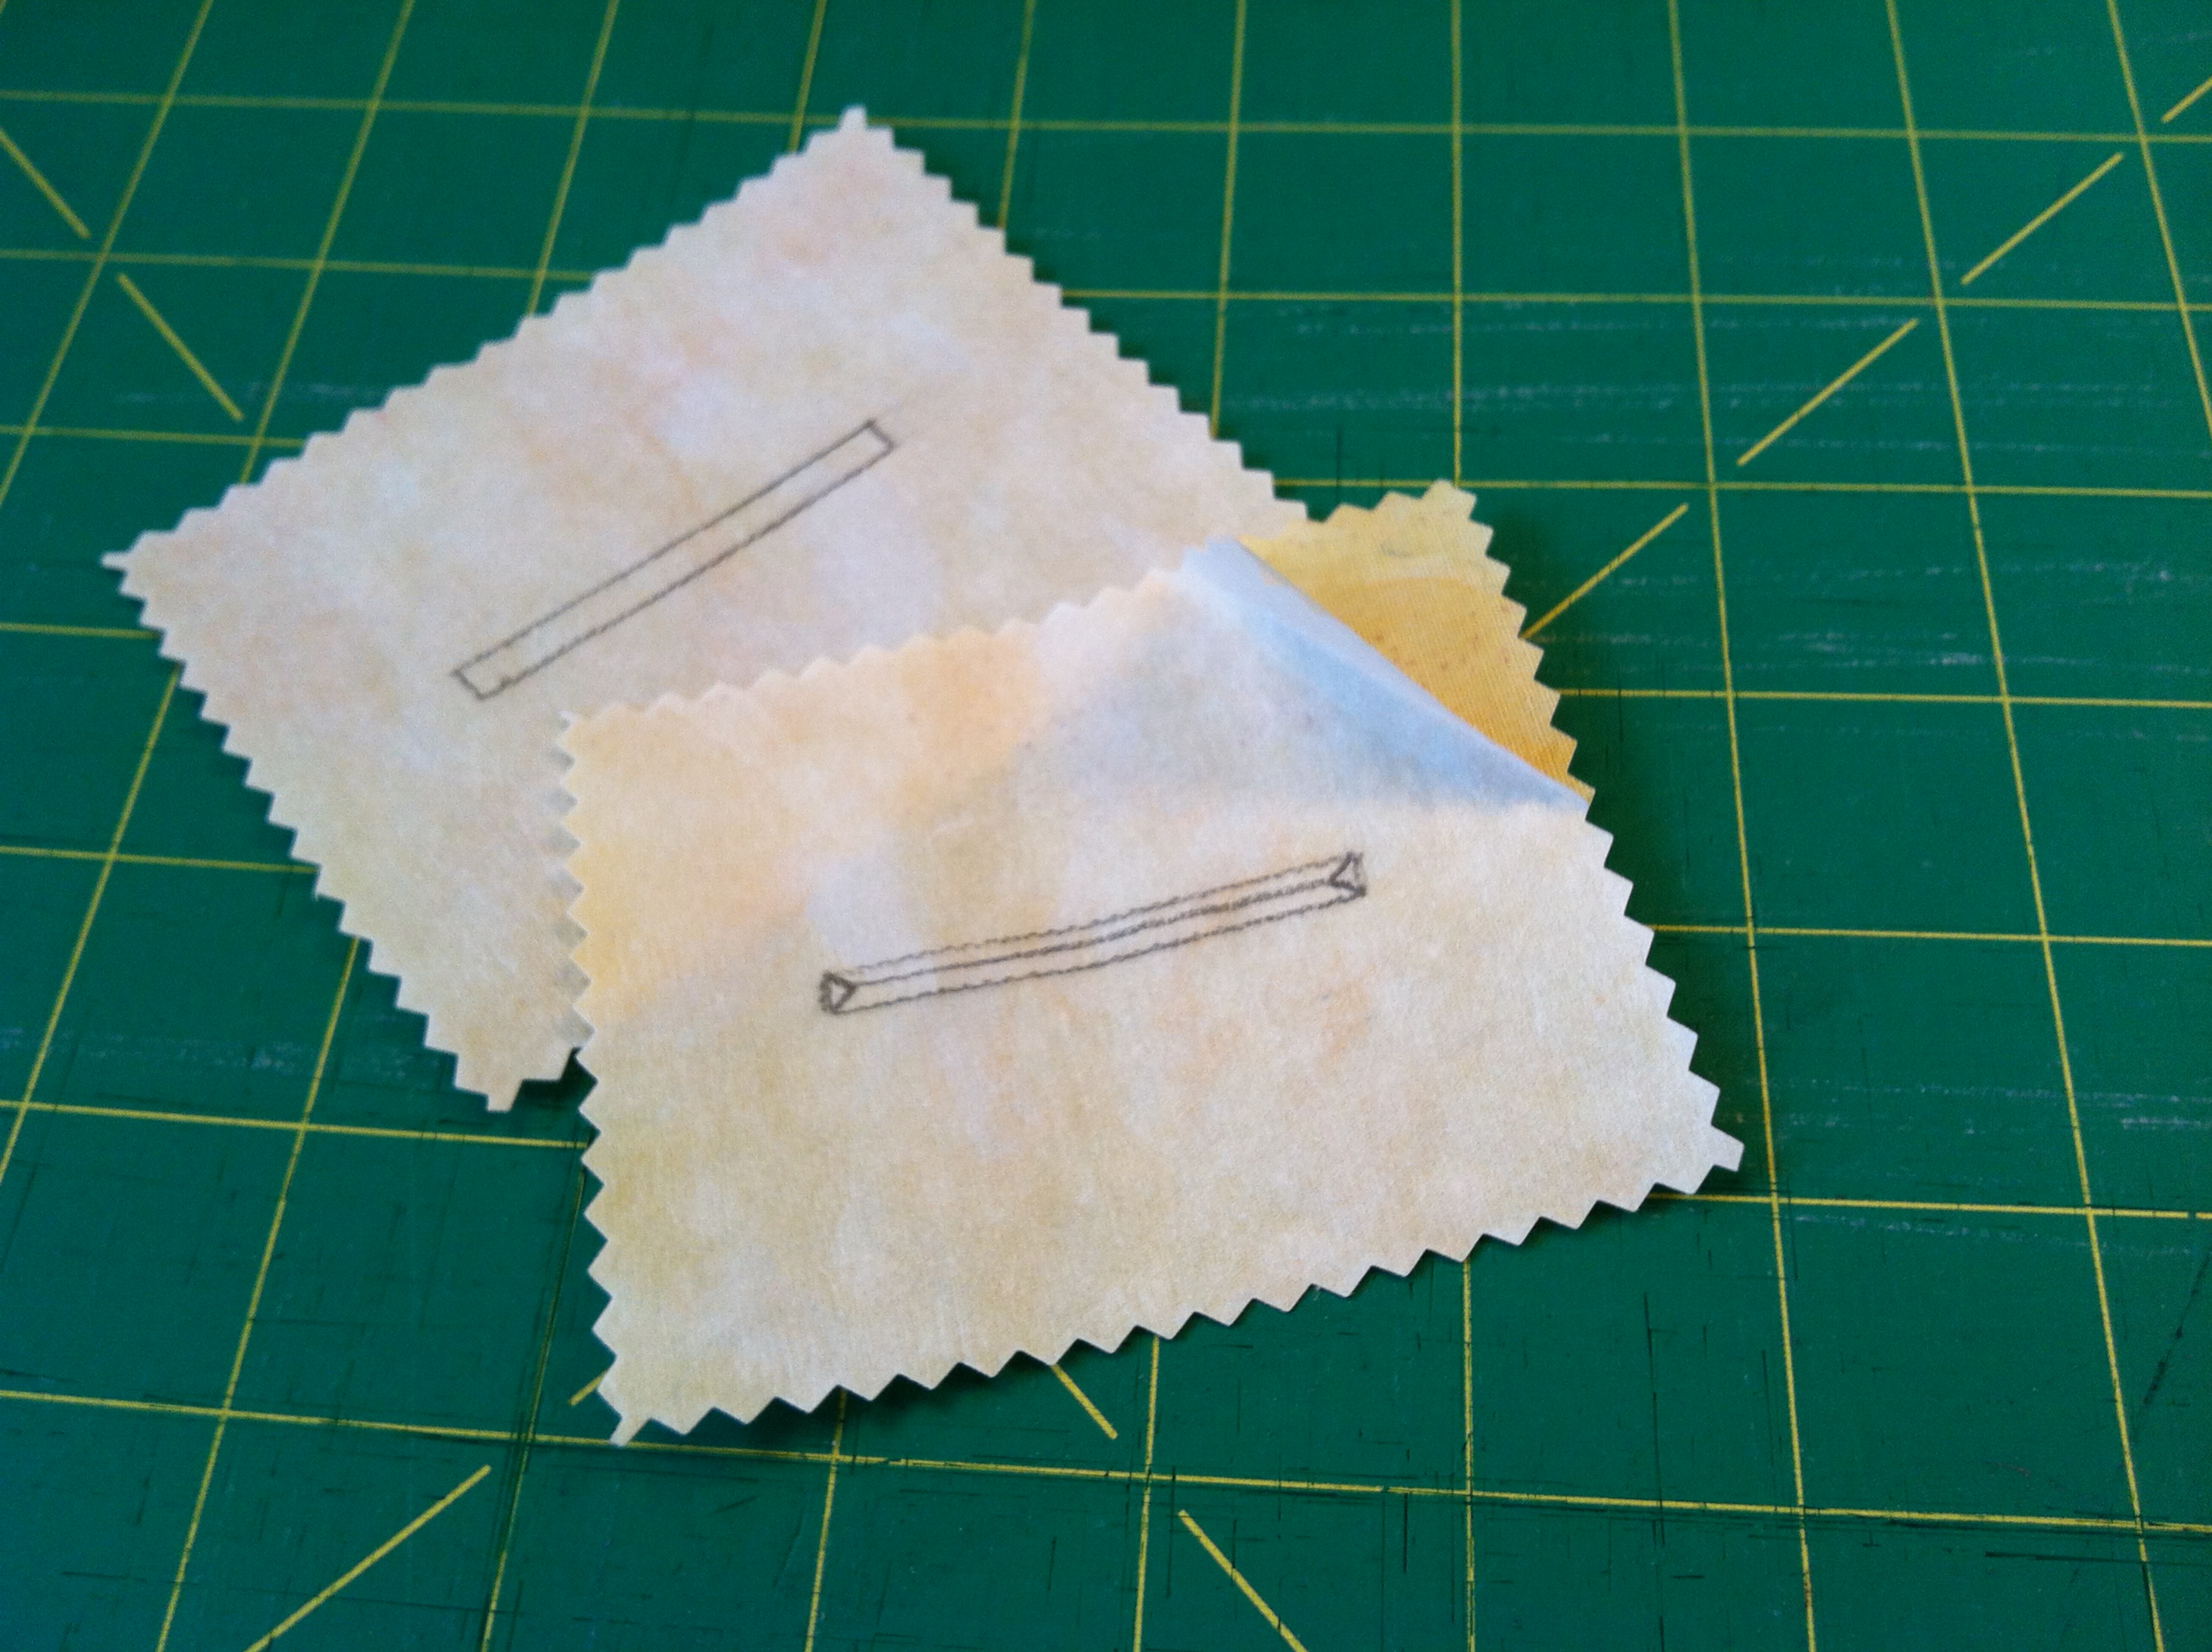
1. Cut two 3” x 4” [7.6 x 10.2cm] pieces of lining and apply Steam-a-Seam to the wrong side of each piece. Steam-a-Seam should be same size as lining piece. With pinking shear, finish off all sides of each piece.
2. Draw a line the width of ring in the centre of piece on the paper side and draw a stitching line rectangle around line. The opening in the sample is 2” [5cm] long and ¼″ [6mm] wide.
3. Position this piece with Right sides together on outside of bucket at the same location as rings.
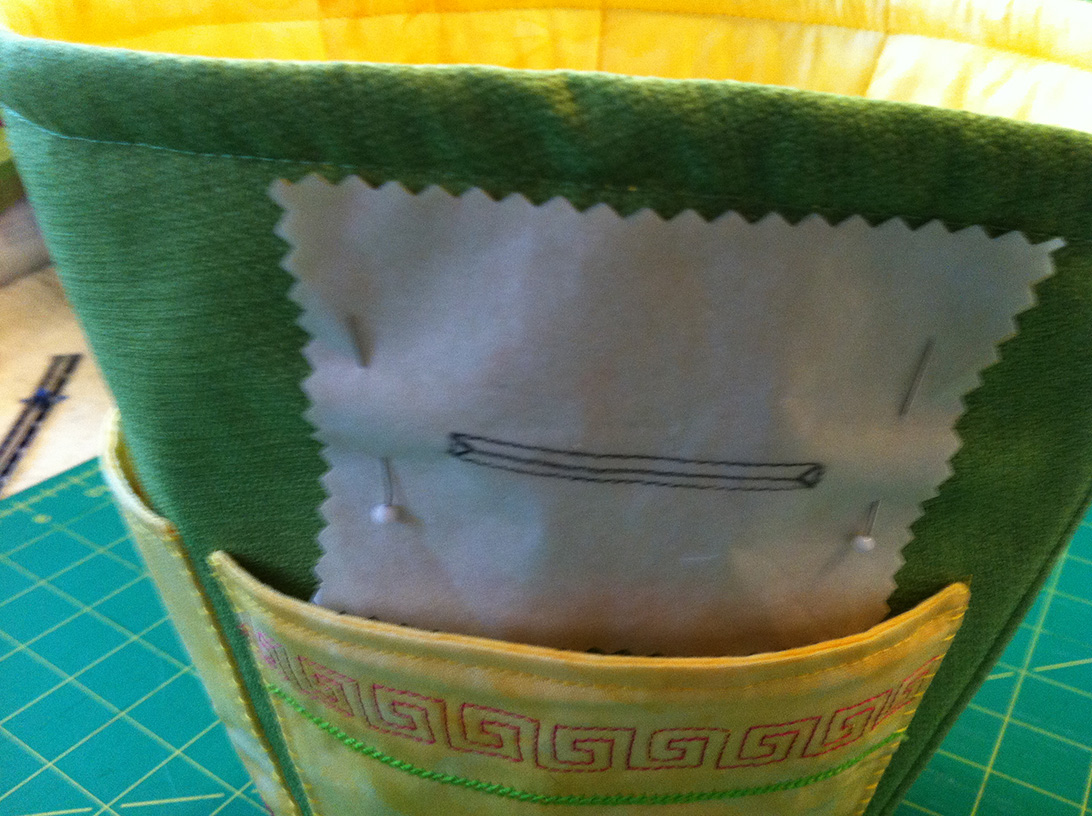
4. Reduce your stitch length to 1mm to allow precise stitching. Stitch around marking on piece, pivoting at all corners. Note: If you have directional sewing on your machine, slip the bucket on the free arm and sew rectangle without turning bucket.
5. Remove the paper from the Steam-a-Seam. Trim through all layers with Y slits at each corner. Push the piece through to the inside of the bucket.
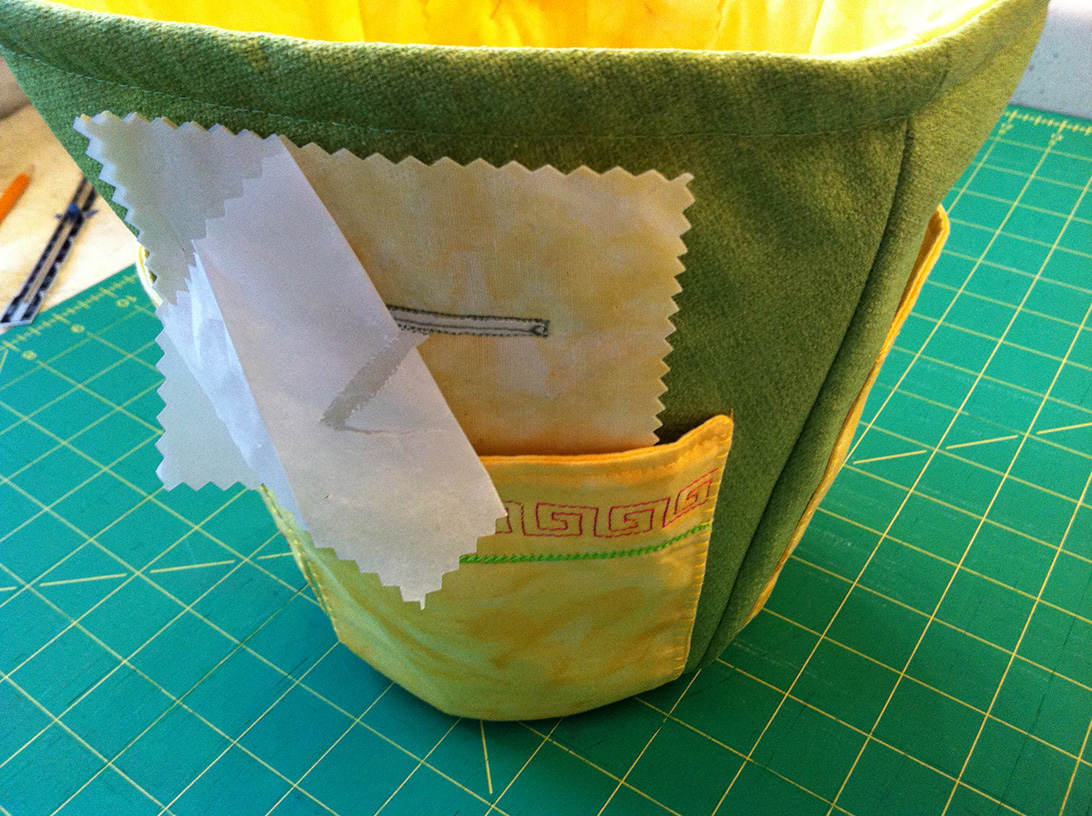
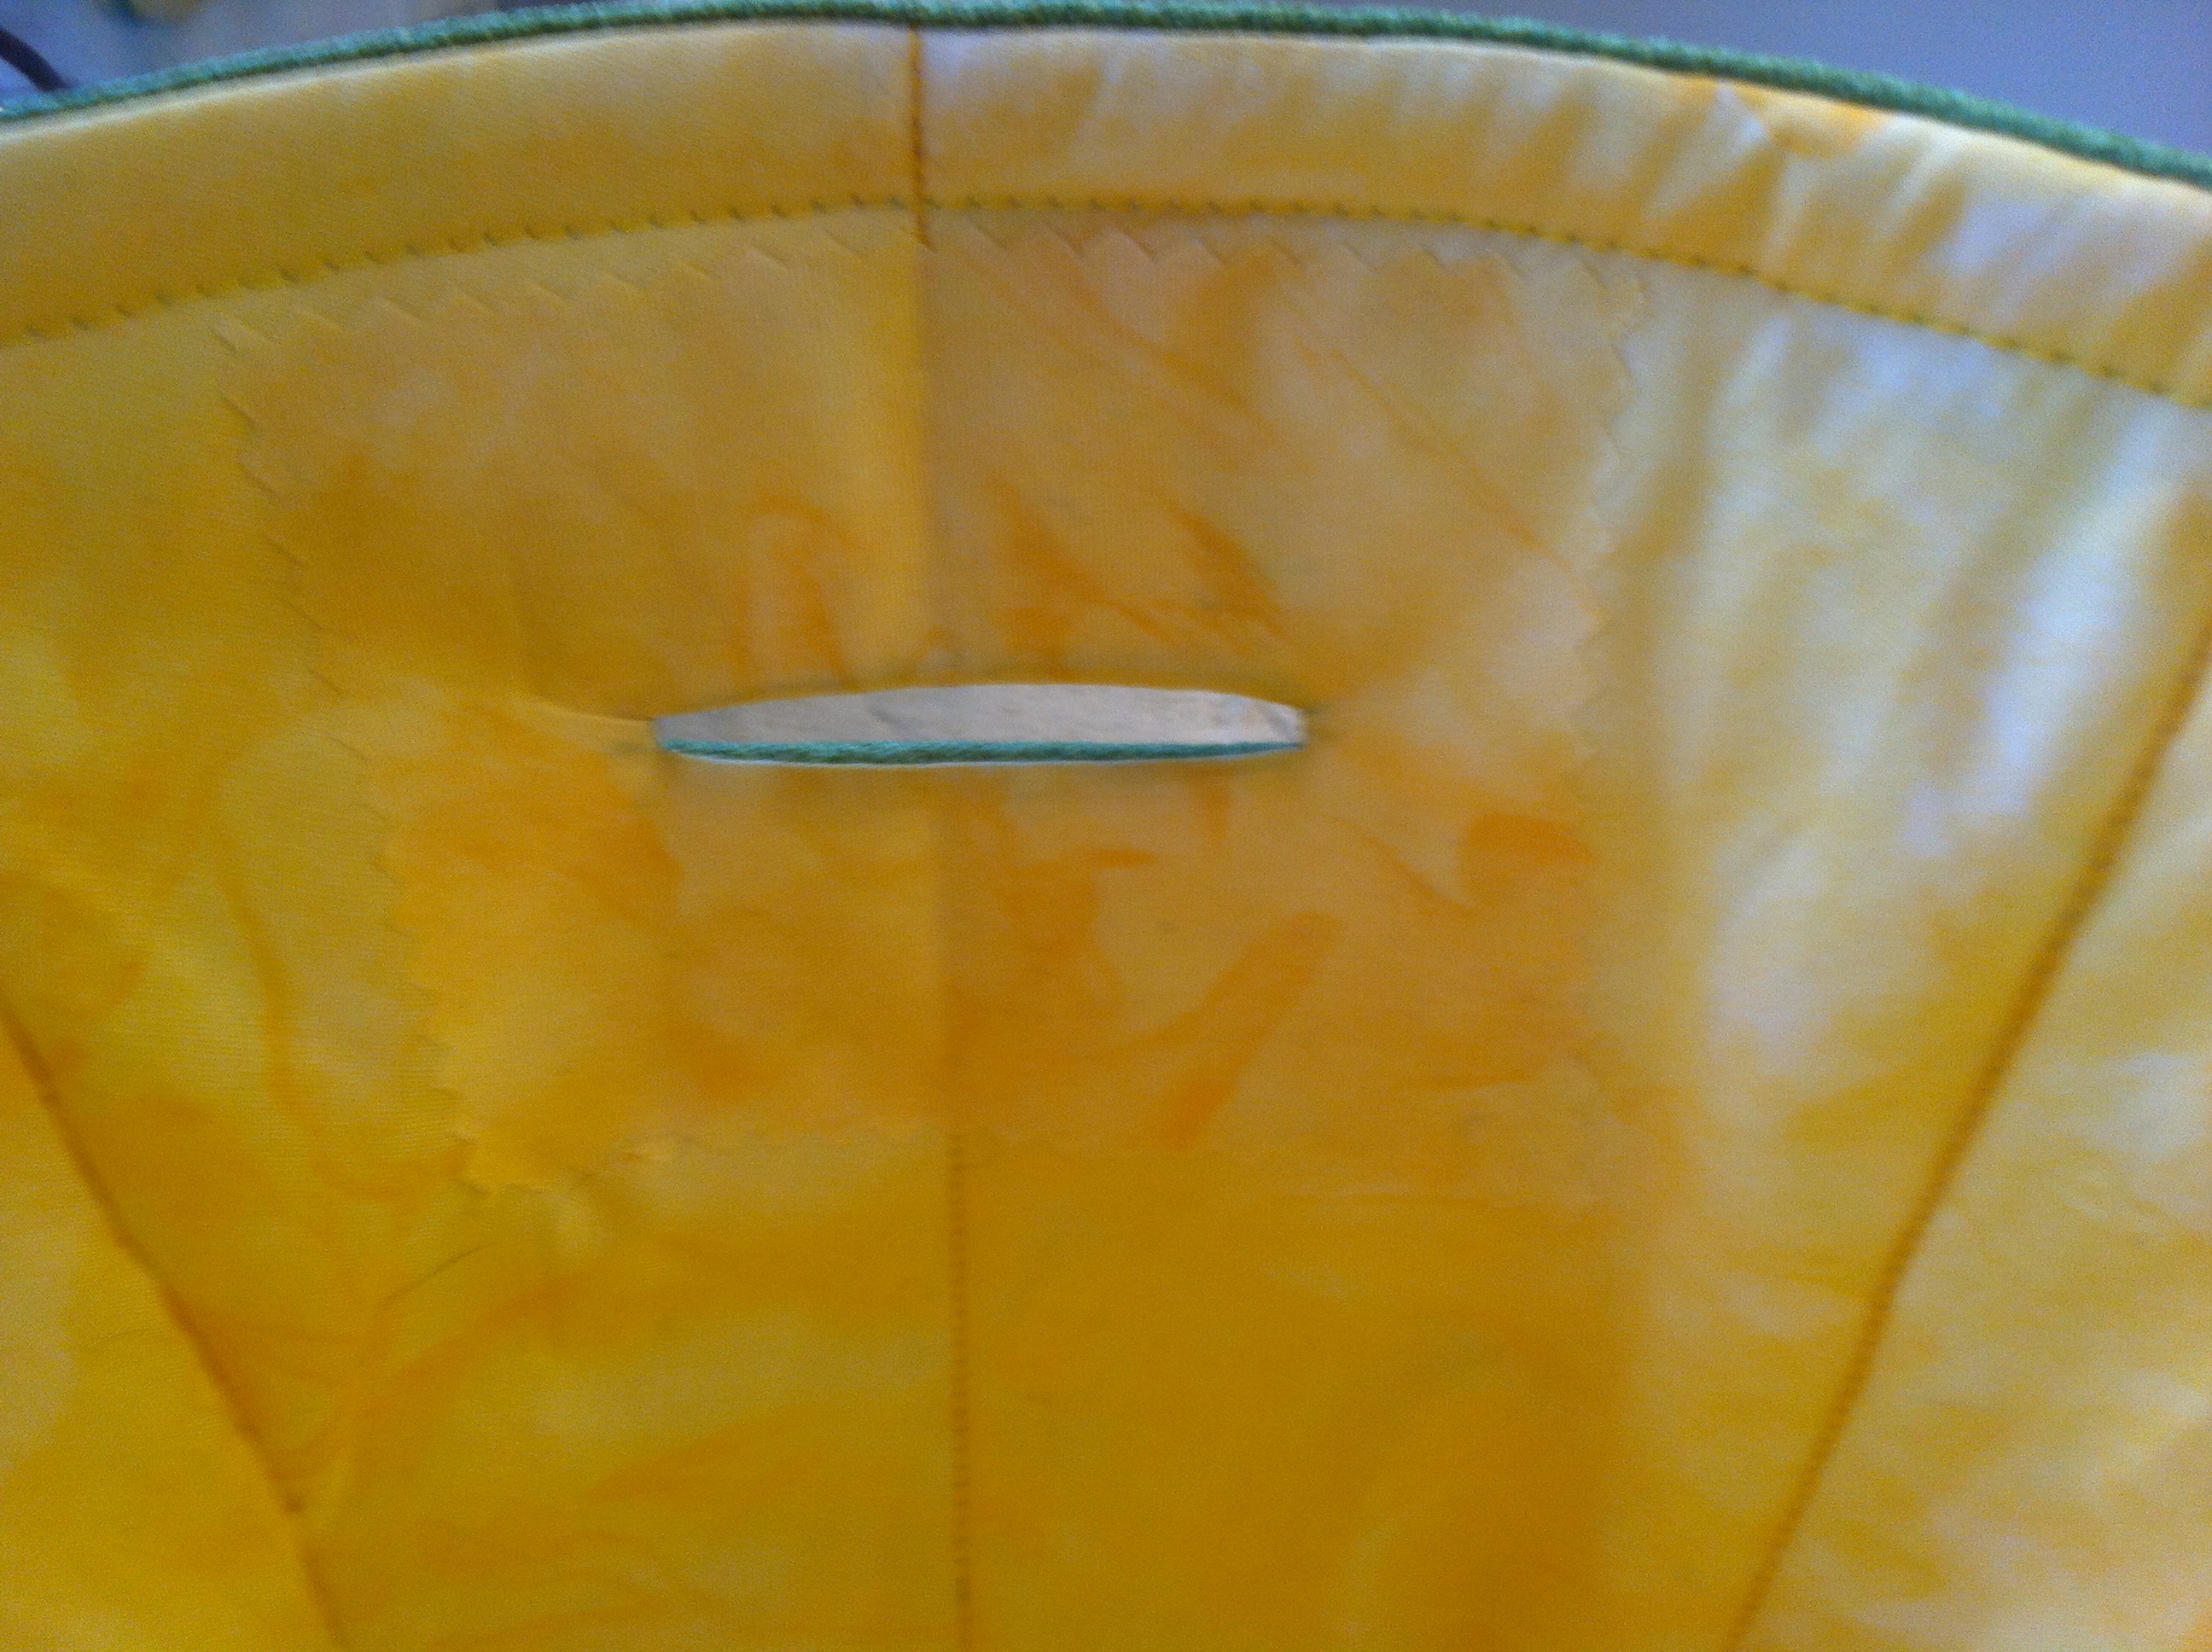
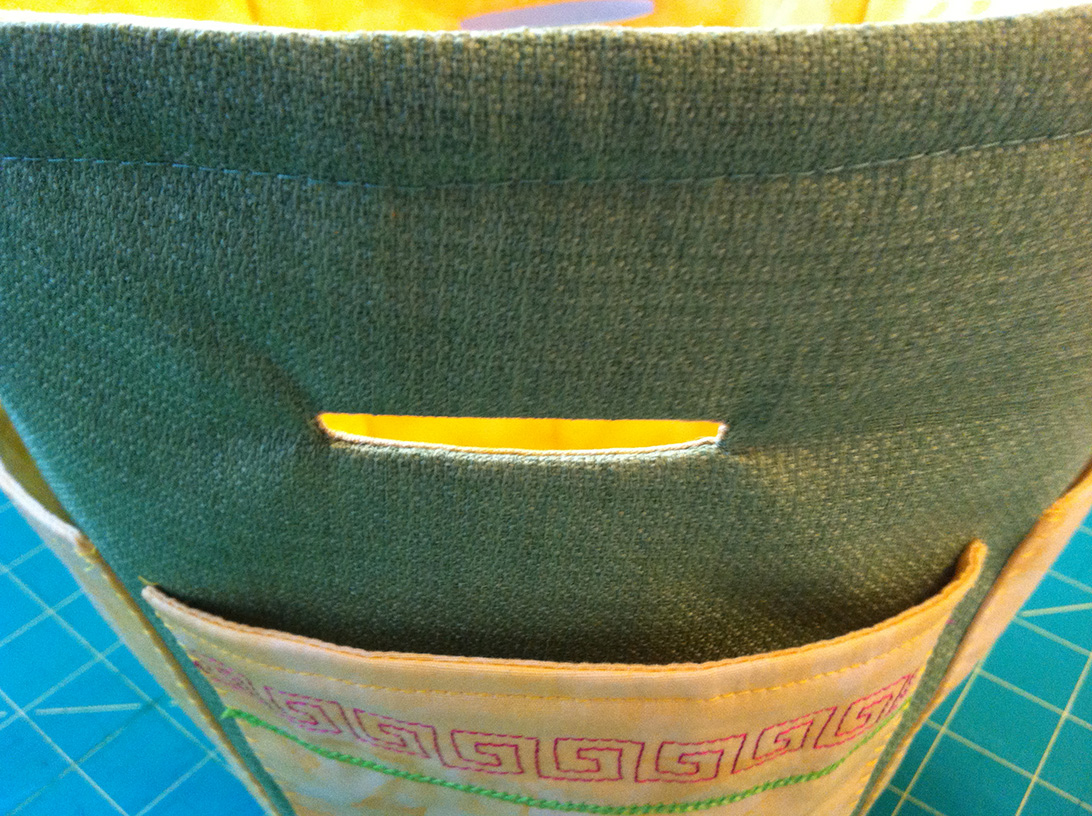
6. Check to see if the ring will pass through the hole before pressing down the inside piece to the lining and topstitch around opening. You can make it bigger at this point if necessary. Lengthen the stitch before top stitching. (Practice on a sample first.) Press the piece to the inside. inside. Be careful as the Thinsulate retains the heat from the iron.
Handle
1. Right sides together, lay a 1” [2.5cm] piece of batting along strip and stitch ½” [12mm] seam closing ends and along the sides, leaving an opening for turning. Turn right-side out and press.
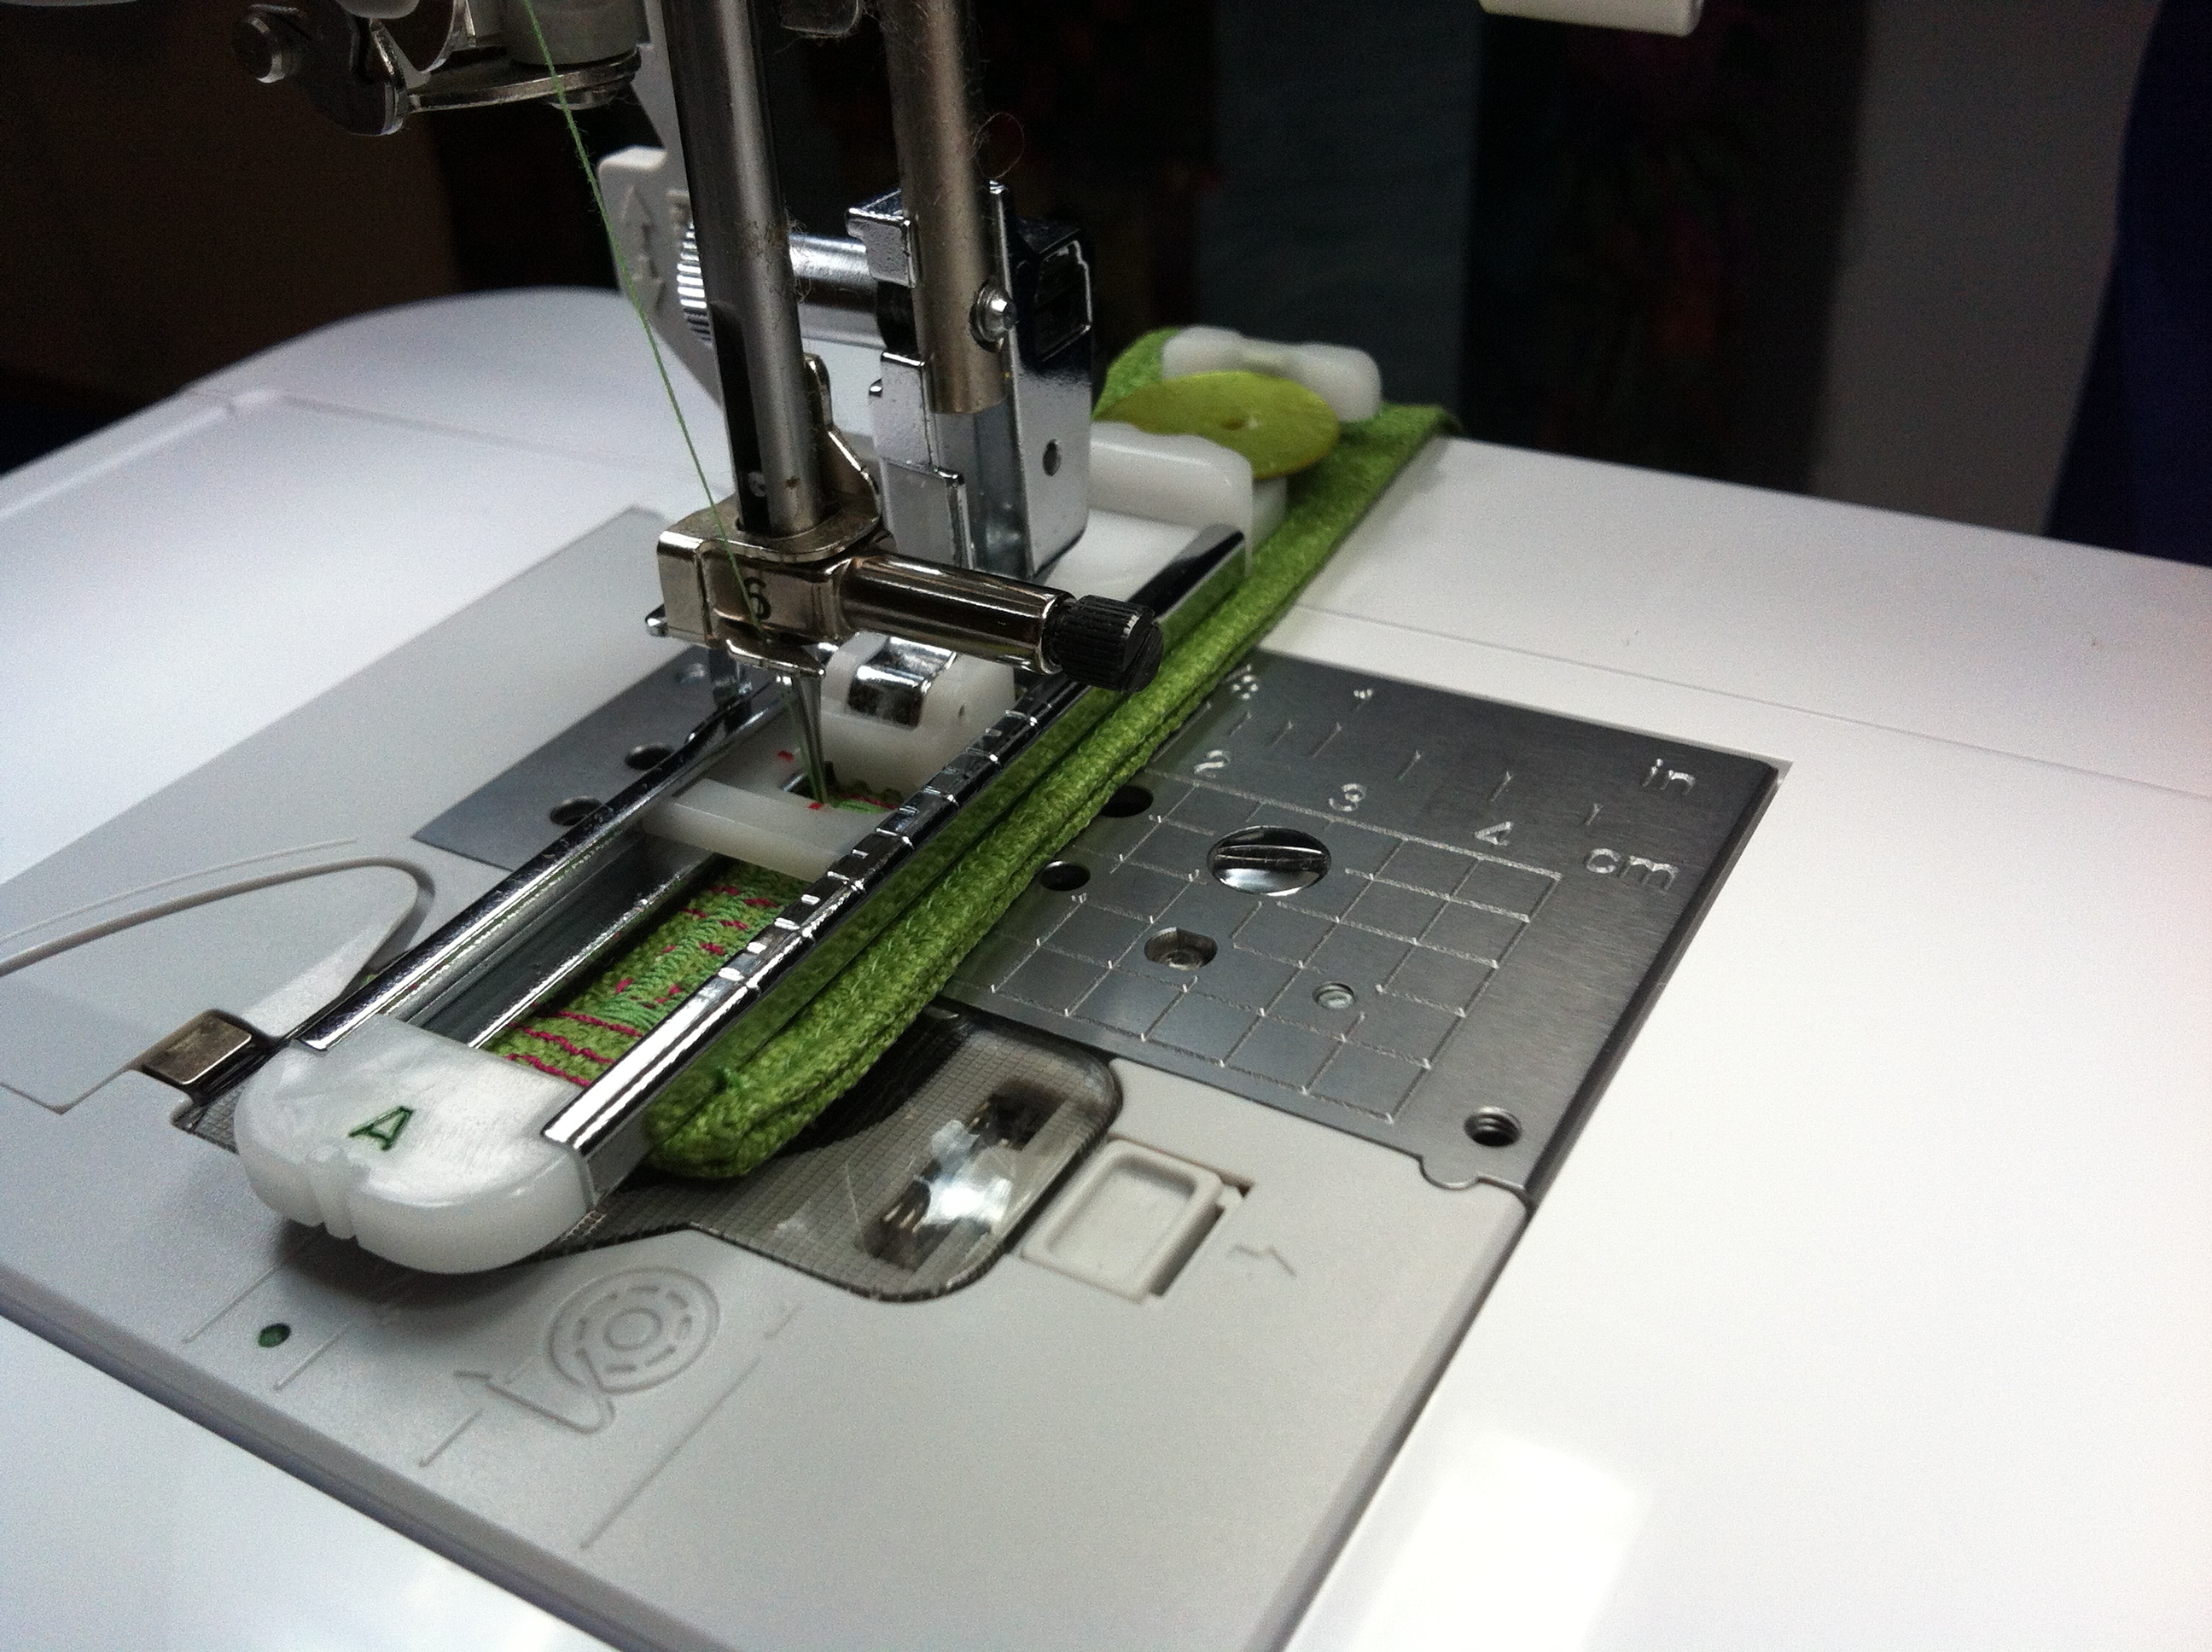
2. Topstitch edges or use decorative stitch down centre to secure batting. Stitch buttonhole on each end of the handle to attach to rings with buttons.
Note: It’s recommended to apply Fray Check to the buttonhole. Let it dry before cutting opening to prevent frayed edges.

3. Position the handle through rings and mark button positions.
4. Use a buttonhole foot to sew on buttons.
Cover
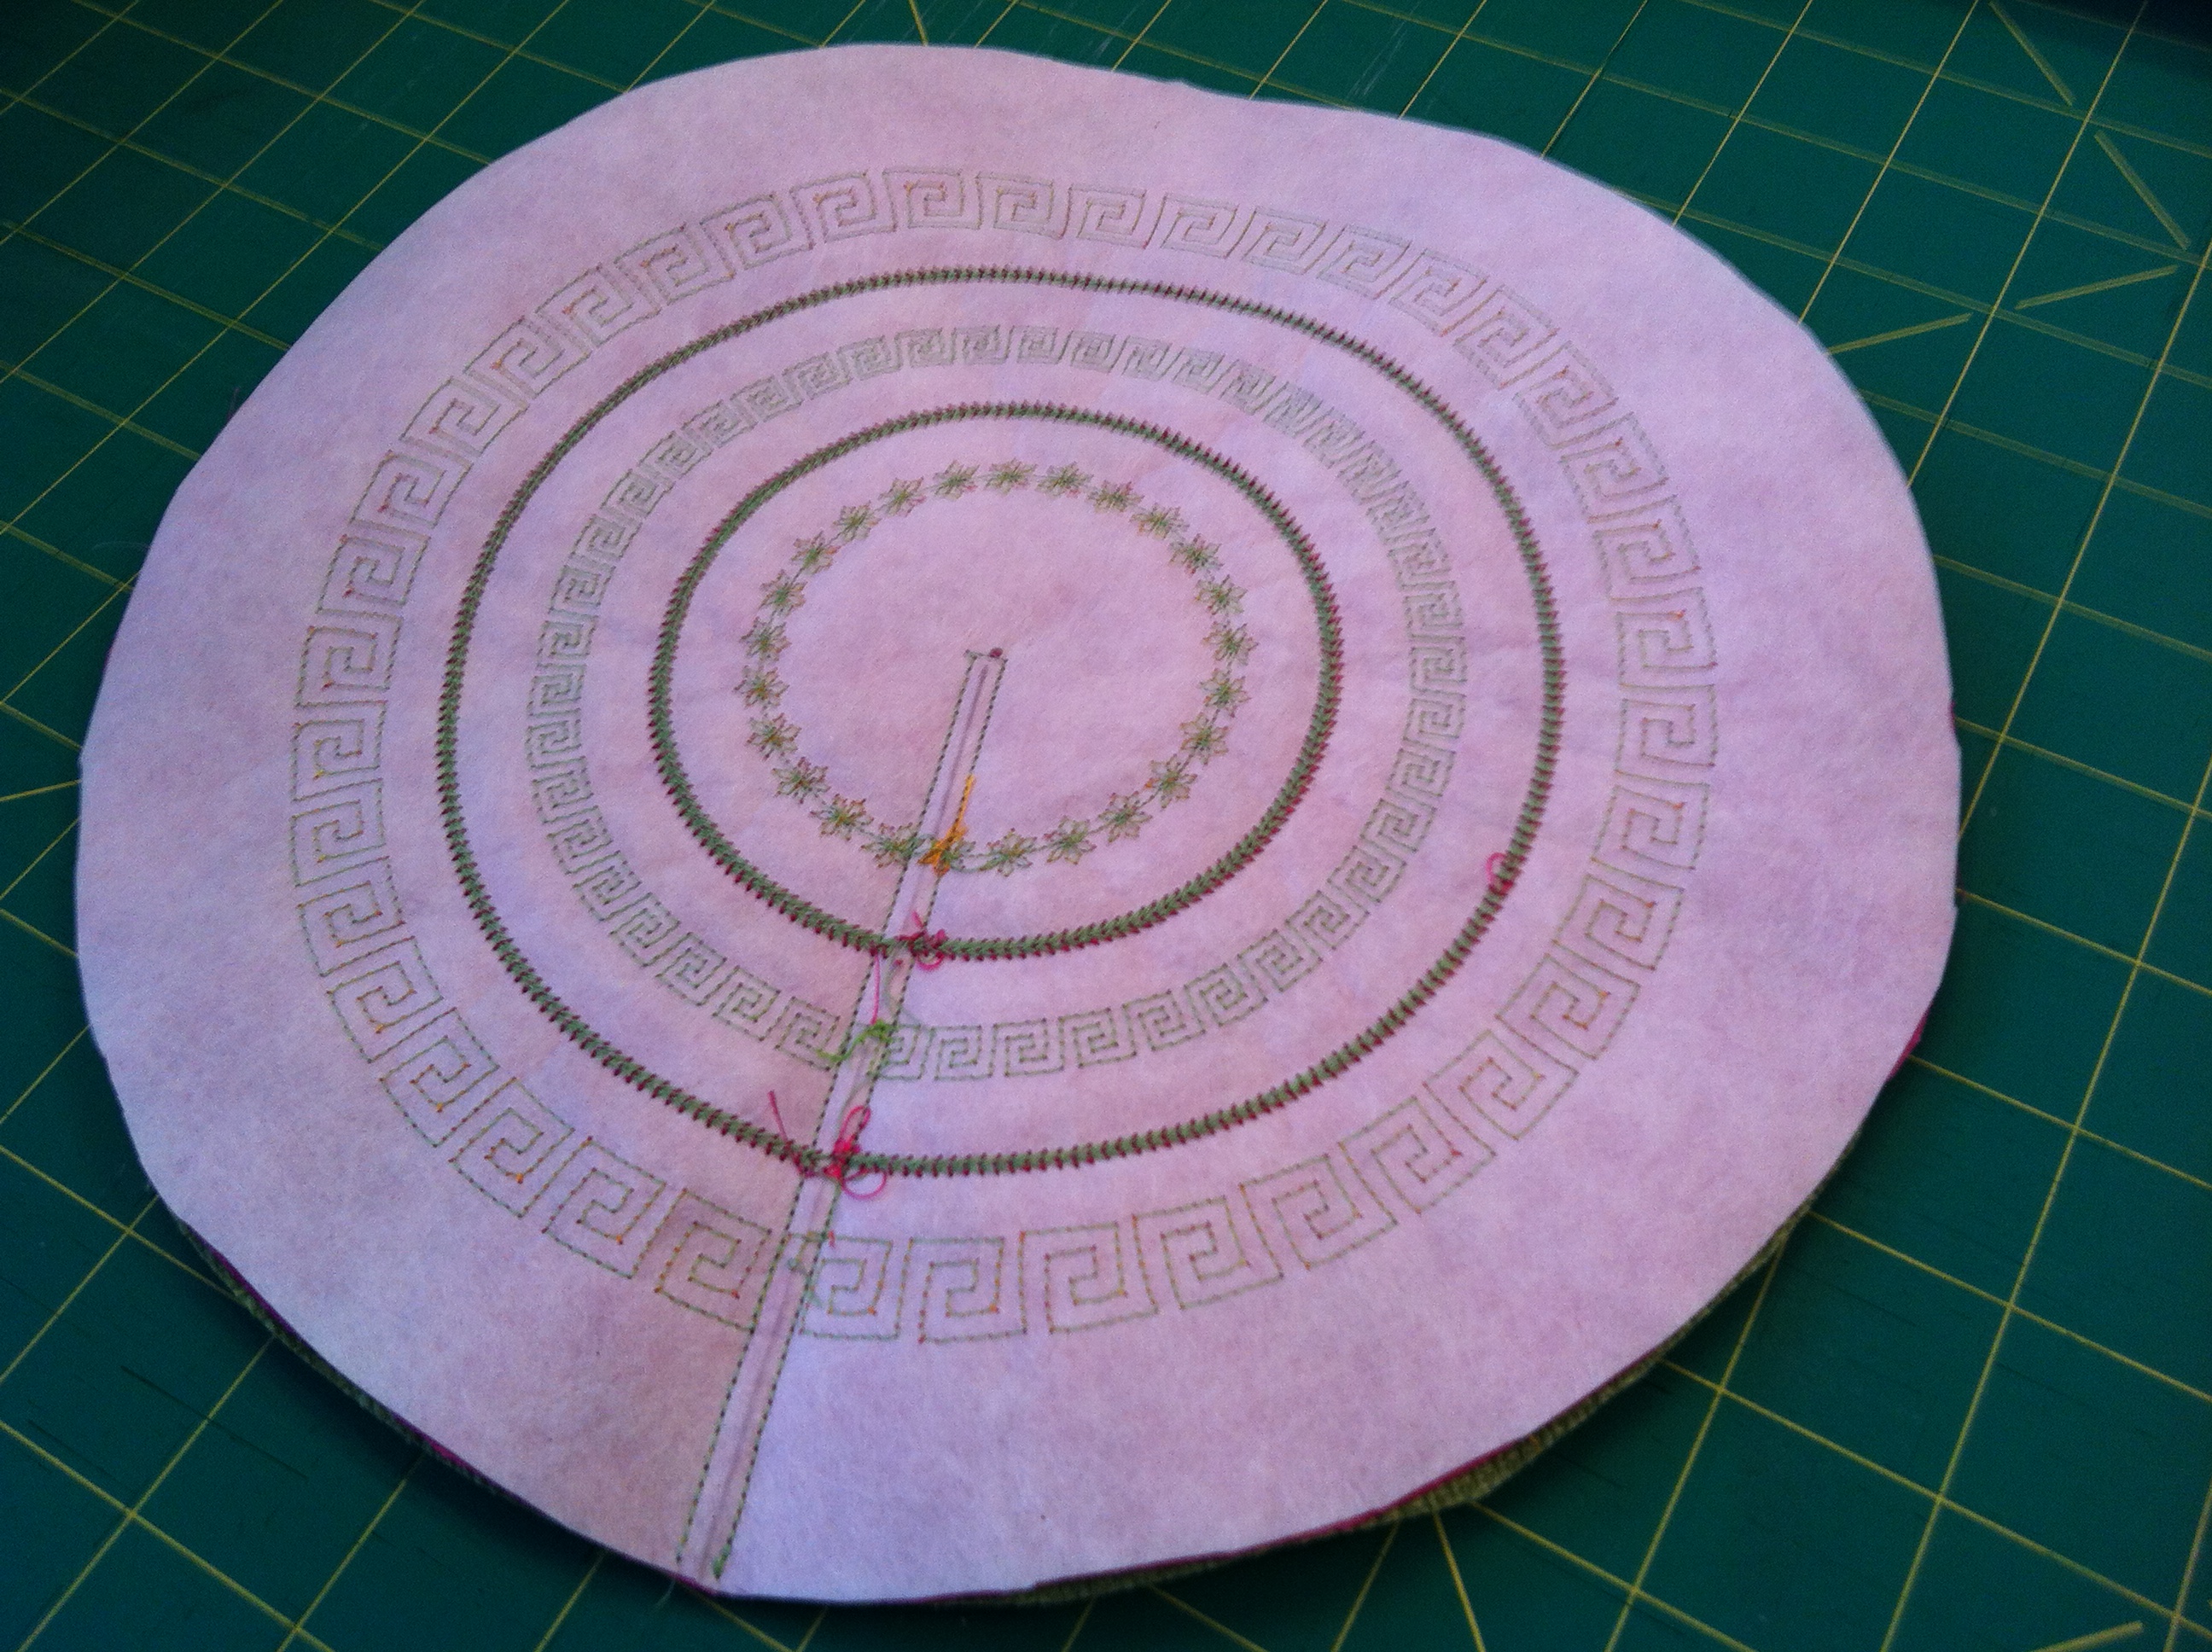
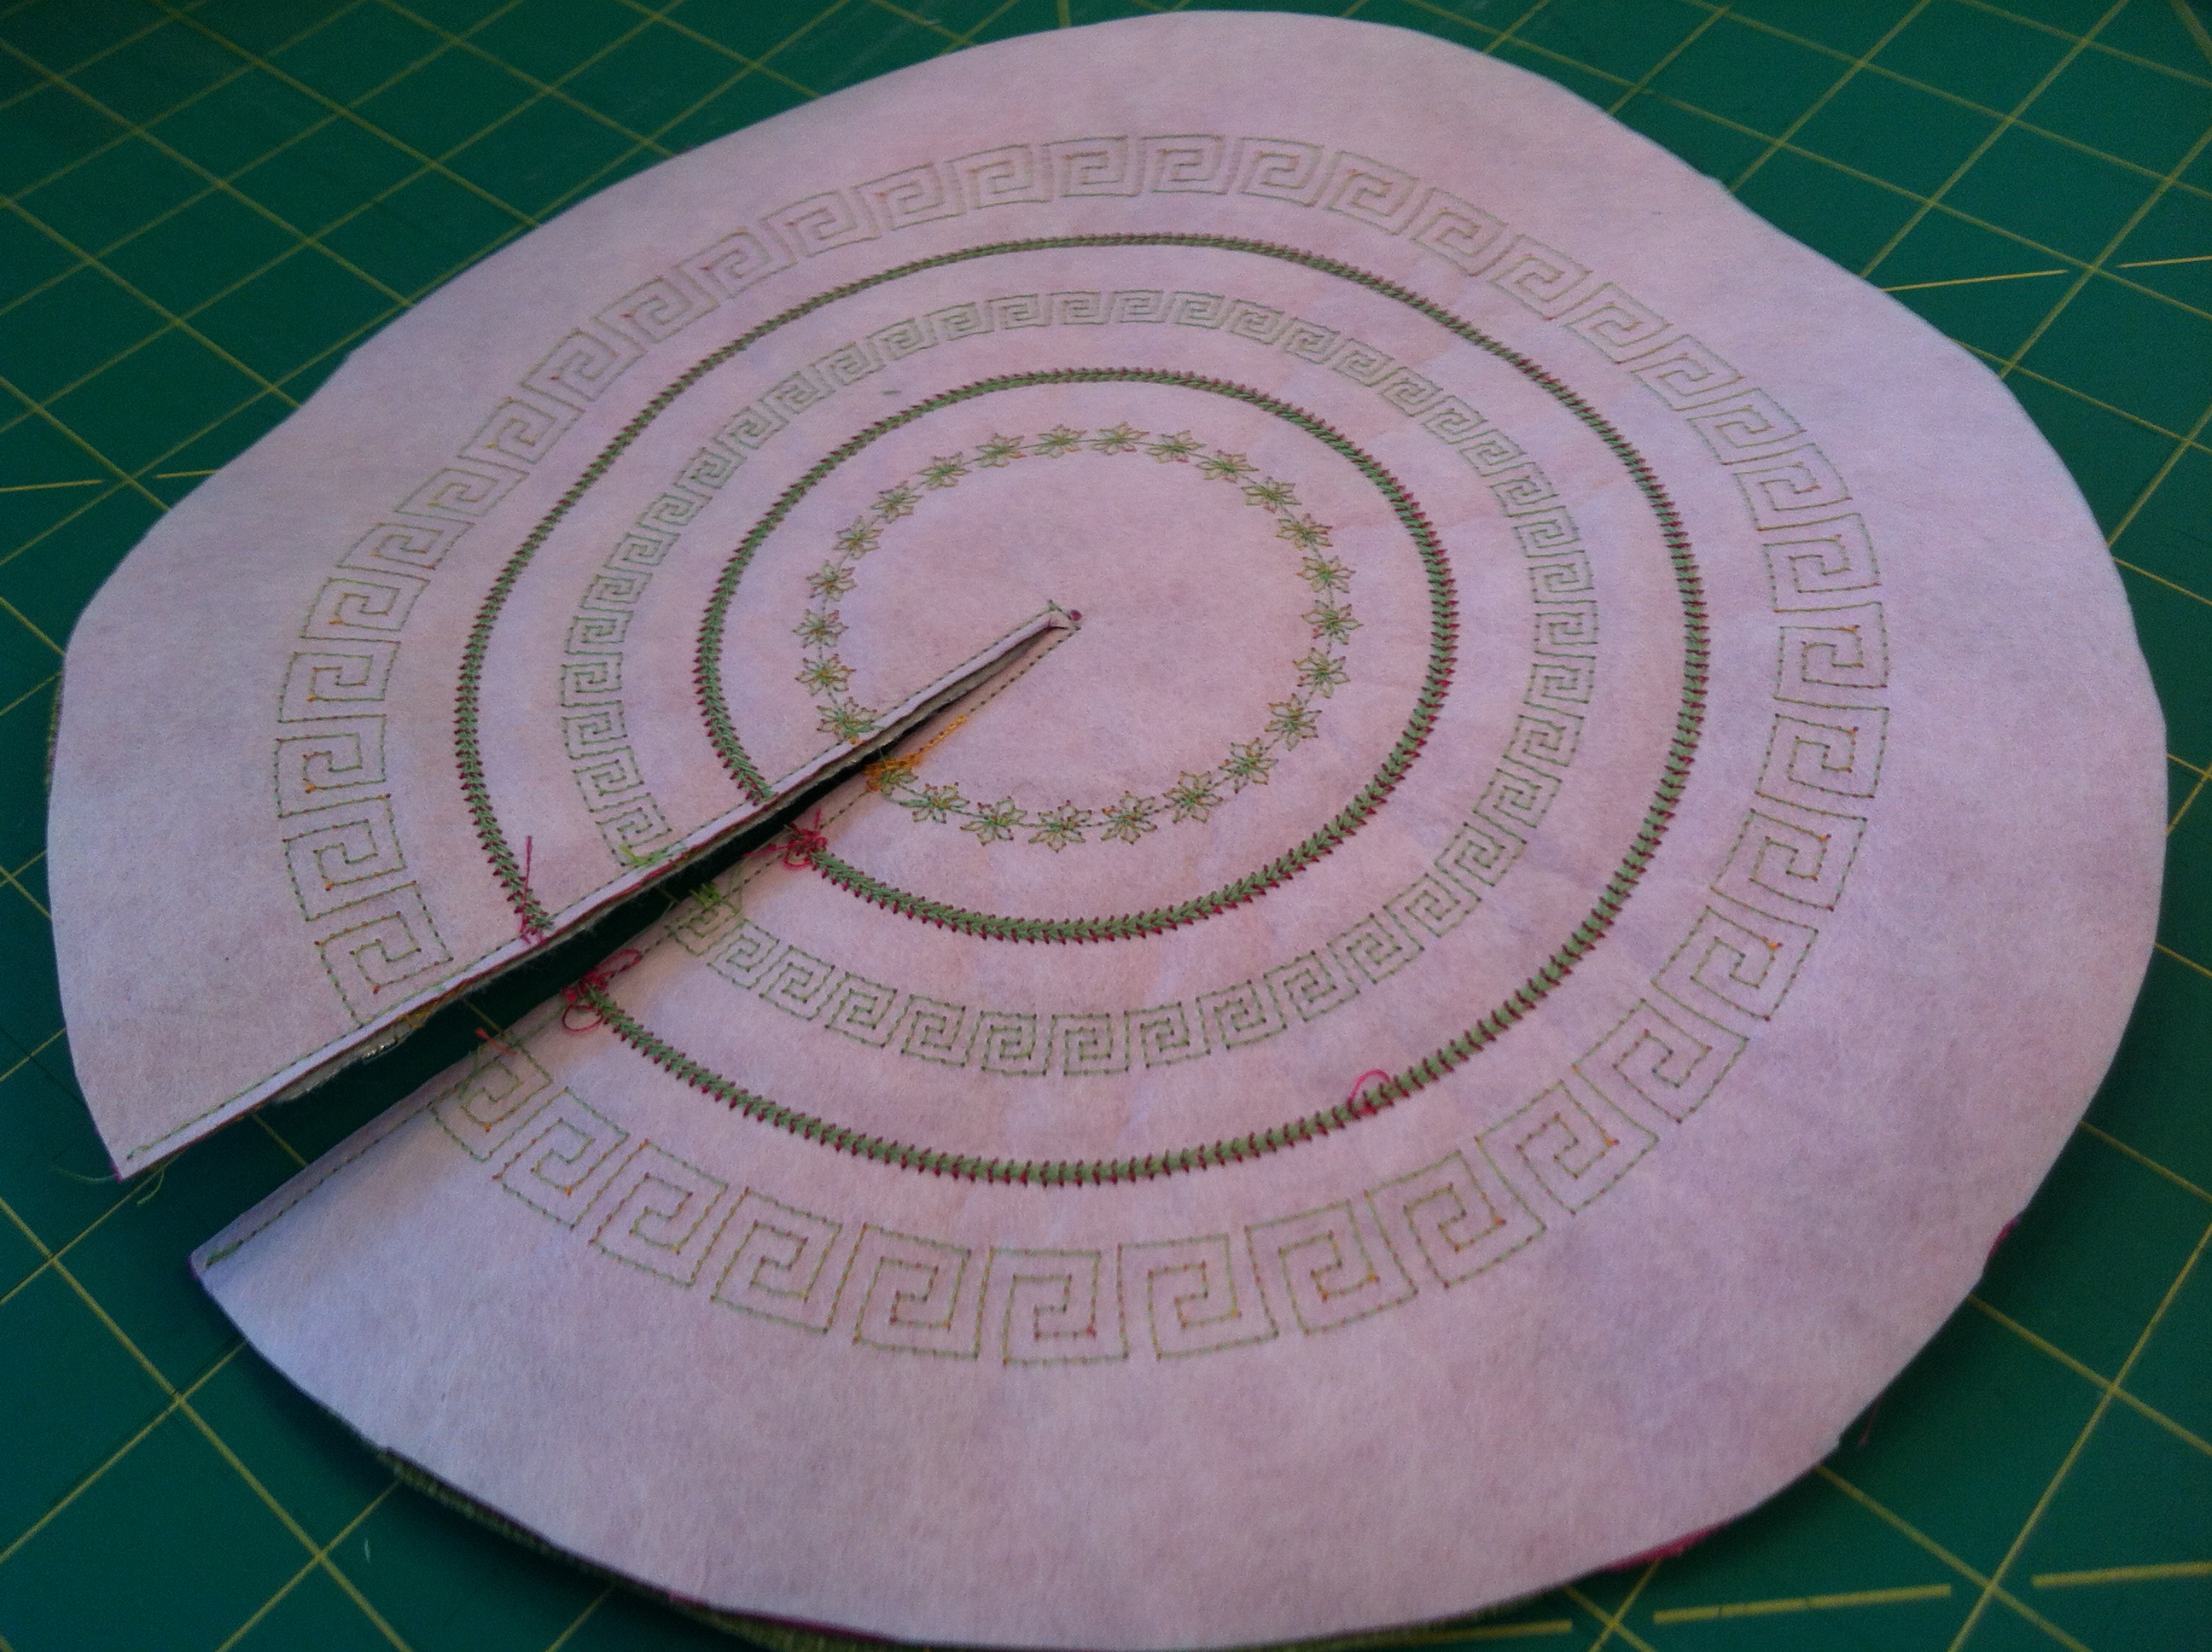
1. The lid was embellished with the circle attachment and decorative stitches prior to construction using the following on the circular attachment:
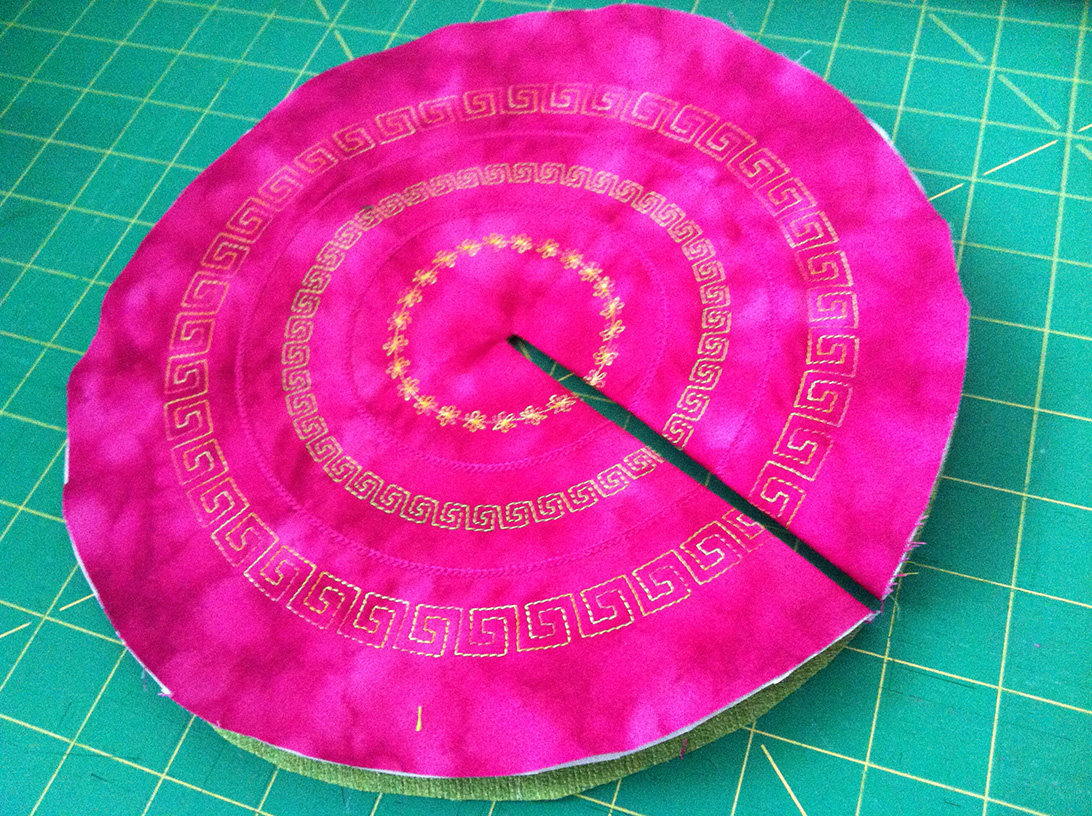
Stitch #6-057 at position 30
Stitch #6-003 at position 45
Stitch #7-024 at position 60
Stitch #6-047 at position 90
2. Use tear-a-way under fabric to stabilize the stitches.
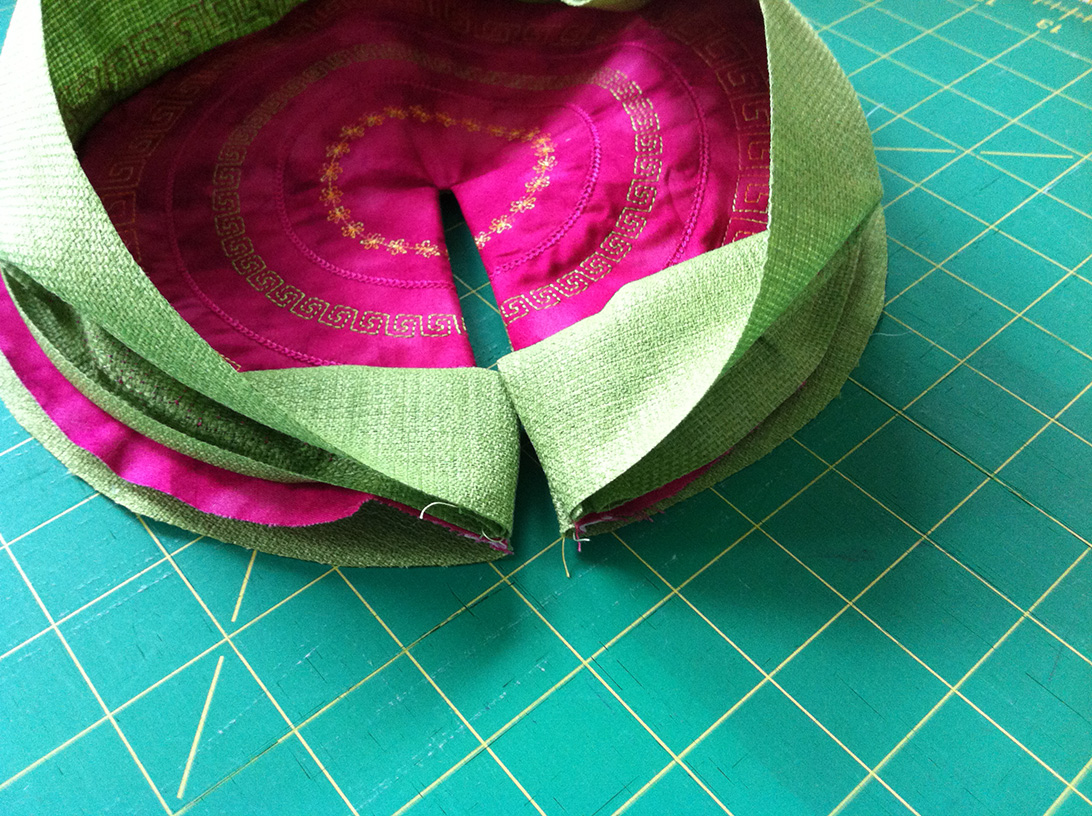
3. With Right sides together, stitch close to the segment line, with 1.5mm stitch from edge to centre. Turn, and return on other side of segment line. Cut segment line and turn fabric inside-out.
4. Right sides together, sew ½” [12mm] seam at each end of banding. Pin the right sides of banding and lid starting at split and continue around to other side of split.
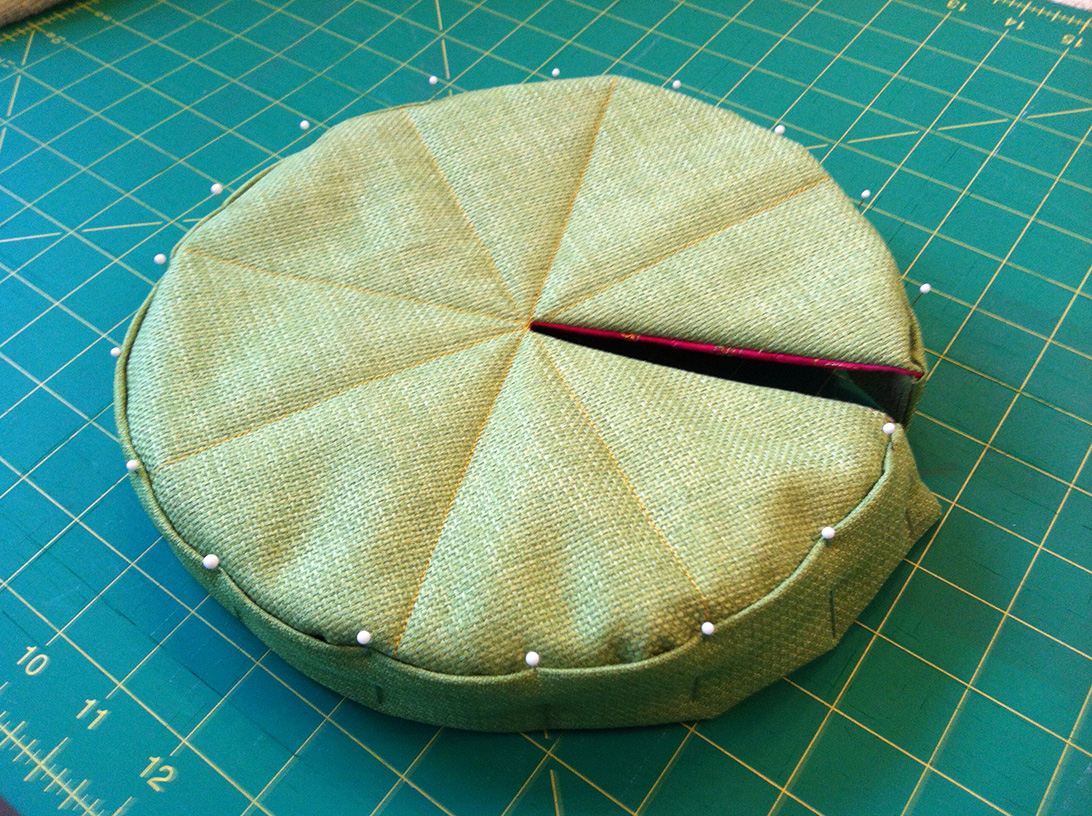
5. Stitch together using a ½” [12mm] seam. Turn banding to right side and press all raw edges to the band side. On right side, topstitch ¼″ [6mm] from seam on band side on three sides. Stitch #6-047 was used to embellish the band prior to sewing. The embroidery frog used to close the lid is one of the many loaded embroideries in the Dreamweaver XE.
Assembly
1. Position the bucket inside the cover.
2. Slide the rings through the openings.
3. Attach the handle and lid. Fill with ice and enjoy!
Instruction photos courtesy of Cathie Schnarr
Finished Measurements: 20” by 20”
Cutting and Sewing Time: 3 hours
If you’re new to free-motion sewing, this is a perfect project to start on. You’ll embellish a canvas (your pillow top) by, basically, painting it with thread!

This project uses Brother’s new Free-Motion Kit for the PRS100. The kit lets you easily do free-motion embroidery, sewing and quilting. You get the freedom to control and guide your work with a hoop. As you “paint with thread,” you’ll gain confidence and improve your skills.
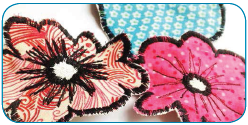
The end result? A whimsical raw-edge appliqué pillow—a perfect gift for Mom. (But the project’s so much fun, we’re sure you’ll want to make more pillows for yourself—and for everyone you know!)
Materials and Supplies
- Brother PRS100 Embroidery Machine
- Brother Free-Motion Kit (Model# PRSFMK1C)
- Brother Sewing Machine
- Brother ScanNCut
- Brother embroidery and bobbin thread
- Iron for pressing
- Variegated assorted thread (rayon or polyester) for thread painting
- Fabric for front and back of pillow top
- Assorted fabric scraps for flowers, leaves, stems and bird
- Brother Iron-On Fabric Appliqué Sheet (CASTBL1)
- Lightweight quilt batting 1 piece, size of pillow front
- Brother fusible stabilizer (Model# SA519)
- Purchased pillow form
- Spray baste (optional)
Instructions
1. Measure pillow form to determine size of fabric for front and back of pillow. Fabric for front of pillow should be 3” longer on each side than the pillow form. Fabric for back of pillow should be 6” longer than pillow form and 1” wider than pillow form.
Note: Cut fabric for back of pillow into two sections so that one piece is cut ¾ the height of the pillow. This will allow you to position the back with an overlap to form an envelope-type closure for the pillow.
2. Cut fabric for front of pillow; cut stabilizer and quilt bat to desired size (see step 1).
3. Fuse stabilizer to wrong side of fabric for front of pillow.
4. Stack quilt batting and fabric for front of pillow.
Note: You may want to spray baste your layers together to prevent slipping of fabric layers when stitching.
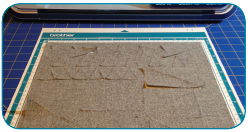
5. Prepare fabric for cutting with the ScanNCut by ironing appliqué material to the back of all fabric that will be cut. (That includes flowers, leaves, bird, etc.)
6. Select flowers and leaves you’d like to cut from the built-in designs on the ScanNCut. (I used an assortment of flowers and leaves for variety. I also added a bird created from a built-in pattern.)
7. Place fabric on ScanNCut mat; cut desired flowers and leaves
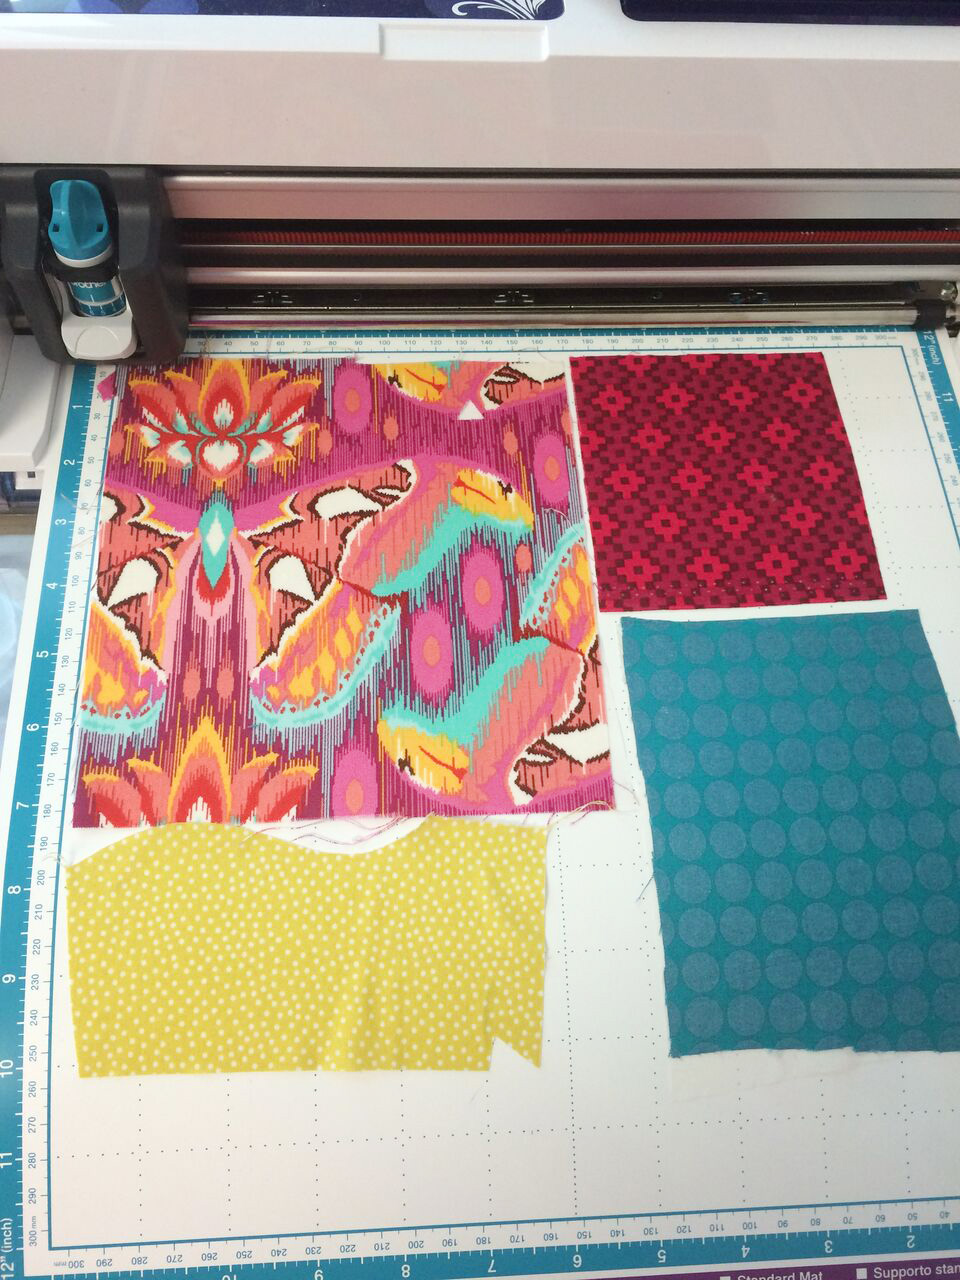
Place fabric on the ScanNCut mat.
Note: The size of your pillow will help you determine the number of flowers you use. I suggest using an odd number (i.e. 5 or 7).
8. Flower stems can be cut with the ScanNCut or free-form cut.
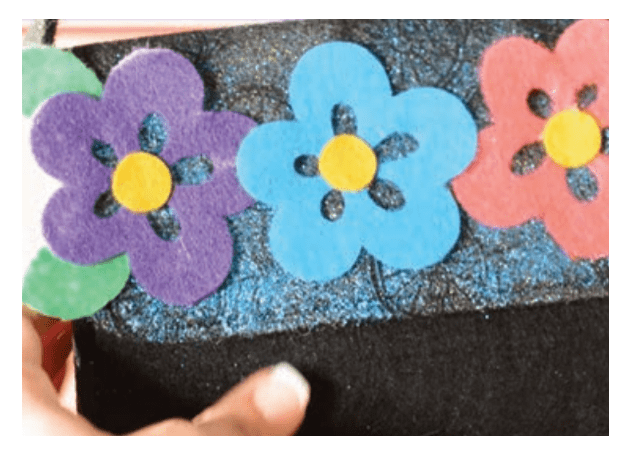
9. Adhere flowers, stems and leaves to pillow front by pressing with an iron.
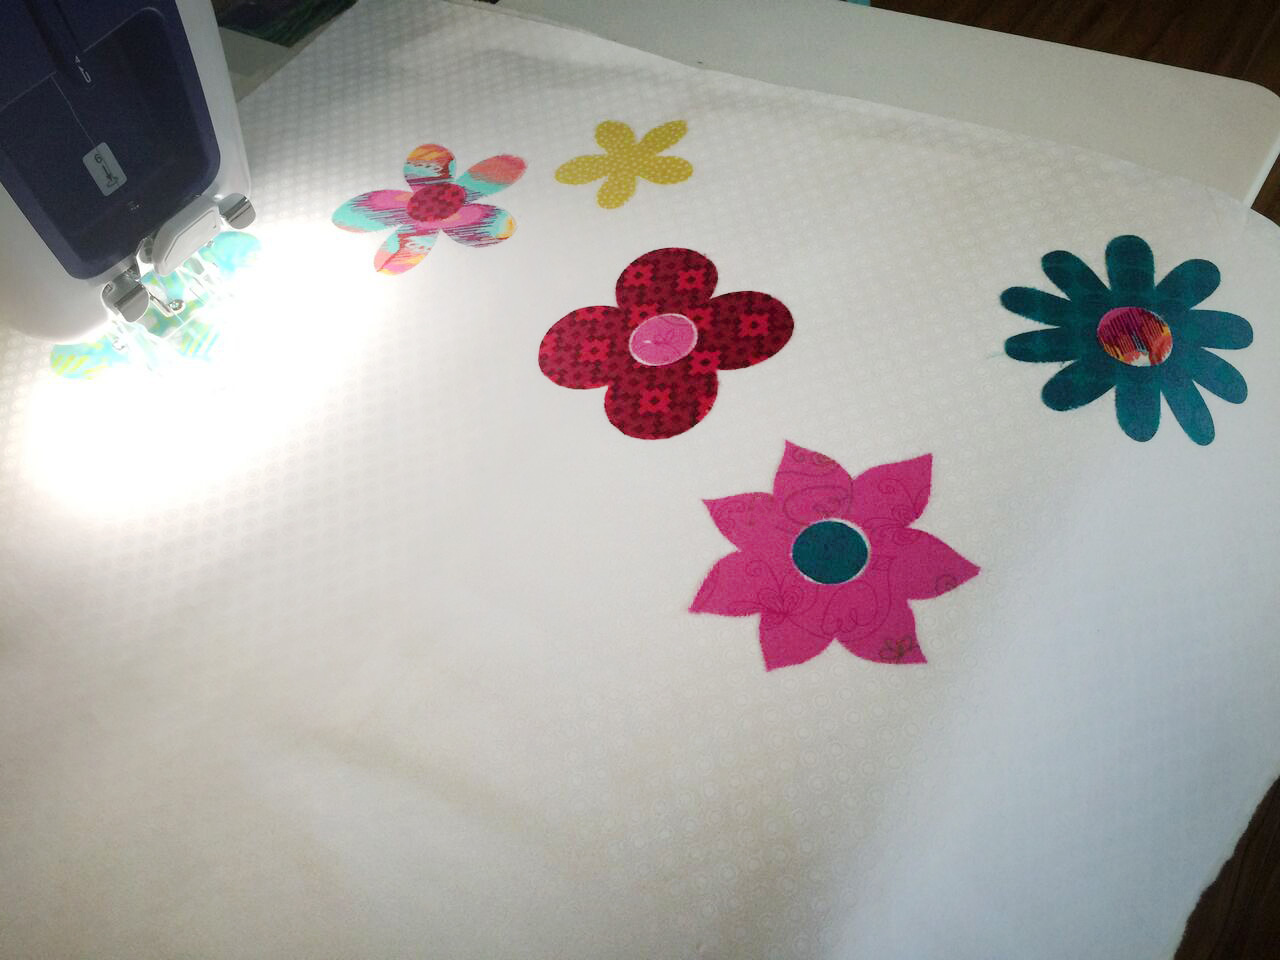
Add colourful flowers to your fabric.
Preparing the PRS100 for Free-Motion Embroidery mode
1. Attach needle guard.
2. Attach embroidery frame holder.
3. Wind bobbin with appropriate thread.
4. Place bobbin in bobbin case provided with Free-Motion Kit and place in PRS100.
5. An icon will appear on the main screen for free-motion embroidery.
6. Select the icon. The embroidery frame holder will move out of the way.
Note: Full instructions on set-up are provided with the Free-Motion Kit.
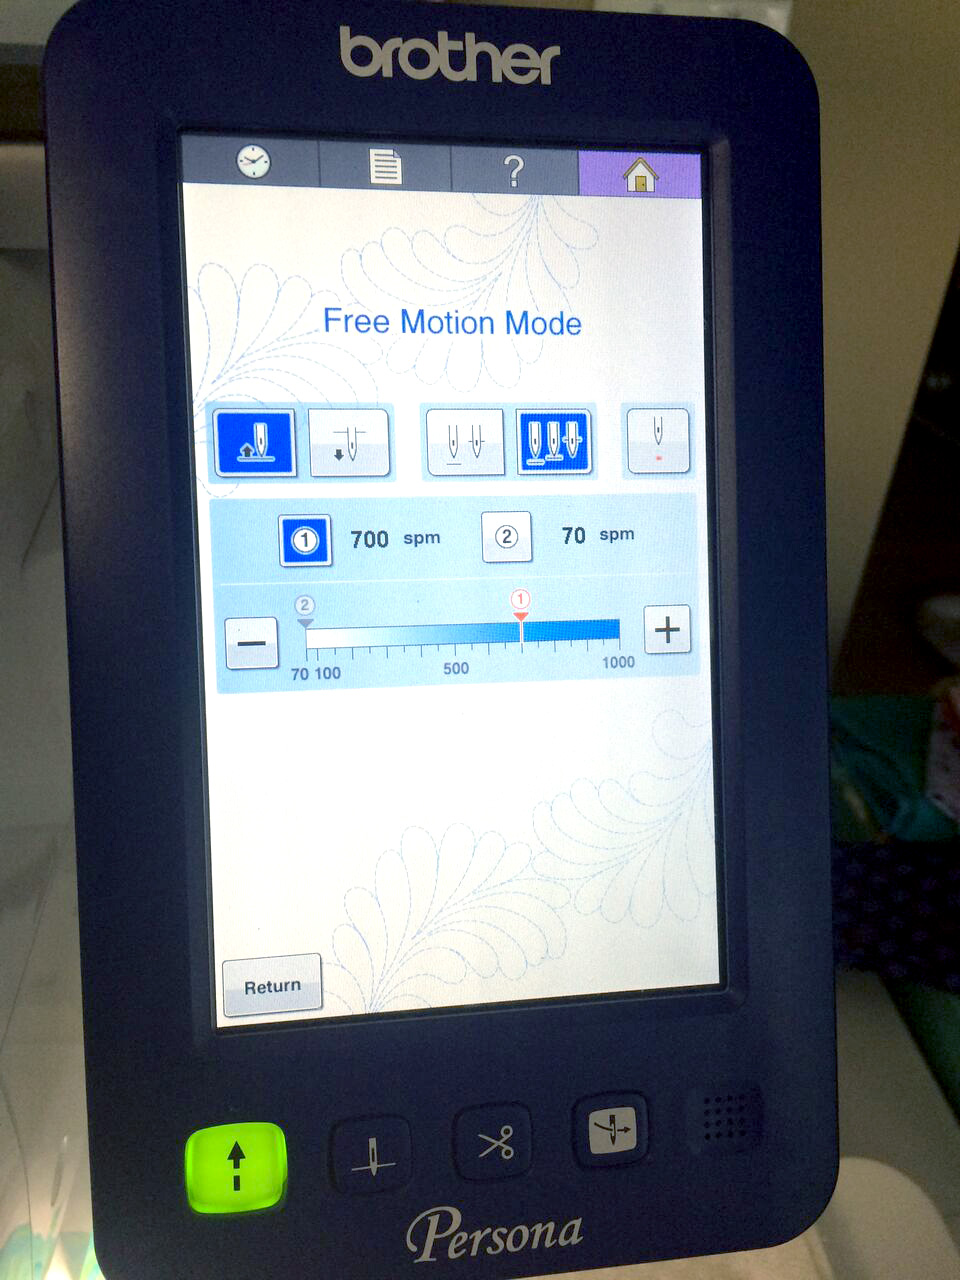
The new free-motion screen display.
Thread Painting
Note: Practice before you begin your pillow canvas. Use the scraps from your ScanNCut, or cut an extra flower or two so you can experiment with your stitching, thread painting and thread choices.
1. Activate the laser light by pressing the icon on the screen. The light shows you the exact location of your needle.
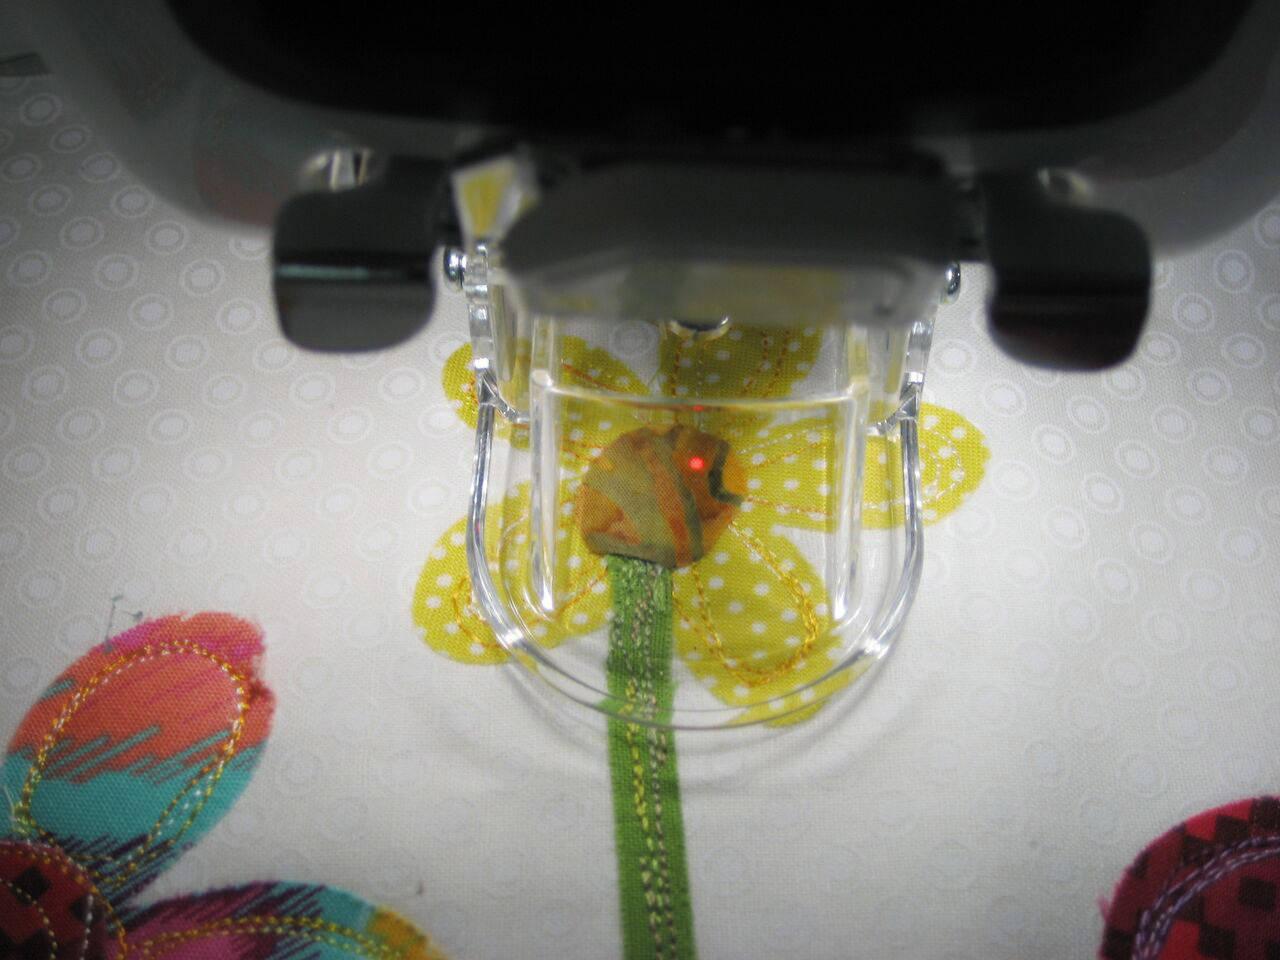
The light shows you the exact location of your needle.
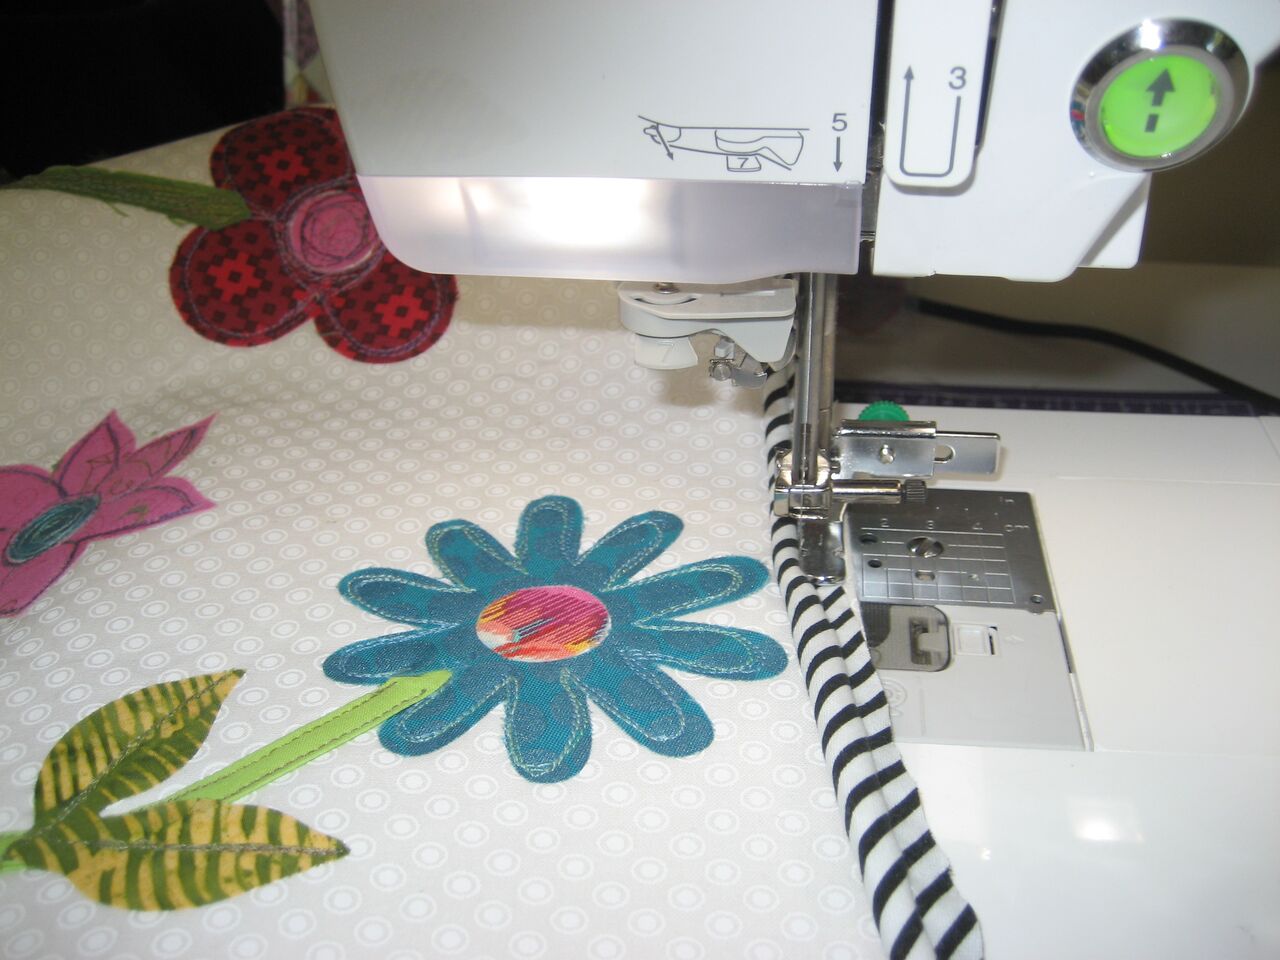
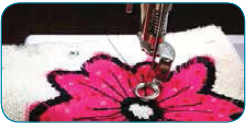
2. Begin thread painting flowers. Start by stitching a row of stitches around the inside edge of each flower. I stitched around each flower at least 3 times so the thread would be dense. Don’t worry if your stitches aren’t even—as you stitch, you’ll add dimension and texture to the flower.
3. Continue to thread-paint the flowers. Stitch swirls or short back-and-forth jagged lines on the flower petals, leaves and stems.
4. Change thread colour to add variety and vary the look.
Additional Optional Design Ideas
1. Once you’ve completed thread painting, you may wish to use the PRS100 and Free-Motion Kit to add stippling around the flowers.
2. Add piping or a flange to the outside edge of the pillow front.
3. Add birds or butterflies.
4. Add buttons to centres of the flowers.
5. Add stippling around the flowers.
Assembling the Pillow
1. Using a rotary cutter and ruler, square the pillow front to fit the size of the pillow form.
2. Layer the two back panels over the right side of the pillow front, overlapping the folded edges to create an envelope for the back.
3. To finish, sew the pillow front and back together using a ½-inch seam allowance. Trim corners, turn right-side-out, press, and insert pillow form.
As a professional writer who works out of a home office, and a mom with a bustling social life, keeping the house organized has always felt like plate spinning.
At least it did until Brother sent me a P-touch 400AD labeller to test out. I never knew something so small could organize my life in such a big way.
The PT400AD is a portable, handheld unit, smaller than a tablet, with touch keys I can easily tap with my thumbs. It’s super easy to use and addictive. Write a word and the tape pops right out, ready for sticking. The TZe tape is dishwasher proof and can withstand freezers, heat and scrubbing. Plus, it’s flexible: you can use batteries or plug it in. I immediately thought of half-a-dozen things I could organize with the PT400AD. I attacked my freezer first.
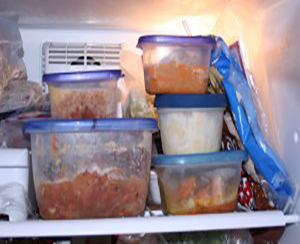
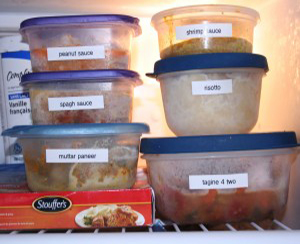
The freezer
I swiftly labelled every unidentified frozen leftover and, unlike the masking tape I’d used in the past, the labels stuck right on. The PT400AD handles like you’re texting. A screen display lets you fix typos before wasting tape; the spool design allows any length; and five minutes with the instruction sheet opens the door to 14 fonts, 600 symbols and decorative flourishes.
Before: After:
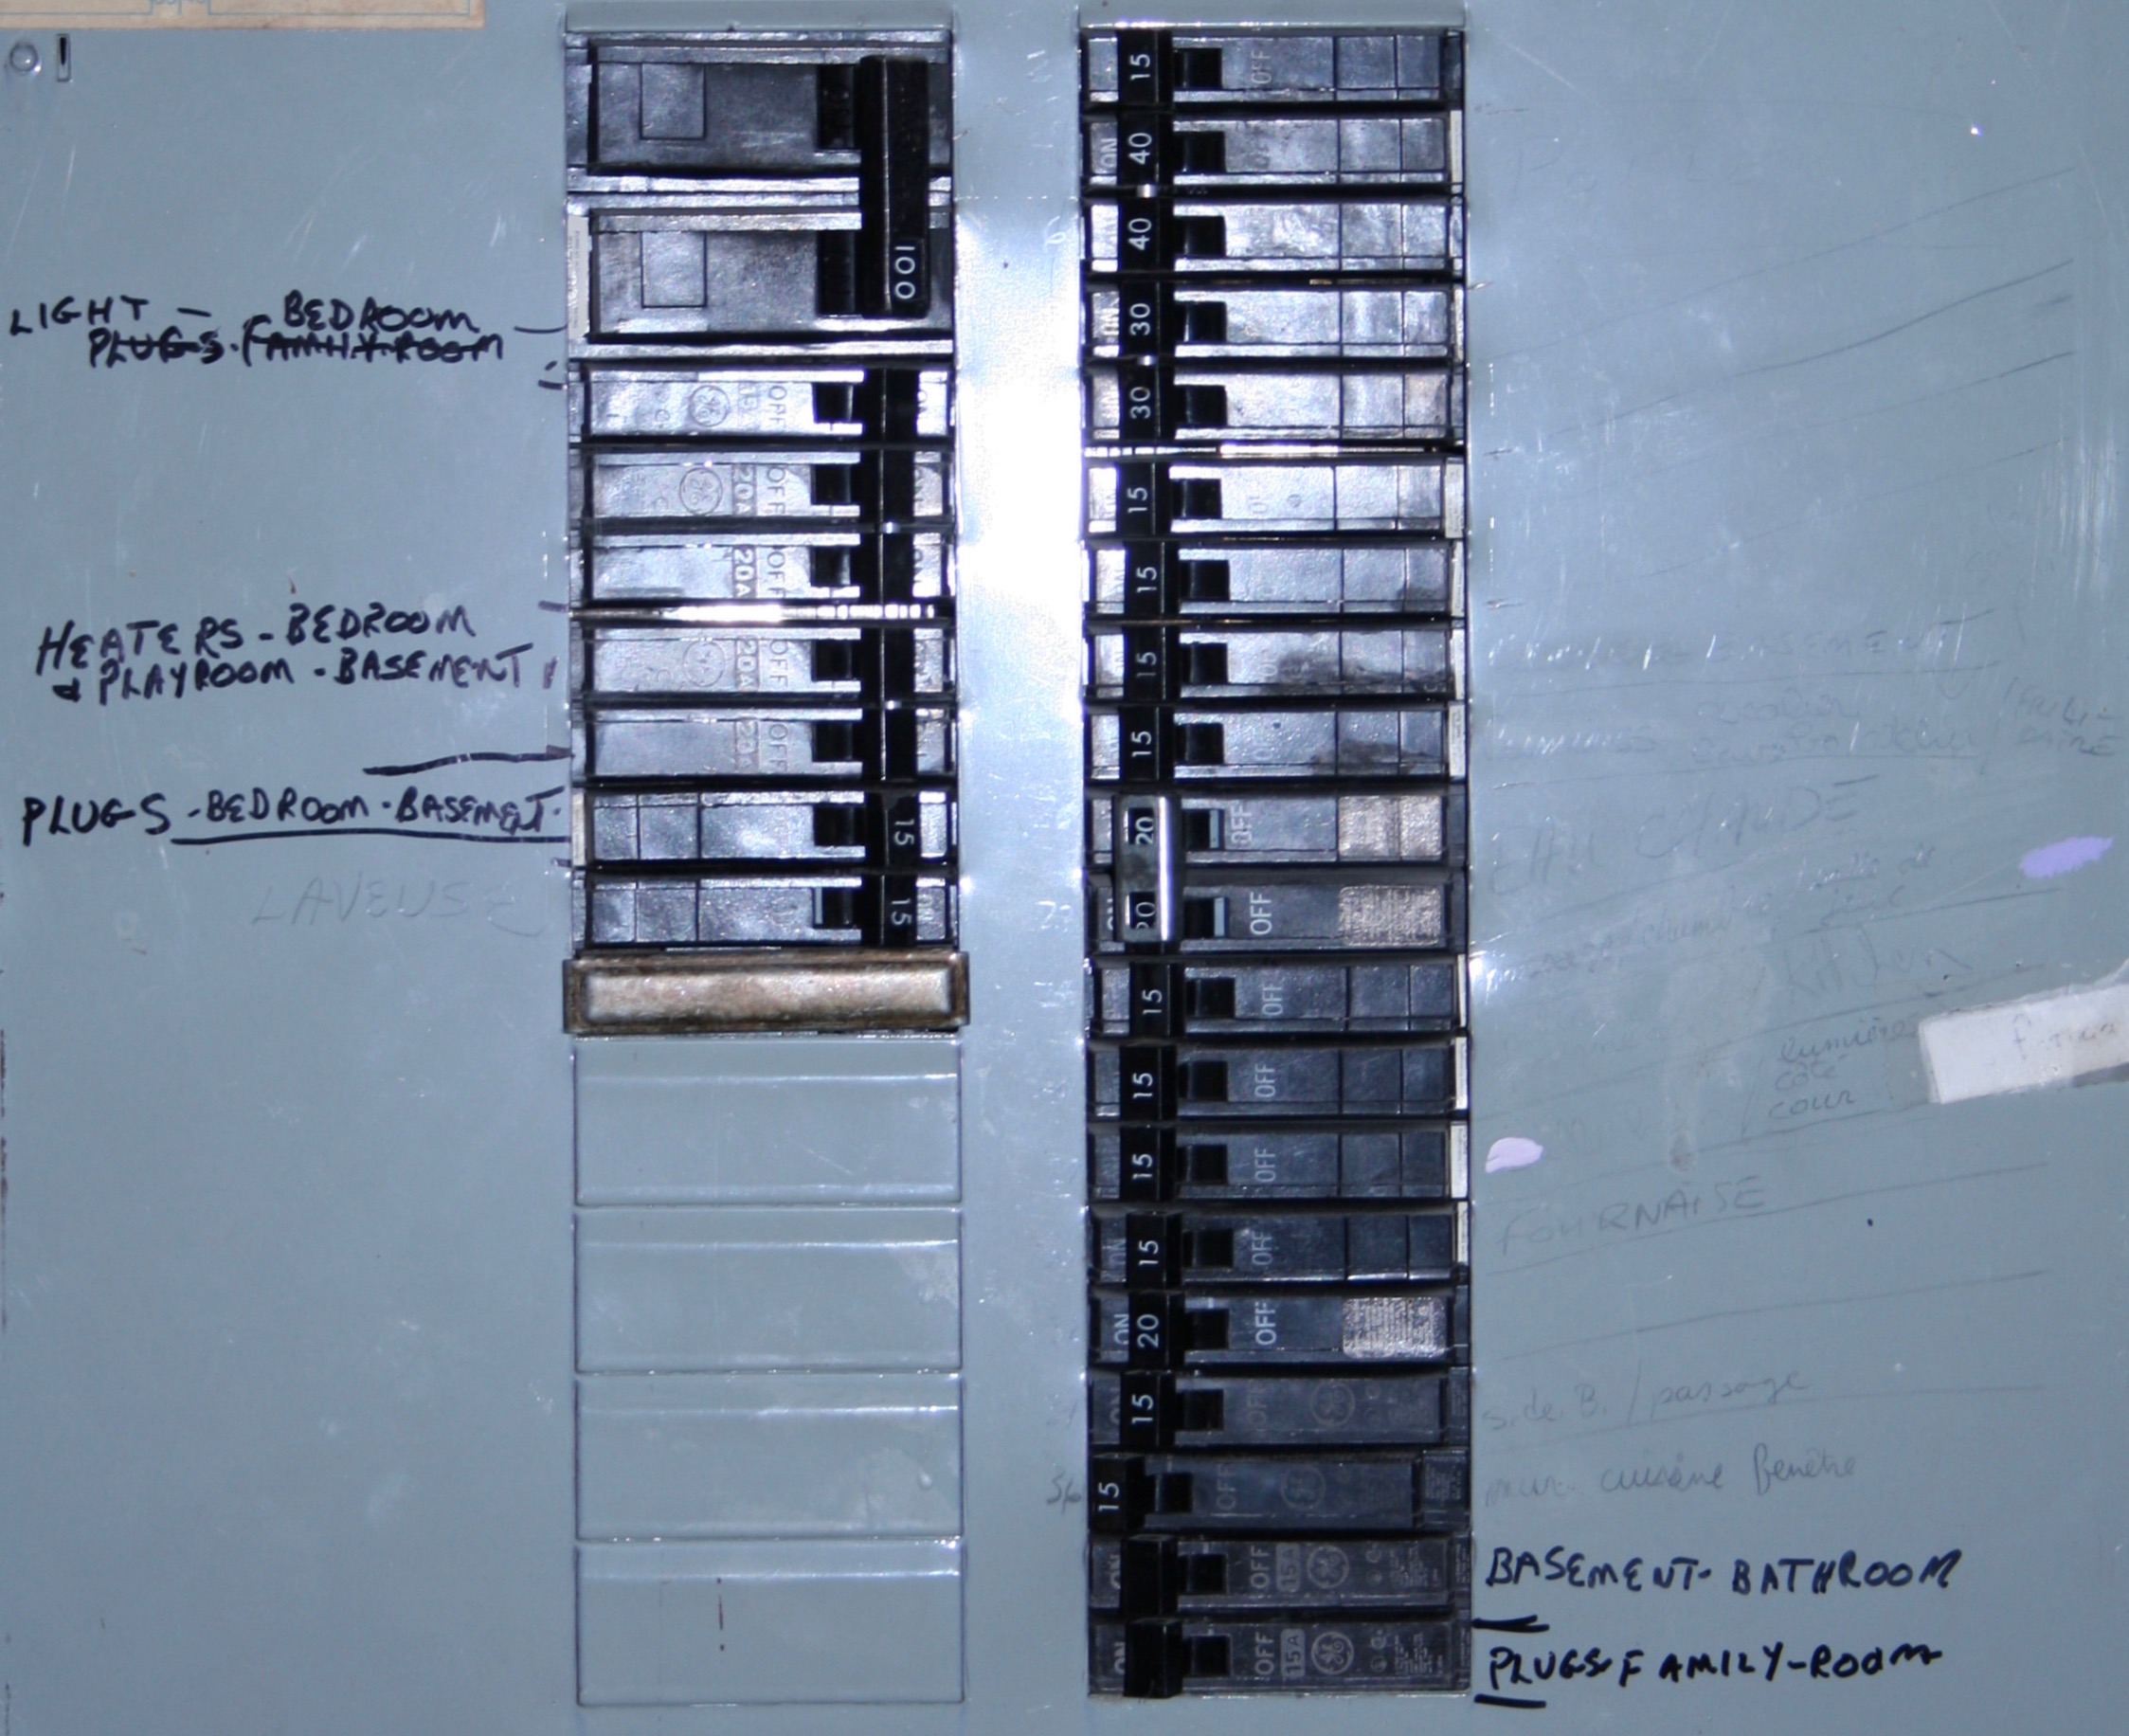
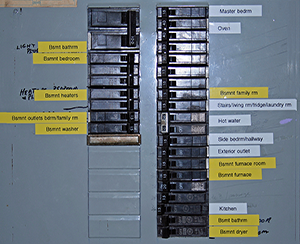
The breaker box
The breaker box in my house was a visual mess. Scrawled in pencil, incomplete—even occasionally inaccurate—hitting the right breaker was sheer guesswork. For safety’s sake, it was begging for proper labelling.
Before: After:
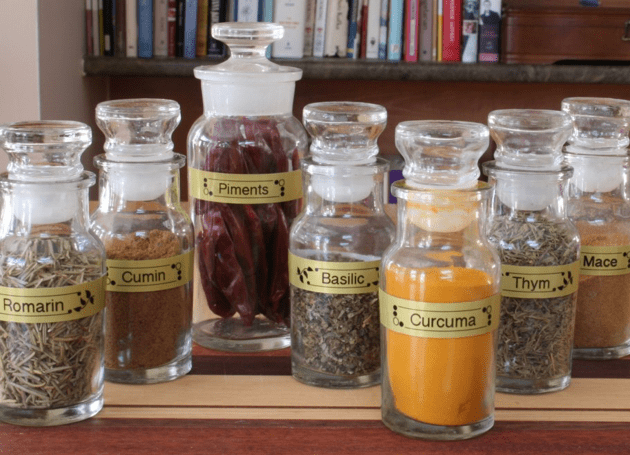
Spices

I snagged a bagful of beautiful glass bottles with stoppers a few years ago. My intention was to label them prettily and use them for spices. But, like the handwriting-challenged procrastinator I am, I feared making a mess of them and never got around to it. It was the perfect opportunity to use the PT400AD’s gorgeous gold labels: leaf frame for herbs, bubble frame for spices.
School supplies

Elementary schools demand labelling of each child’s supplies. It’s a breeze in kindergarten, labelling a few chubby pencils and an eraser. By Grade 5—when coloured pencils, markers, pens, sharpeners, erasers, a geometry set, calculator and ruler have to be individually ID’d—it’s a tedious task that will make you rue the day you named your child Stephanie and not Sue. But it’s a snap for the PT400AD. Repeat a label? Just use the multiple printing function for more copies!
Household finances

My better self would be someone who files important papers regularly, not the current someone who heedlessly jams them into an accordion file. And searching for a particular bill would take seconds, not be an exercise in frustration that involves riffling through a random pile that lacks any order. The simple answer is file folders; the labeller makes them cute, so they’re clearly marked and fun to use.
Bake sales

The PT400AD will be a huge timesaver when I help out at our spring church bake sale. We have to repackage tonnes of baked goods into smaller containers to spur sales. Each packet needs its own label, and those labels can be pretty detailed (like last year’s “Orange, cranberry and white chocolate muffins. No nuts”). This year, the PT400AD will be a big help. Since its memory stores up to 50 completed designs, I can make all my pretty labels in batches.
Just use the multiple printing function for more copies!
Materials
• Brother ScanNCut Machine
• Brother Standard Mat (model CAMATF12) and Fabric Support Sheet (model CASTBL2)
• Brother Pen Holder (model CAPENHL1) and Fabric Pen (model CAPEN2)
• Brother Standard Blade (model CABLDP1) and Carriage (model CAHLP1)
• Iron-on Fabric Appliqué sheet (CASTBL1)
• Quilting Cotton Poly Felt
• Quilt Batting
• 9-10 magnets (I used 1/4” x 1/16”)
• Pieces: 1.5” in diameter for both “O”s and “X”s
• Board squares: 2.8” each
• Curved corner: 8.5” x 8.5”
• Rectangle: 5” x 7”
• Triangles: 5.58” x 5.58”
• Brother Sewing Machine
• Thread
(Be sure to check out the Iron-On Adhesive Patterns at the end of this project!)
Step 1.
Begin by prepping your materials. Trim your fabrics down to a size that fits on the mat. Place the Fabric Support Sheet onto the mat (glossy side down). Remove the protective blue sheet when you are ready to use. (See Figure #1)
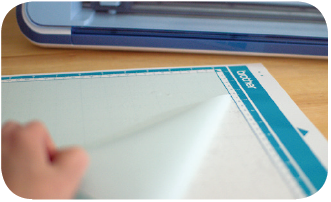
Figure #1
Step 2.
Begin by marking seam allowances. (See Figure #2)
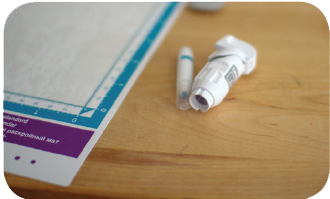
Figure #2
Step 3.
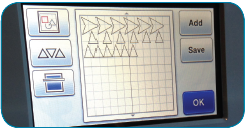
Place fabrics on the mat. Use the “Background Scan” function to see exactly where the fabrics are placed. (See Figure #3)

Figure #3
Step 4.
Arrange the tic-tac-toe squares on the screen, using the “Background Scan” image as your guide. (See Figure #4)
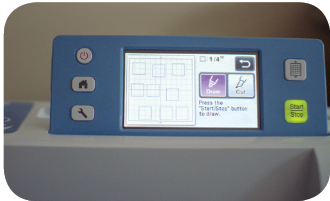
Figure #4
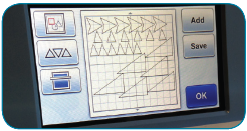
Step 5.
Begin first by marking seam allowances. Next, cut out your fabrics. (See Figure #5)
Figure #5
My Settings:
• Blade depth: 3.5
• Blade pressure: 5
• Blade speed: 1
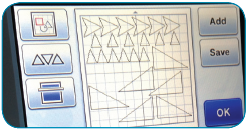
Step 6.
Continue with the perimeter fabric pieces of the board. (See Figure #6)
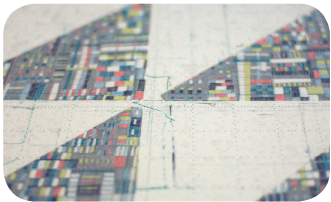
Figure #6
Step 7.
Begin piecing your quilt. Start with the tic-tac-toe grid by piecing in strips (three across). Then sew the strips together. You can either press seams to the side or make open. (See Figure #7)
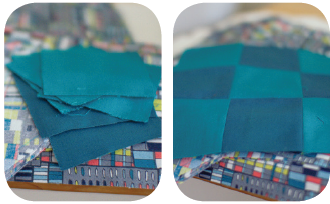
Figure #7
Step 8.
When you’ve finished piecing the top, attach the magnets that you will pocket inside. (See Figure #8)
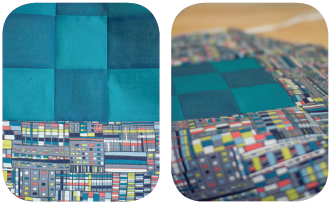
Figure #8
Step 9.
Cut a piece of quilt batting that is the same size as your tic-tac-toe grid. Measure a grid matching your quilted grid. (See Figure #9)
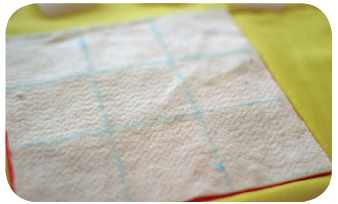
Figure #9
Step 10.
Using scrap quilting cotton, iron the Iron-on Adhesive to one side. Cut out the magnet squares from the pattern download. (Use the Standard Mat with the Iron-On Adhesive placed down. You can use the same settings that were used for the quilting cotton.) (See Figure #10)
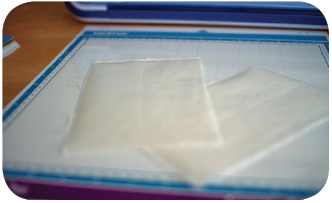
Figure #10
Step 11.
Place the magnets in the center of each tile. (See Figure #11)
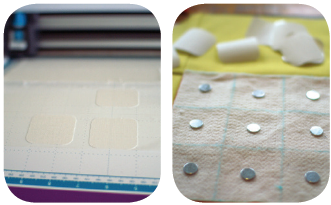
Figure #11
Step 12.
Iron the magnet squares over the top of each magnet to hold in place. (See Figure #12)
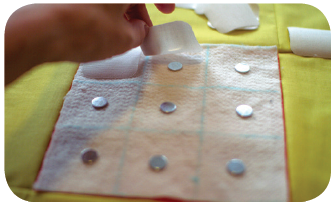
Figure #12
Step 13.
Place the magnet grid batting-side up under your quilt. Place another, larger piece of batting under it. Complete the quilt sandwich with a large piece of quilting cotton at the bottom. (See Figure #13)
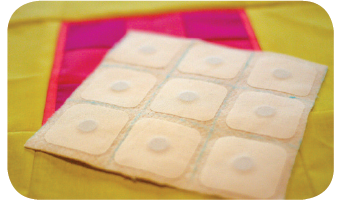
Figure #13
Step 14.
Quilt the sandwich using your Brother sewing machine. (If you have a Walking Foot, use it!) (See Figure #14)
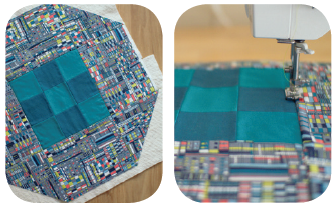
Figure #14
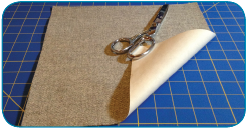
Step 15.
Now cut out your playing pieces from stiff poly felt. (See Figure #15)
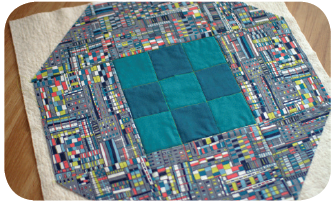
Figure #15
Step 16.
Place the felt on your Standard Mat with the Fabric Support sheet in place. Remember, if you have a lot of fuzzies and frays, use an alcohol-free and scent-free baby wipe to remove them to clean your mat. (See Figure #16)
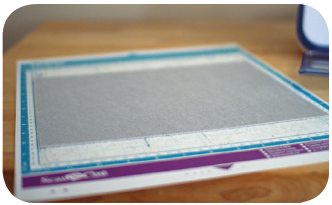
Figure #16
Step 17.
Use “Background Scan” for scanning your felt and then place the pattern pieces on it. (See Figure #17)

Figure #17
Step 18.
Change your settings, sit back, and let your ScanNCut do the work! (See Figure #18) In “Cut” Settings, set the following parameters:
• Blade Depth: “8”
• Blade Pressure: “’9”
• Blade Speed: “1”
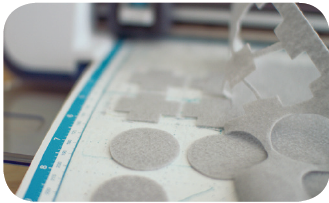
Figure #18
Step 19.
Sandwich a small magnet between the two layers and sew the perimeter. (See Figure #19)
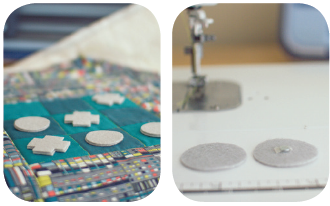
Figure #19
Step 20.
Next, take the circular template and cut from a piece of cardstock or large paper. Using the template, measure and mark the centre on your quilt and also mark the circular perimeter. Cut and discard scraps. (See Figure #20)
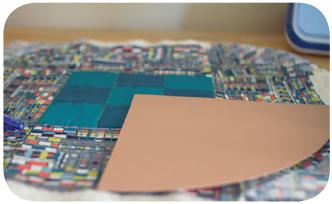
Figure #20
Step 21.
Now it’s time to add the binding. (See Figure #21)
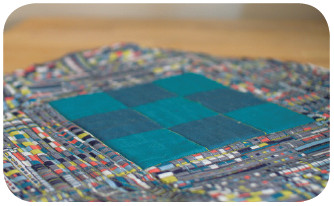
Figure #21
Step 22.
Bias tape is a great way to bind curved edges. See how to bind using bias tape here. (See Figure #22)
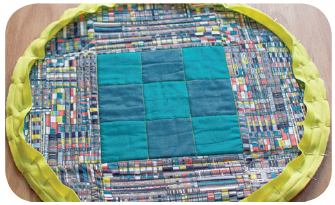
Figure #22
Step 23.
Sandwich a small magnet between the two layers and sew the perimeter. (See Figure #23) Attach a large hair elastic at the edge. To roll game, fold in two sides and roll towards the elastic. Use the elastic to keep your game rolled up.
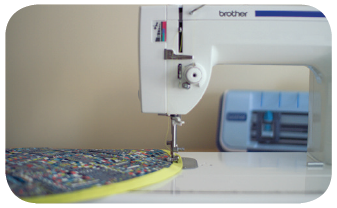
Figure #23
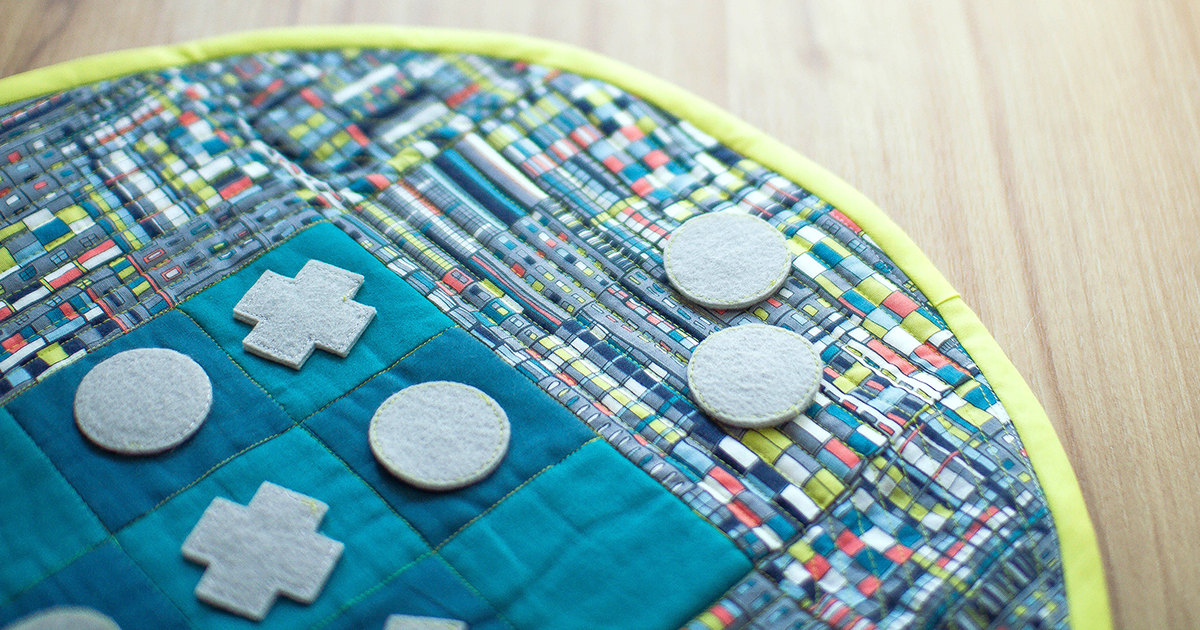
Ready? Set? Go! Enjoy a great game of tic-tac-toe on your awesome, quilted tic-tac-toe board.
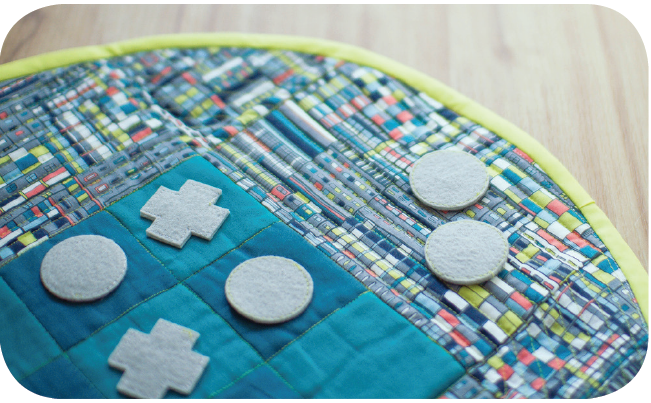
Figure #24
I love giving pillows as gifts, especially for weddings. They’re quick, fun and easy to make. And they add a personal touch that you simply can’t buy in a store. Plus, they’re a great way to kick up your home décor!
This past summer, we attended two weddings. Part of our wedding gift to the newlyweds was a custom-made pillow with their monograms and wedding colours. I made them using the Brother Q-Series 3500D’s large built-in embroidery designs. Both couples loved them.
In my role as a Brother Educator I get to learn, use and train others on all the Brother sewing, serging and embroidery machines. The NQ3500D (what Brother calls “The Fashionista”) is one of my absolute favourites! I love it for a lot of reasons, including its ease of use, colour LED touchscreen and large hoop size—not to mention its incredible range.
Top Six Pillow Making Essentials
I’ve come to consider the NQ3500D as my first go-to machine for sewing projects. Here are six of the Fashionista’s amazing features that make sewing pillows a breeze:
1. 6” x 10” Embroidery Hoop. This hoop, which comes with the NQ3500D, allows you to stitch nice, big embroidery designs without re-hooping. I was able to embroider all of my pillow designs in one hooping without stopping to reposition my hoop. Bigger is better!
2. Needle Down Pivot. It’s like having a third hand. When you select the needle down position, the needle stays in the fabric, and the pressure foot raises when you stop sewing. This allows you to pivot around corners or reposition your fabric without your fabric slipping away.
3. AHA feature. AHA allows you to smoothly sew over multiple layers of fabric or seams without any change to your stitch size or length.
4. Touch LED Colour Screen. The LED screen lets you clearly see and select your decorative stitch, straight stitch or embroidery design. Once selected, your embroidery design appears in colour on the screen, giving you a really clear picture of what it will look like when you stitch it out.
5. Ruffler Foot. I used this foot to add an updated modern touch to the heirloom look of these pillows. The Ruffler Foot allows you to stitch a continuous gather, or gather a pleat, every 6 or 12 stitches. I just love the knife-edge pleats I created using the every-6-stitch option. And you can pleat fabric and attach the pleats in one step, saving time and effort. (You have to buy it separately.)
6. Zipper Foot. For a more tailored look, I used piping to edge the pillows. Although there are piping feet available, you can easily attach piping using a zipper foot.
Materials and Supplies
• Brother Q-Series NQ3500D Sewing and Embroidery Machine
• Brother embroidery thread to match fabric
• Sewing thread and bobbin thread
• Fabric for front and back of pillow top
• 1 piece of fabric 13” square for the front of the pillow
• 2 pieces of fabric 17” wide by 13” long for the back of the pillow
• 1 piece of fabric 4” x 96” for knife-pleated ruffle
• 1 piece of lightweight quilt batting 13” square
• Brother Iron-on stabilizer (model #SA519) to stabilize one 12”
fabric square
• 12” pillow form
• Brother Ruffler Foot (model# SA143)
Instructions
1. Fuse stabilizer to the wrong side of one of the 13” squares. Set up the machine for embroidery and select Design #52 or #54.
2. Centre the fabric in the hoop and hoop fabric, stabilizer and quilt battingin the large 6” x 10” hoop.
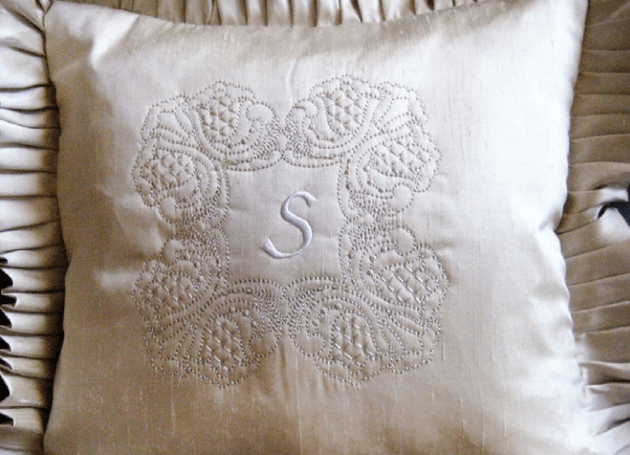
3. Embroider design in the centre of the pillow front piece. (See Figure #1a) (I added a monogram letter from built-in Alphabet 04 to the centre of Design #52.) (See Figure #1b)
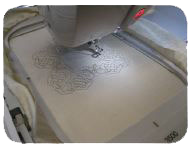
Figure #1a: Stitch out your embroidery design.
Figure #1b: Embroidery design complete with monogram added.
4. Remove from hoop and tear away excess stabilizer.
5. Change machine to regular sewing.
6. Fold fabric for knife-edge pleat in half lengthwise with wrong sides together. Press.
7. Attach ruffler foot to machine. Be sure your needle is in the centre position and is directly above the hole in the ruffler foot. Tighten the screw on the ruffler foot to securely fasten the foot in place.
8. Set ruffler foot to 6 stitches per pleat. (See Figure #2) Place fabric to be ruffled between the forks on the ruffler foot. Align the right edge of fabric (raw edge) to be pleated with the right edge of ruffler foot. Stitch slowly. Note: You can save a step here by pleating your fabric and attaching it to the pillow top at the same time! To do that, place the pillow front right-side-up under the ruffler foot. Place the fabric to be pleated between the blades. Stitch.
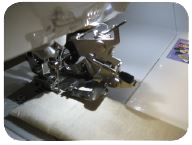
Figure #2: Ruffler foot set to 6 stitches/inch.
Note: You can save a step here by pleating your fabric and attaching it to the pillow top at the same time! To do that, place the pillow front right-side-up under the ruffler foot. Place the fabric to be pleated between the blades. Stitch.
9. If you’re attaching your ruffle as a separate step, remove the ruffler foot and replace with the “J” foot. With right sides together, stitch the pleated fabric to the pillow front. (see Figure #3a) Ruffle should be facing the inside of the pillow front. Sew a ½” seam.
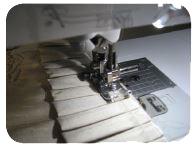
Figure #3a: Right sides together, stitch ruffle to pillow front (using “J” foot).
10. Select back pieces. Prepare each piece by folding in half with wrong sides together and 13” edges matching. Layer the two panels over the right side of the pillow front, overlapping the folded edges to create an envelope for the back. (See Figure #3b)
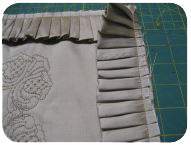
Figure #3b: Ruffle attached to pillow front.
11. To finish, sew the pillow front and back together using a ½-inch seam allowance. Trim corners, turn right-side out. Press. Insert pillow form.
You’re done! Now that you’ve finished your first pillow present, they’re sure to be in-demand from all your friends and family.
You’ll never have to search for a present idea again!
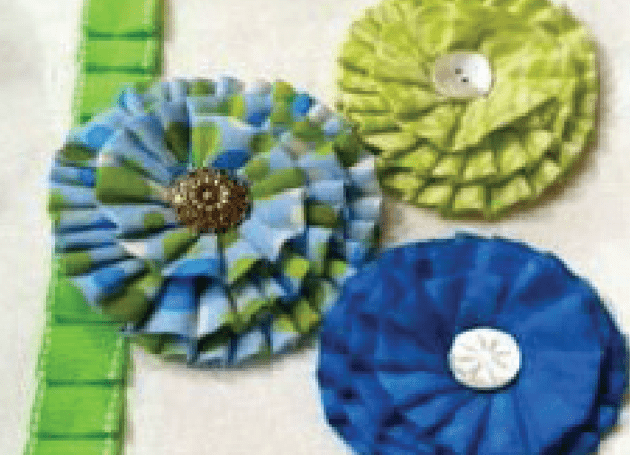
Give her flowers that won’t wither away! Fabric flowers are easy to create and can be worn with a pin or glued to a headband or simple hair elastic. They add a burst of life to any outfit!
Materials and Supplies
• 2” x 45” strip of fabric for each flower
• 2 1/2” squares of felt for each flower
• 1 large button for the centre of each flower
• Glass beads for embellishment (optional)
• Brooch pin (optional)
• Any Brother sewing machine
• Brother Gathering Foot (SA120)
• Straight Stitch Foot
Instructions
1. Cut a strip of fabric 2” wide x the width of fabric.
2. Trim selvedges and turn under to the wrong side of the fabric, ½” on each end of the fabric strip.
3. Fold the strip in half widthwise, wrong sides together, and press.
4. Attach the ruffler to the sewing machine.
5. Ensure the needle is aligned with the needle hole in the Gathering Foot.
6. Set the ruffler to the gathering position (#1).
7. Place the raw edge of the pressed strip along the left side of the ruffler foot and slip into the ruffler.
8. Start with a slow machine speed and begin pleating the strip from end to end.
9. Draw a circle on the felt square.
10. Start at the outside of the circle you drew on the felt and lay the pleats onto the circle. The pleats will naturally form into a circle.
11. Attach Straight Stitch Foot to the sewing machine.
12. Stitch the pleats to the felt on the ruffle’s seam line. Once you’ve made it all the way around the first time, place the strip just to the inside of the first row and continue in a concentric circle until the entire strip has been sewn down.
13. Trim the felt circle so it can’t be seen from the top of the flower.
14. Stitch a button to the centre of the flower to cover the middle gap, and embellish with glass beads.
I just love this easy way to change up your home décor. No need to make and store a massive pillow collection. Just take your existing pillows and wrap them with a seasonal phrase or greeting! All simply done with your Brother Sewing Machine, decorative stitches and the Brother ScanNCut.

Materials
• Pillow to cover with a pillow wrap
• Fabric for front of pillow wrap (melton or felted wool)
– Size of fabric determined by your desired width of pillow wrap and long enough to wrap around your pillow of choice + 4” overlap. (As you can see, I like to leave a couple of inches of my pillow exposed at the ends of the wrap.)
• 3 or 4 buttons
• Brother Sewing Machine, with decorative stitches
– Brother 1-Step Buttonhole Foot
– Brother Button Sewing Foot
• Decorative threads
• Brother ScanNCut
• Brother ScanNCut Iron-On Fabric Appliqué Sheets (CASTBL1)
• Acrylic paint
• Paintbrush
Instructions
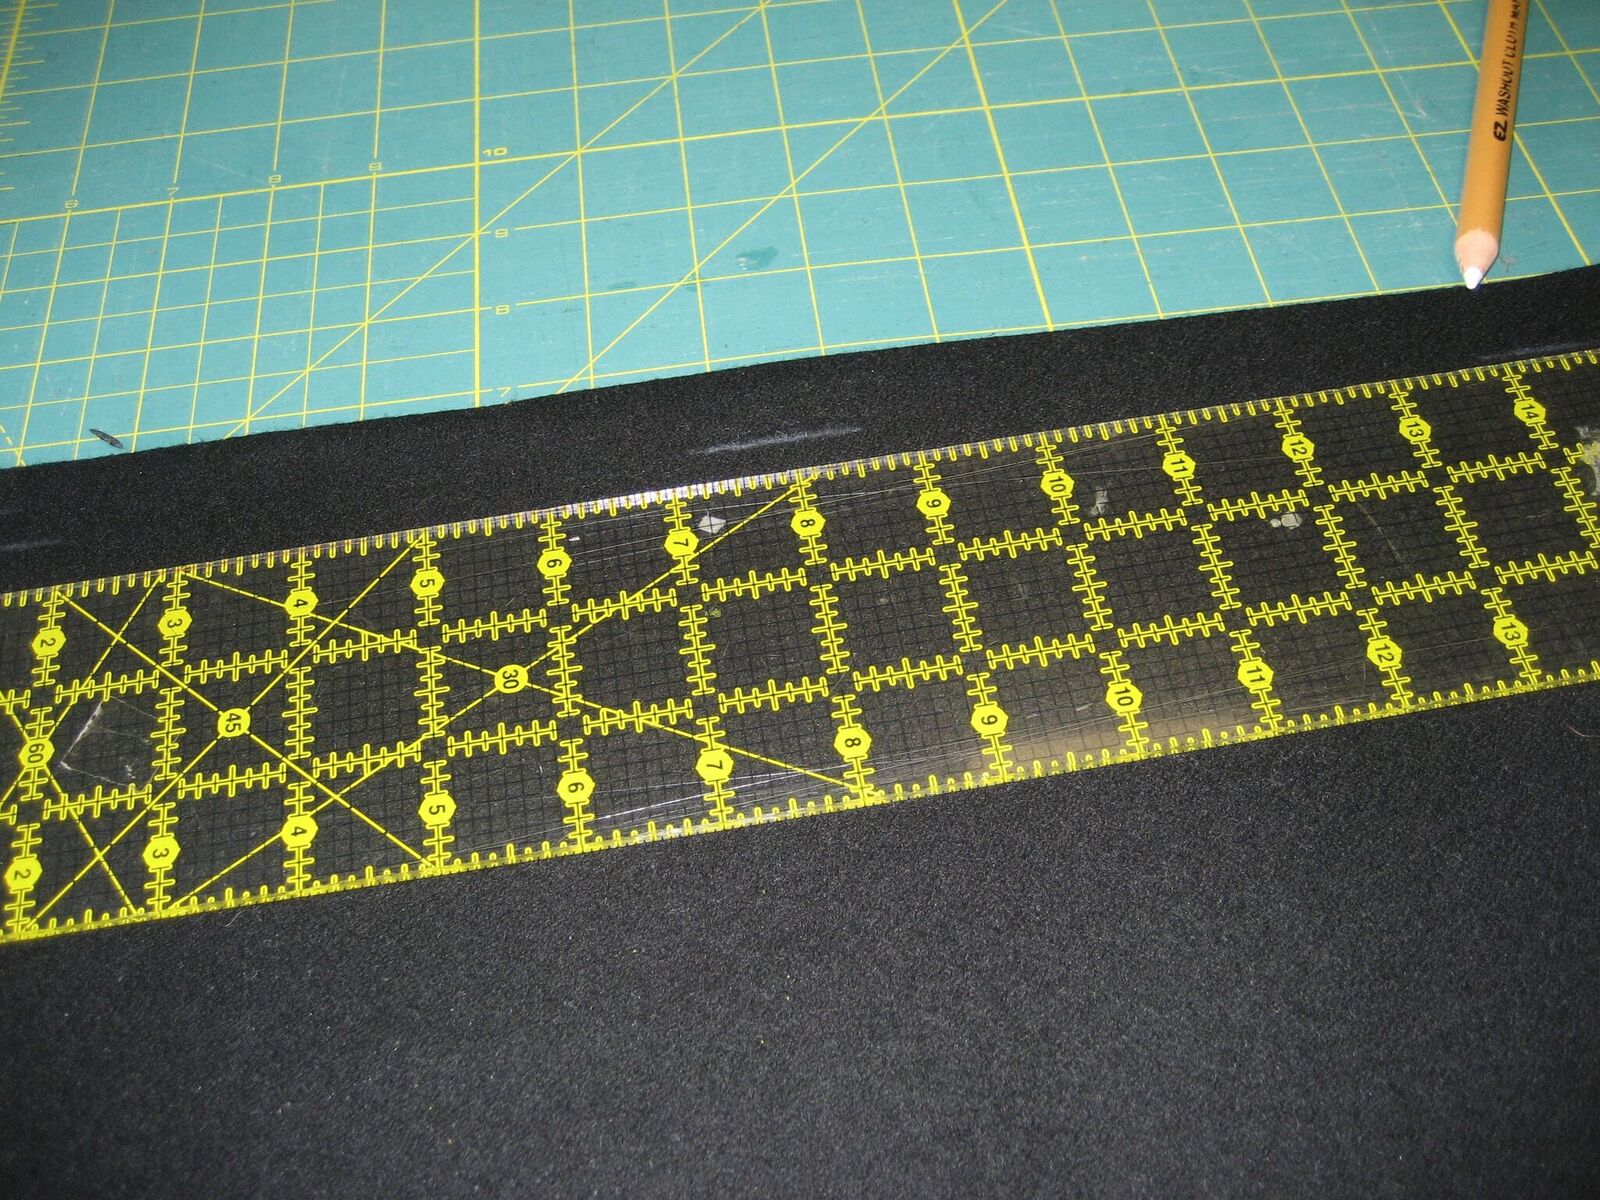
1. Determine desired width of pillow wrap by measuring around pillow. I wanted mine to be the width of my existing pillow minus 2” (to allow for 1” of the pillow to show on either side of the wrap).
2. Measure the circumference of your pillow and add 6” to the total length (to allow for overlap and installation of the buttons).
3. Cut fabric for the pillow wrap to the size you determined.
4. Fold over ½” on each of the long sides of the pillow wrap and press. This will give you a clean edge on the long sides.
TIP: I use double-sided iron-on tape to hold the edge in place.
5. Select a decorative stitch on your Brother Sewing Machine.
6. Using a coordinating thread, stitch one or more rows of decorative stitches along each of the long sides of the pillow wrap (see Figure #1). TIP: Align the edge of the Presser Foot with the edge of the fabric to ensure a straight stitching line. (The grid lines on the needle plate will also help you keep your stitches straight.)
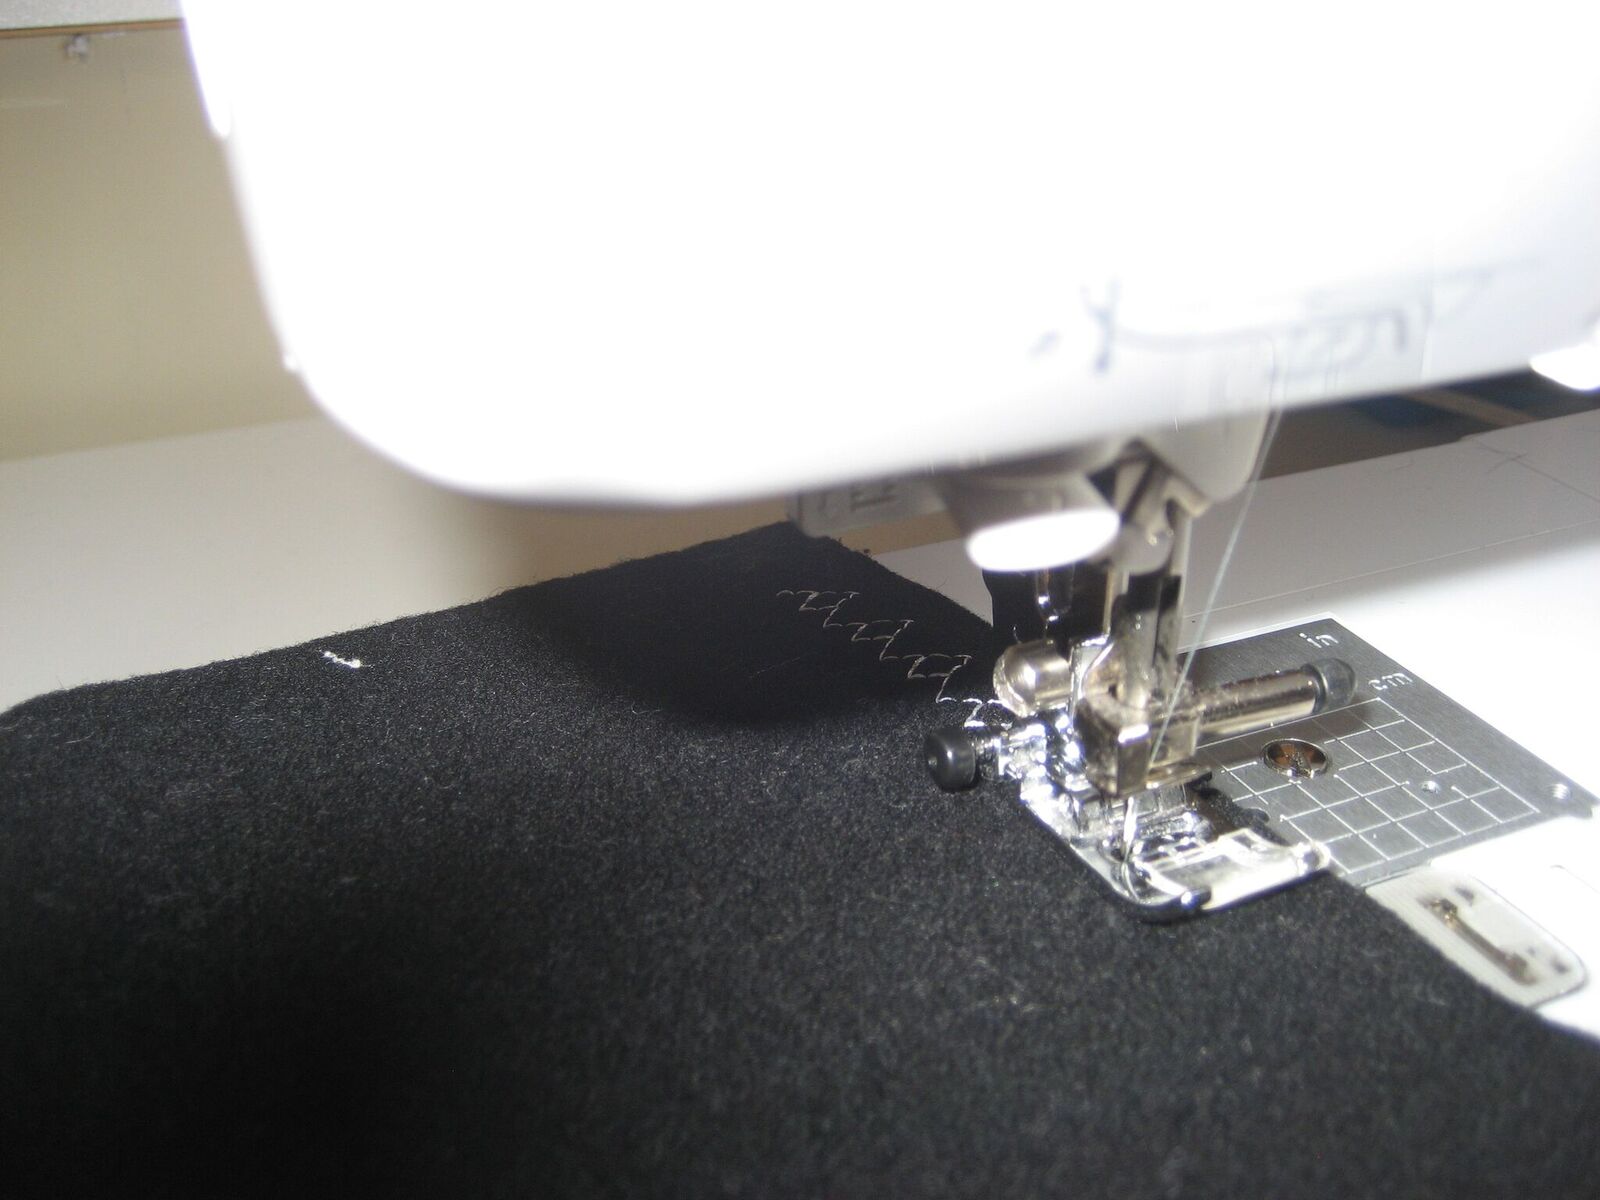
Figure #1
7. On one of the short ends of the pillow wrap, determine where you will place the buttonholes (evenly spaced). Mark placement (see Figure #2).
 :
:
Figure #2
8. Attach the Buttonhole Foot to your sewing machine and place button in the back part of the attachment. Stitch buttonholes (see Figure #3).
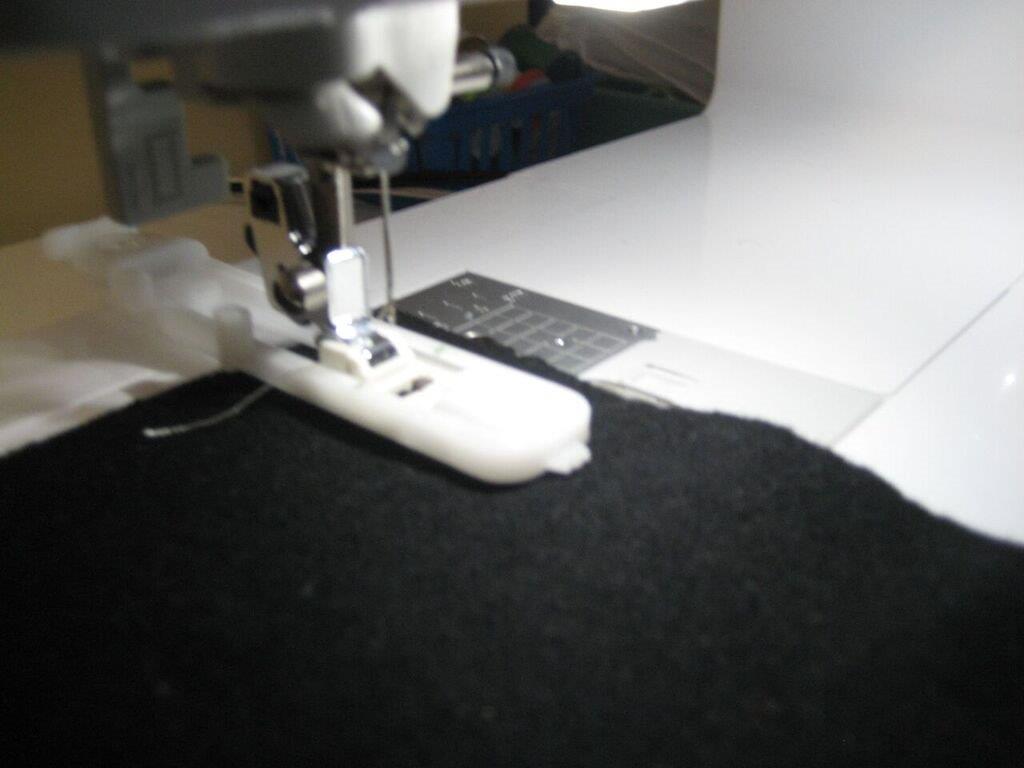
Figure #3
9. On the opposite short end of the pillow wrap, mark the location of buttons to correspond with the buttonholes.
10. Attach Button Sewing Foot to the sewing machine. Position button in Foot and select the button attachment stitch. Stitch on the buttons (see Figure #4).

Figure #4
CUTTING EMBELLISHMENTS WITH THE SCANNCUT
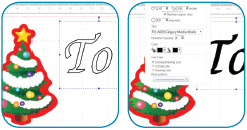
1. At the ScanNCut, select the word art you’d like on your pillow wrap. I chose “Joy”, along with its built-in design (see figure #5).
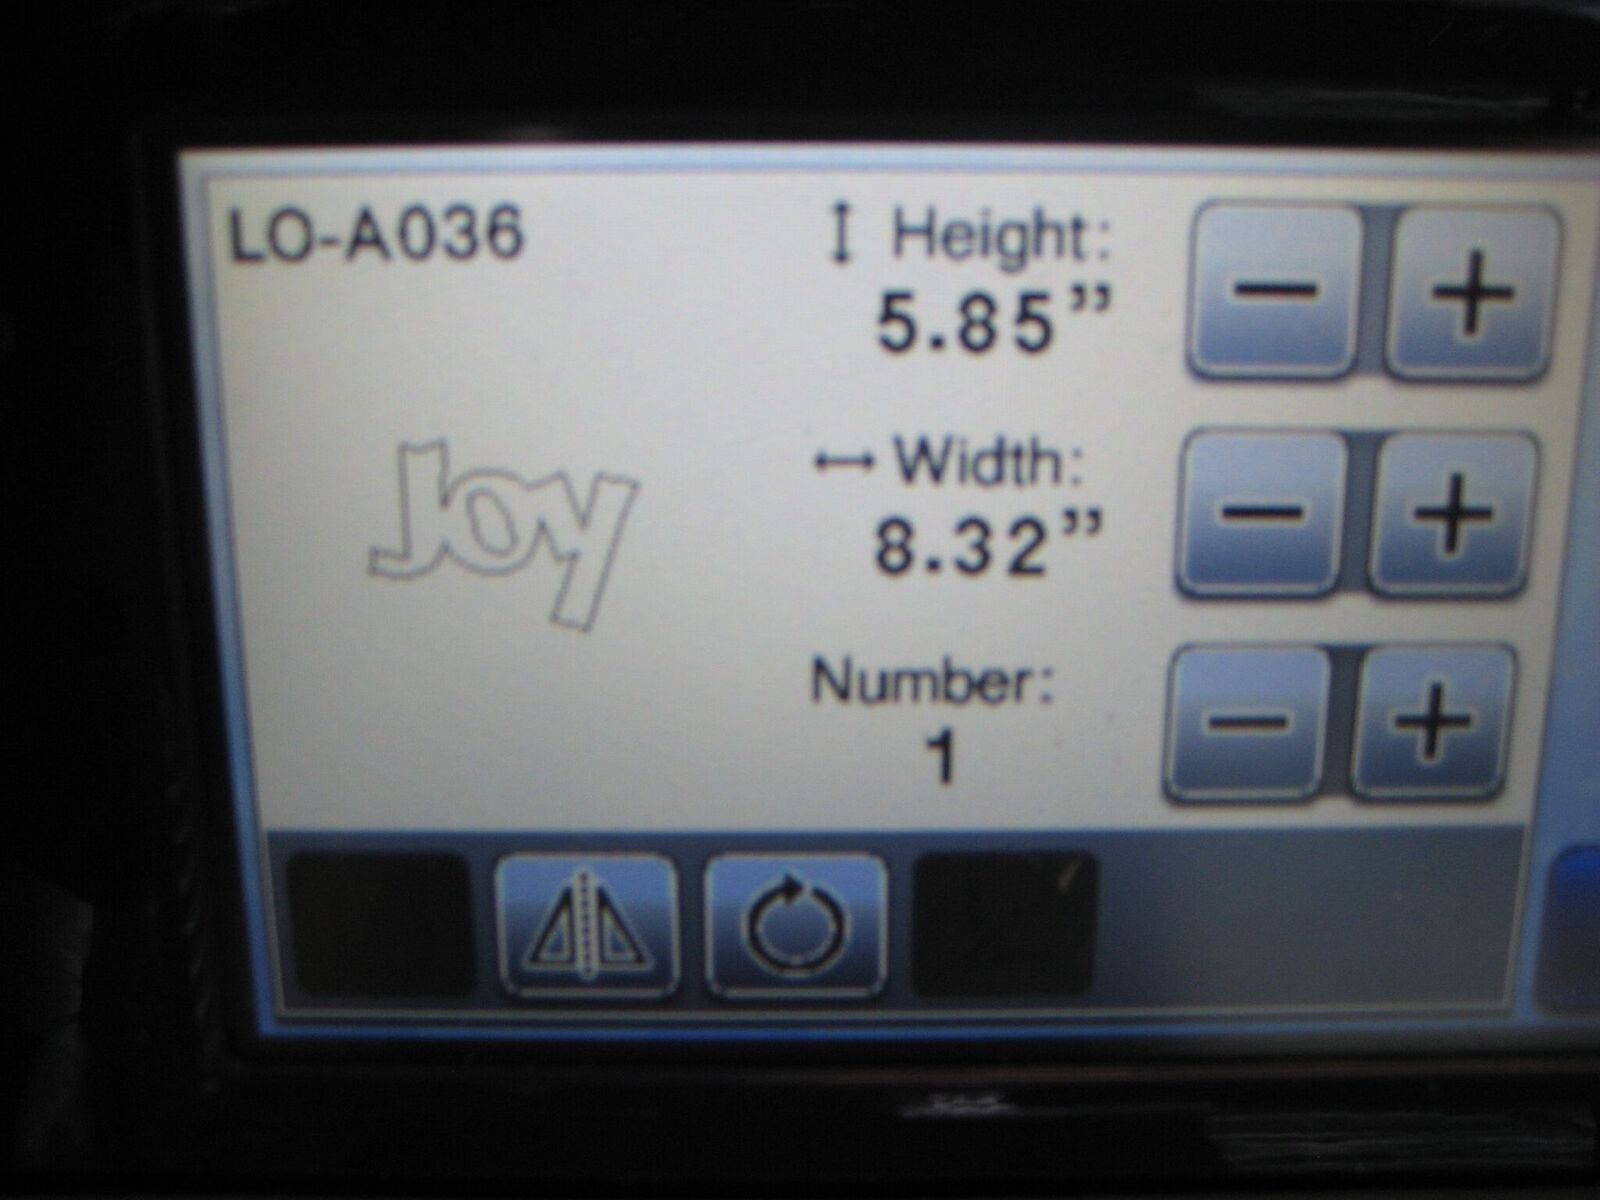
Figure #5
2. Enlarge word art to desired size to fit the pillow wrap.
3. Position stencil sheet with the backing material on the ScanNCut Middle Tack Adhesive Mat.
4. Set blade at 1 to 2 and Cut Pressure to -1.
5. Do a test cut to ensure the stencil film is cut, but the backing material is not cut.
6. Cut.
7. Remove backing material. (But keep it to store your stencil later.)
8. Determine where you want to place word art on your pillow wrap.
9. Position stencil on front of pillow wrap.
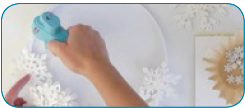
10. Using acrylic paint, “pounce paint” over the letters to create the stenciled word art (see Figure #6).

Figure #6
11. Allow to dry.
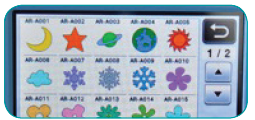
12. Select the snowflake design (built-in design AR-A007) on the ScanNCut. Choose the size you want and duplicate (see Figure #7). (I have two snowflakes on my pillow wrap).
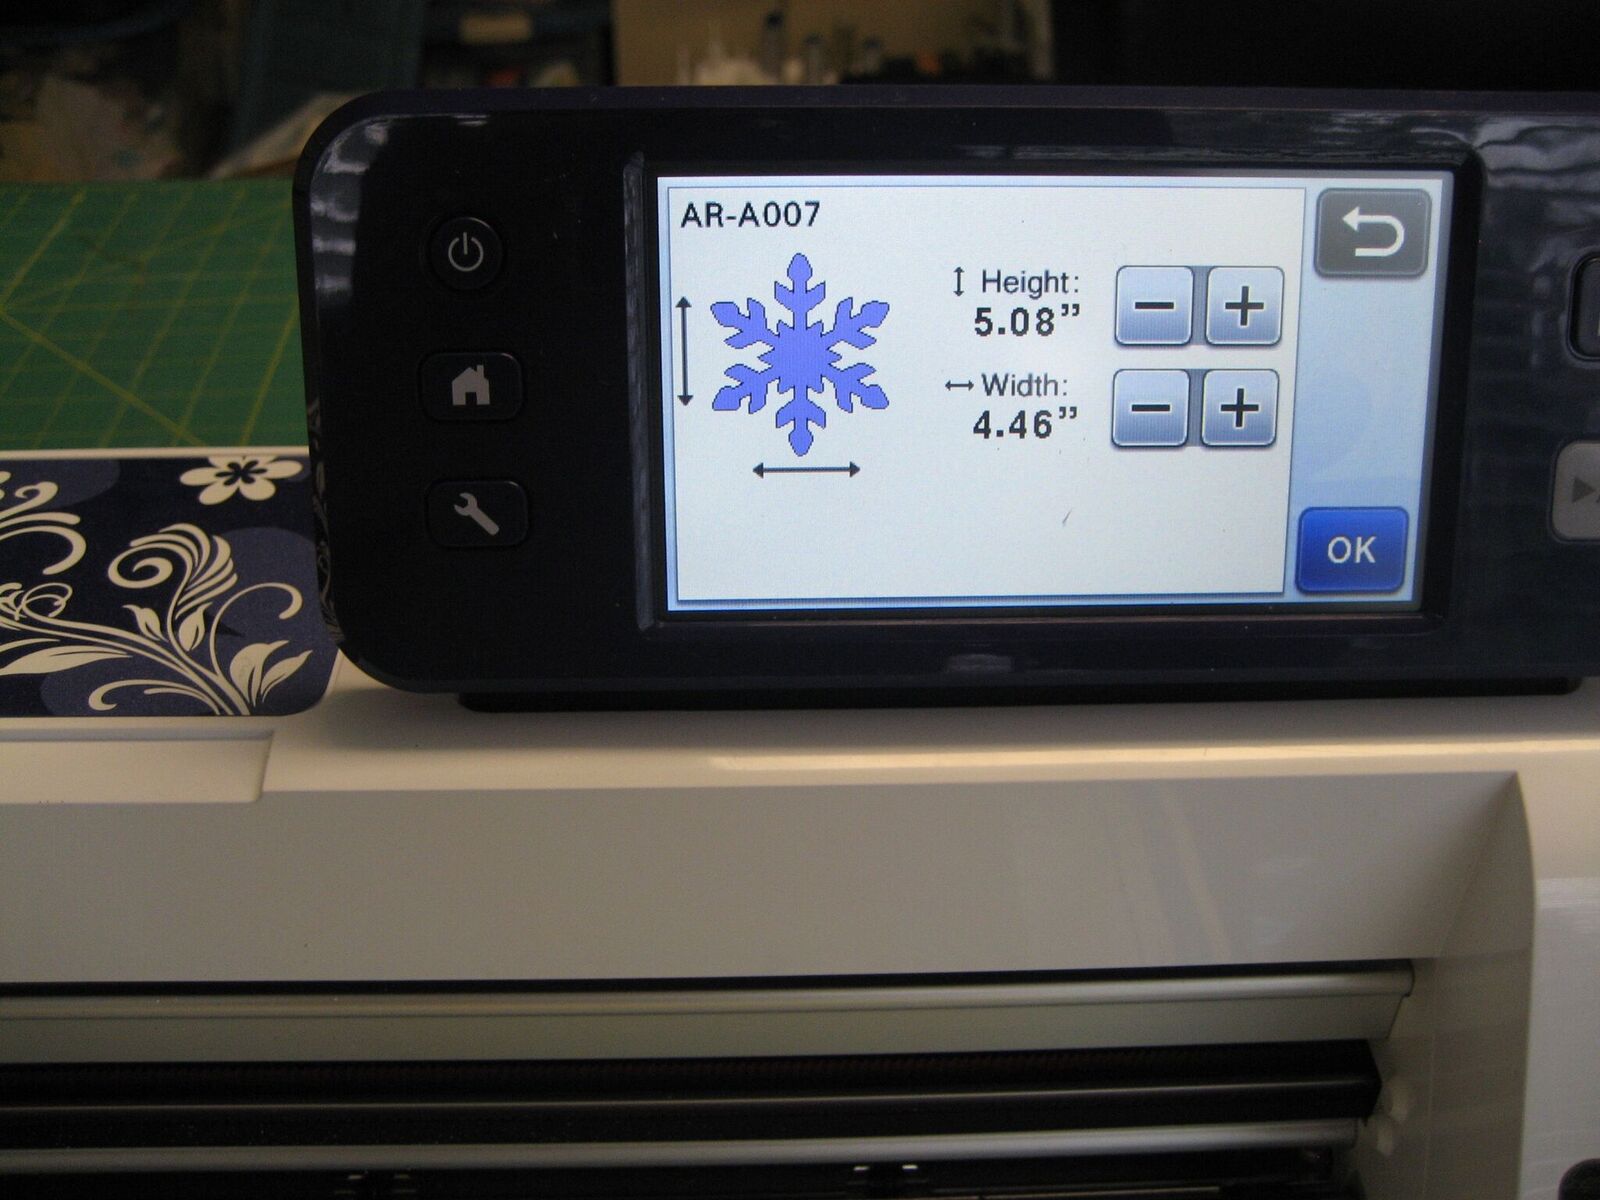
Figure #7
13. Adhere iron-on fabric appliqué sheets or a similar product to the back of snowflake fabric.
14. Position fabric on ScanNCut Middle Tack Adhesive Mat.
15. Set blade at 5 or 6 to cut your snowflake fabric.
16. Set blade pressure to 0.
17. Perform a test cut.
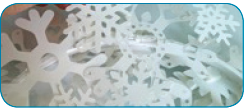
18. Cut snowflakes.
19. Adhere snowflakes to pillow wrap with a hot iron. Add bling if you like.
20. Wrap you pillow.
21. Enjoy the holidays!
Just think of all the other pillow wrap possibilities. All you need to do is change the word art: “Love” and hearts for February, “Fall” and leaves for Fall, and so on. It’s so easy to adapt your house to special moments!
Designed exclusively for you by Lynn Swanson of the Brother Education Department.
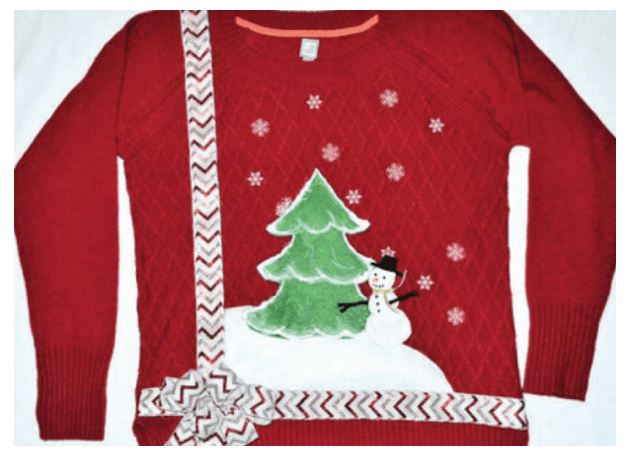
Win this year’s Ugly Holiday Sweater Contest at work—with your very own over-the-top creation! The craftier, the better. Bling out a plain red sweater using felt, ribbon, fabric paint and embroidery. A Brother sewing/ quilting machine is perfect to add appliqués and embroidered snowflakes.
Materials
• Brother Sewing/Quilting Machine
• White sewing thread
• Ribbon-1½” wide, length and width of sweater
• Fabric paint, white, orange, black, white glitter paint
• Plain purchased red sweater
• Felt squares-1 white glitter, 1 green, 1 black
• 1 gold ribbon, ¼” X 4”
Instructions
1. Lay the sweater on a flat surface, front facing up.
2. Measure the width of the sweater from side seam to side seam. Measure
the front length from near the neck opening to the bottom of the sweater.
Add two inches to each measurement. (See Figure #1)

Figure #1
3. Cut both measurements from the wide ribbon. If you purchased wired ribbon, remove the wires from both sides. Position the shortest length of ribbon 3 inches up from the bottom band on the sweater. Pin in place, folding over each end one inch. Do the same with the long length of ribbon overlapping the first. Follow Figure #1 for perfect placement. You can also use spray adhesive to temporarily hold the ribbon in place.
4. Set your machine up for sewing. Install matching sewing thread on top and in the bobbin. Choose a small zigzag stitch and sew the ribbon edges to the the sweater.
5. Remove from the machine and lay flat. Cut the white piece of felt square in half lengthwise. Set one piece aside for now.
Cut the snow mound out lengthwise starting high on one side and tapering down to the other side. Place on the sweater where the ribbon intersects. Pin in place. (See Figure #2)

Figure #2
7. Repeat Step 4 to adhere the snow mound to the sweater front.
8. Print the pattern for the tree and snowman below.
9. Cut out the tree from the green felt fabric and position it on the mount, centering the tree with the neck opening. Stitch in place. (See Figure #3)

Figure #3
10. Cut out the snowman from the remaining white felt fabric. Tack the head, middle and bottom of the body together. It’s easier to assemble the snowman before stitching him to the front of the sweater.
11. Continue to cut out the hat and arms, and tack them in place. Tie the small gold ribbon to the neck of the snowman. Position the snowman on the sweater next to the tree. Using matching sewing thread, stitch the snowman onto the sweater. (See Figure #4)

Figure #4
12. Hand-embroider snowflakes using white thread. (See Figure #5)

Figure #5
13. Using the black fabric paint, add two eyes, mouth and buttons to embellish your snowman.
14. Make a carrot nose with the orange fabric paint.
15. Change to white fabric paint and add snow to your tree. Add lines to define the body of the tree. Add some glitz using glitter paint to embellish the tree, snowman and snow mound. Make them sparkle! (See Figure #6)

Figure #6
16. To add the finishing touch to your sweater, cut a length of wide ribbon a yard long. Create a bow to add to the bottom of the sweater where the two ribbon strips meet. (See Figure #7)

Figure #7
17. Allow the fabric paint to dry for two days before you remove all watersoluble stabilizer.
Check out the actual size template on pages 4 and 5.
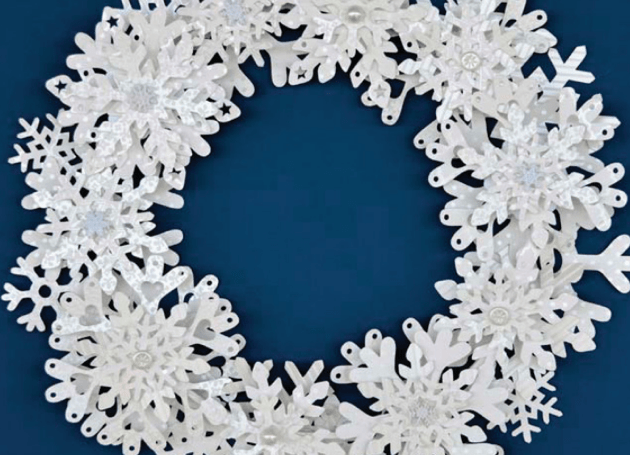
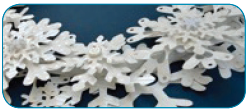
This stacked snowflake wreath is a great way to celebrate winter. It’s a declaration of love for snow-covered trees, spending holidays with loved ones and all that winter offers!
Materials
• Brother’s ScanNCut machine and accessories
• USB memory stick
• 10” embroidery hoop
• White acrylic paint
• Paintbrush
• Approximately 5 sheets of 12”x 12” white patterned paper
• Buttons
• Foam adhesive mounting tape
• Glue gun and glue
Instructions
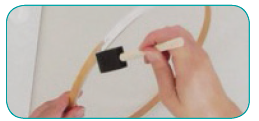
1. Start off by separating the embroidery hoop. Use just the inner circle (not the one with the hardware on it). Paint all the sides of the hoop white and allow it to dry. (See Figure #1.)
2. Next, we need to cut out our snowflakes. You can use the ScanNCut built-in designs, the free download snowflakes, or scan in and cut your own. (See Figure #2)
Make about 40 flakes, from 1.5” – 4” high. (You’ll need to cut out a lot of them since they’ll be layered up.) We used all-white paper, with pearl-finish debossing. Mixing up the size, shape and pattern of the flakes really individualizes each snowflake stack! (See Figure #3)
3.Once you’re finished cutting, build your snowflake stacks. For each stack, start with the largest flake. Then, using foam adhesive, adhere a medium-sized flake on top of it, followed by a small flake on top of that. Vary your flakes so that some are stacked 2-high, and some 3-high. (See Figure #4)

4. Using your glue gun, attach the snowflake stacks to the top of the hoop. (See Figures #5, 6, 7)

5. Apply one layer of snowflakes on the back side of the hoop to create depth. You can stagger different sizes to fill in any areas that need filling out from the front view. (See Figure #8)
6. Add some embellishments (such as buttons) to your front-facing snowflakes. We love how the layers of the snowflake stacks look so multi-dimensional when it’s finished. (See Figure #9)
Your delicate lingerie deserves this awesome, elegant lingerie pouch! Quick and easy to make, it’s perfect for storing your delicate items at home. Plus, it makes a wonderful travel case!
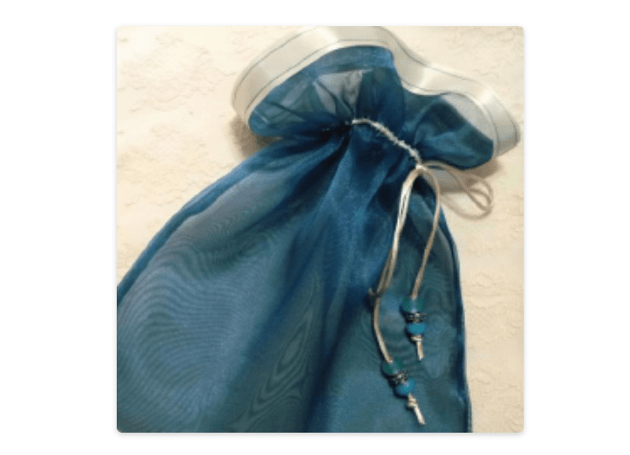
This lovely project uses the Brother Pearls and Sequins foot, great for attaching satin cording for a drawstring on a sheer organza pouch. You’ll learn a neat technique for finishing the organza with satin ribbon trim for an elegant touch at the top edge.
Materials
• Brother Sewing Machine with 7mm capability
• SA150 Brother Pearl and Sequins foot, 7mm
• Sharp scissors
• Fine, sharp pins
• Fine, sharp sewing needle for sewing fabric
• 1 piece of sheer synthetic organza, 14” wide X 28” long
• 2 pieces of contrasting satin ribbon measuring 1” wide X 15” long to finish top of pouch
• Wash-out marker or chalk suitable for marking organza
• 2 yards of narrow, round satin cording for drawstring (commonly called “rattail cording” and measures about 2mm in diameter)
• 1 spool of good quality Brother thread to match sheer organza fabric
• 1 spool of good quality Brother thread to match satin rattail cording
• Optional: Assorted beads to decorate ends of rattail cording
Fabric Notes:
Take care when pressing heat sensitive synthetic organza. Test on scrap fabric to determine heat setting before pressing your project. Important: This fabric doesn’t have a noticeable right and wrong side. When stitching ribbon, simply press ribbon to one side. Use this as the right side consistently as you complete the project.
MORE ABOUT BROTHER’S SA150
This foot is great for adding a little glitz to your projects. It’s clear for added visibility and features a groove for even feeding of pearls, sequins, and rounded cords. Simply place your embellishment choice under the foot and into the guide to stitch onto your base fabric.
INSTRUCTIONS FOR FINISHING TOP EDGES
Step 1
Set up your sewing machine with thread matching or contrasting with ribbon. To finish the first top edge, pin a 15” piece of ribbon along one of the 14” edges of sheer fabric. Make the long edge of the ribbon even with the raw edge and leave a small amount of ribbon at each end.
Step 2
Select a straight stitch and attach the ribbon by sewing 1/8” from the edge, opposite the raw edge (See Figure #1). Note: Sew slowly to keep the ribbon and fabric from shifting. Remember to remove pins as you stitch.
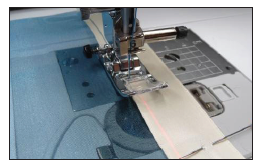
Figure #1
Step 3
Use scissors to carefully trim approximately 1/8” of sheer fabric from the unstitched edge.
Step 4
To finish off the top edge, fold and press ribbon toward the right side. Stitch along the remaining long edge (See Figure #2.)
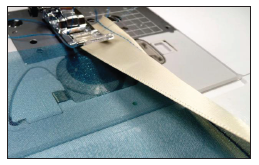
Figure #2
Step 5
Repeat steps for sewing ribbon to finish the remaining 14” raw edge. Make sure the ribbon finishes on the same side as the previous ribbon-trimmed edge. Trim ribbon at outer edges, making sides even.
Step 6
Use a French seam technique to sew the side seams as follows:
• Fold the rectangle with wrong sides together and the ribbons matching at the top edge.
• Sew along each side using a ¼” seam allowance ( Figure #3).
• Trim seam allowance to slightly less than ¼”.
• To finish the seam, fold and press it so the right sides are facing, and the narrow seam is sandwiched between the fold. Stitch the seam a second time using a 3/8” seam allowance (Figure #4).
NOTE: Brother’s SA538’s adjustable seam guide is ideal for sewing accurate seams.
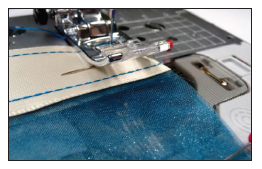
Figure #3
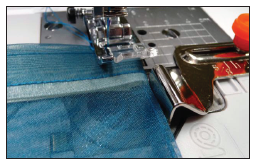
Figure #4
Step 7
Turn bag right-side out and press. Tack down seam allowances at the top edges, pressing seams toward one side. Topstitch through the ribbon and seam allowance (Figure #5a and Figure #5b).
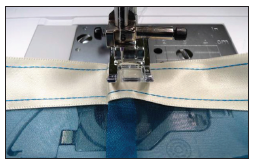
Figure #5a

Figure #5b
Step 8
Prepare to stitch cording as follows:
• Switch machine to sewing with the free arm.
• Attach the pearl and sequins foot and thread machine to match cording.
• Select a zigzag stitch (width: 7.0mm, length: 2.5mm).
• Use a wash-away marker or chalk pencil to mark a line measuring a distance of 3” from the ribbon-trimmed top edge.
Step 9
Slip the bag over the free arm. Beginning at one side seam, loosely pin the cord under the foot. Line it up with the marked line with about 6” of loose cord behind the foot. Position the cord under the foot (Figure #6.)
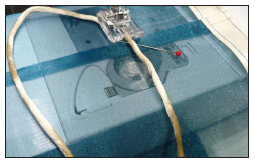
Figure #6
Step 10
Zigzag over the cord, smoothing it as you go. Cover the marked line as you stitch (Figure #7).
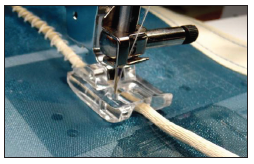
Figure #7
Step 11
Stitch cording across the top of the bag, stopping a slight distance from the point where you began.
NOTE: It’s important that the stitch forms over the cord and doesn’t catch any of the cording. Be sure to tie off threads at the beginning and end, and leave a slight gap between your starting and stopping points.
Step 12
Attach beads to the ends of the cords (if desired) and securely knot ends. You’re done!
Options and Ideas:
• Adapt these instructions to experiment with changing the finished size of the bag to hold different garments.
• The drawstring pouch is a great gift—and wow is it versatile! You can make it from loads of different fabrics, and add a personal touch by changing the trim at the top.
Designed exclusively for you by the Brother Education Department
Making this super cute quilted tote bag from pinwheel patchwork blocks is a fun way to dabble in patchwork and quilting techniques, while creating a bag for toting summer essentials.
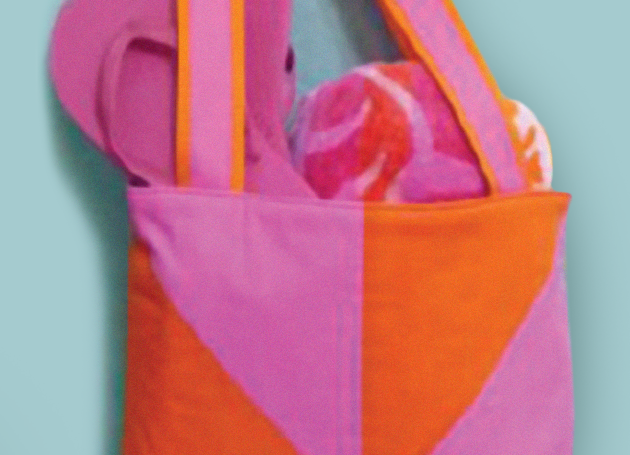
This project highlights the Brother Open Toe accessory for the Brother MuVit™ Dual Feed Foot. The MuVit™ foot is motor driven and powerful, with digital controls, for precision and accuracy. Designed for use with Brother V-Series machines, it’s the ultimate even-feed foot, providing great feeding for a multitude of sewing tasks. (You can also substitute alternative Brother models with a standard or open toe walking foot for quilting the tote.)
Materials
• Brother Sewing Machine
• SA195 Open Toe Brother MuVit™ Dual Feed Foot for use with Brother V-Series machines
• Brother Standard Walking Foot or SA188 Brother Open Toe Walking Foot for alternative Brother model machines
• SA185 Brother ¼” Piecing Foot with guide
• Basic sewing notions, including sewing thread to match or blend with fabrics and a wash-away marker
• Machine quilting needles, size 11 for patchwork and size 14 for bag construction
• Optional (but helpful) quilting notions include a 24” quilt ruler, rotary cutter and cutting mat. You can carefully draw cutting lines with a fine wash-away marker and then cut pieces with scissors
Fabric and Notion Requirements
• Pink quilting cotton: ½-yard total, for patchwork and bag lining
• Orange quilting cotton: ½-yard total, for patchwork and bag lining
• Thin cotton batting, two pieces measuring 16” square
• Ribbon for handles: 1¾ yards of 7/8”-wide pink grosgrain ribbon and 1¾ yards of 1½”-wide orange grosgrain ribbon
INSTRUCTIONS FOR CUTTING PATCHWORK PIECES
Step 1
Cut one 16½” square from pink fabric. Cut one 16½” square from orange fabric. Reserve remaining fabric for cutting lining in a later step.
NOTE: Only one block is shown in many of the illustrations. You’ll need to create two identical pinwheel blocks: Block One for the front of the tote and Block Two for the back.
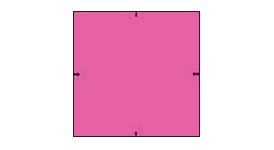
Figure #1
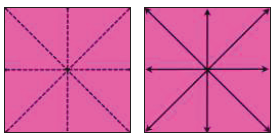
Figure #2
Step 2
Follow the steps below to mark and cut each of the two 16½” squares:
• Mark a small dot or dash at the precise centre of the top, bottom, and sides of each square. (See Figure #1.)
• Place the squares on your cutting surface, with the right side of the fabric facing up. Cut each square into eight triangles, cutting diagonally from corner to corner, and then cutting across the square from top to bottom and side to side. Cut, but don’t separate the pieces until the next step. (See Figure #2.)
Step 3
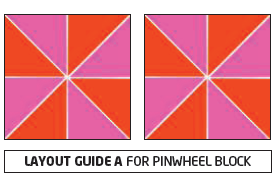
Lay out each of the two blocks in preparation for sewing them together. Divide the pink and orange triangles to create the two pinwheel squares. Each block should be identical. Arrange the blocks using Layout Guide A, positioning each of the triangles with the right side facing up.
INSTRUCTIONS FOR SEWING PATCHWORK PIECES
Step 1
Prepare to sew pieces together for each of the pinwheel blocks as follows:
• Working from left to right in a clockwise fashion, layer one orange triangle on top of a matching pink triangle.
• Prepare to sew by pinning along the long edges of the triangles. For each block, you’ll have four sets of triangles. (See Figure #3.)
• Keep each of the four sets separate. Label the sets Block One and Block Two.
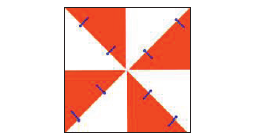
Figure #3
NOTE: Handle the cut-and-pinned pieces gently to avoid stretching the edges and causing a distorted seam. For increased accuracy, cut, layer and then pin the pieces together while working on a flat surface.
Step 2
Set up the machine for sewing a ¼” seam by selecting a centre needle straight stitch. If you’re working on a V-Series machine, you can further enhance the accuracy of your ¼” seam by using the Sew Straight™ Laser Vision Guide in addition to the ¼” foot. (See Figure #4 for more information.) Set the stitch length to 1.8 to chain piece your patchwork and avoid backstitching the seams. Once you’ve positioned your fabric along the edge, watch the fabric along the edge guide (not your needle) as you stitch, and your seams will remain consistent.
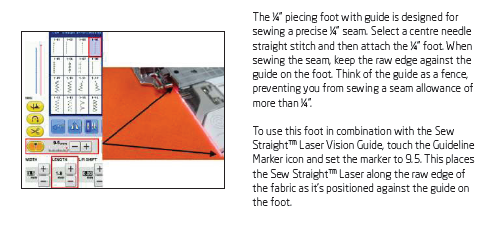
Figure #4
TIP: When sewing a ¼” seam, you can adjust the settings as desired for a scant ¼”, or a deeper ¼”. Move the needle position slightly to the left or to the right to adjust for the thickness of the fabric layers. Moving to the left results in a slightly deeper seam. Moving to the right results in a scant seam. Make sure your needle stays within the opening of the foot. Different fabrics produce different results. If you need a scientific ¼” seam, test it on scraps before sewing your quilt blocks. (In many cases, however, the main consideration is consistency rather than having a scientific seam.)
2. Take the pinned pieces to the machine. Begin to sew the first piece, with the pins facing you. Remove pins as you stitch and push the beginning of the next set of pieces right up against the end of the first. (This is called “chain piecing.”) If necessary, lift the presser foot slightly to position the next piece. Sew all pieces for Block One, and Block Two, keeping each set separate to avoid confusion.
Leave the thread tails connecting the pieces together until you reach the ironing surface.
3. Take pieces to your ironing station. Clip the thread tails holding the pieces together. Open up the triangles and press each one with a dry iron, pressing seams toward the orange fabric.
4. Snip off points extending from each piece. Lay out four squares for each block using Layout Guide B. Pin and then chain piece the squares together so you have two halves for each block. Leave the joining thread tail in place and press seams toward the orange fabric. Snip off points as you did previously.
5. For the final seam on each block, begin by pinning the two halves together, paying careful attention to the centre area where the seams meet. Here, you’ll need to finger press the seams so they’re opposite one another. (They shouldn’t be on top of one another. Instead, each one is pushed in the opposite direction from the other.) The seams should be pushed snugly together at the centre, with all of the seams coming together for a neat centre point. The thread tail holding the pieces together will help you accomplish this. To check seams prior to sewing, push a pin into the centre intersection. When seams are properly aligned, the pin should intersect the seam on both sides.

Figure #5
6. Sew the last patchwork seam on each block, making certain seams stay flat, facing in the proper direction as you stitch. (See Figure #5.) Raise the presser foot and adjust if necessary as you sew.
7. Press each finished block flat. If you have any uneven edges, trim away the excess. Each block should be equal in size and finish at 15” square.
INSTRUCTIONS FOR QUILTING THE BLOCKS
1. Prepare blocks for quilting by layering each block on top of a 16” square of batting. Pin around outer edges. (See Figure #6.)
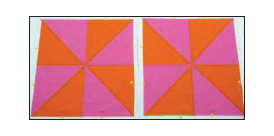
Figure #6
2. Attach Brother’s MuVit™ Dual Feed Foot and the Open Toe accessory, or the walking foot appropriate for your machine. Select a zigzag stitch set for 2.5 in width and 2.5 in length. Working from the centre toward the edge, zigzag along each of the seams to quilt the patchwork block. (See Figure #7.) Your zigzag stitch should evenly pierce the fabric on the right and left side of the block. Working with an open toe foot makes this easy. When finished, trim away excess batting. Each block should be equal in size and finish at 15” square.
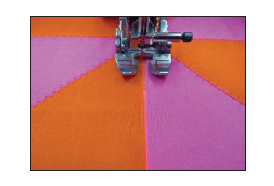
Figure #7
NOTE: Brother’s V-Series machines can use the Sew Straight™ Laser Vision Guide, setting the laser in a position directly on top of the seam, for enhanced guidance while quilting the blocks. Use the Set Mode to adjust the dual feed as necessary. We used a setting of +02 for quilting the patchwork and a higher setting during construction of the tote. Touch the “plus” key to ease in more fabric on top. For more details, please see the manual.
INSTRUCTIONS FOR FINISHING THE TOTE
1. Select the ribbon to make straps. Centre one piece of pink ribbon on top of one piece of orange ribbon. Zigzag down both sides to attach the ribbons. Repeat for the second set of ribbons.
2. For lining pieces, cut two 15” squares from the remaining pink and orange fabric. Remove the open toe accessory and replace with the closed toe, or use an ordinary sewing foot for all remaining steps. (Note: you can disengage the dual feed on the MuVit™ foot to sew without dual feeding.) Sew all seams using a ½” seam allowance to build the tote.
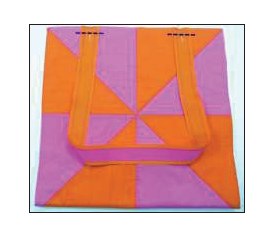
Figure #8
3. Place quilted blocks’ right sides together and sew a bottom seam. Place ribbon straps along top edges on each side, centering the ribbon within the top two blocks. Machine baste ribbons ½” from the top to temporarily secure them. (See Figure #8.) With the right sides together, sew both side seams. Place right sides of lining pieces together. Sew a bottom seam as you did for the quilted pieces, leaving a 5” opening in the approximate centre of the bottom seam to allow for turning. Sew side seams of lining. Press all seams, pressing quilted seams open and lining seams toward one
side.
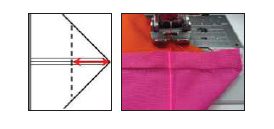
Figure #9a
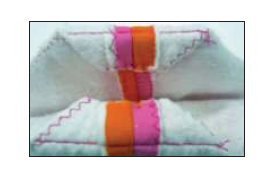
Figure #9b
4. Create “boxed” corners on the bottom of the quilted bag and bag lining piece as follows: Match the bottom seam to the side seam, forming a triangle. Mark a line measuring 1½” from the point. Stitch along the marked line. Trim the boxed corners of the quilted bag to eliminate bulk. Tack seam allowances to the bottom seam. (See Figure #9a and #9b.)
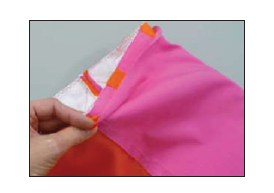
Figure #10
5. Turn the quilted tote piece right sides out. Slip inside the lining piece with right sides together, with side seams matching and top edges even. (See Figure #10.) Using the free arm on the machine, sew the top seam in a circular fashion around the entire top edge. Turn right sides out through bottom opening. Close bottom opening with hand or machine stitches.
6. Carefully press the top edge of tote. Top stitch close to the edge to reinforce the straps and keep the lining from moving. For Brother V-Series machines, you can use the MuVit™ foot and the Sew Straight™ Laser Vision Guide to help with topstitching. And now, you’re done! Enjoy your colourful tote wherever you go!
Options and Ideas:
• Make a larger tote by increasing the size of your initial squares. Add yardage as necessary for a larger tote.
• Sew a colourful button to the centre of the pinwheel.
• Add pockets to the lining prior to construction.
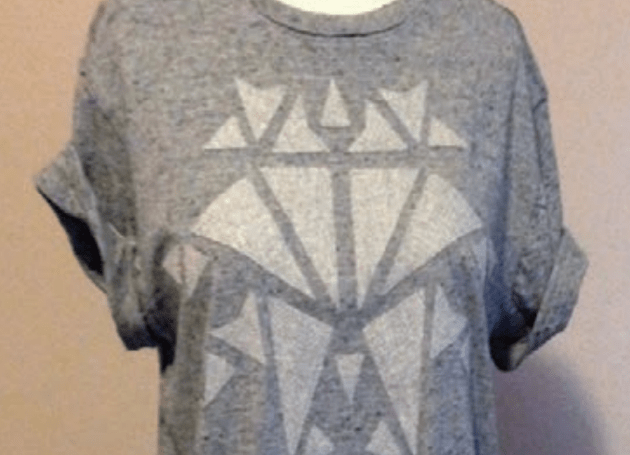
You’re creative. You’ve got great ideas. Turn a simple T-shirt into a canvas of personal expression with the ScanNCut. Let your inner fashion designer loose with this fun and easy project!
Materials
• Brother ScanNCut machine
• T-shirt
• Fabric
• Iron-on fabric appliqué contact sheet
Step 1
Find a T-shirt, tank, maxi dress, etc., of your choice.
Step 2
Choose a medium-sized shape (we chose triangles). Adjust the size according to the proportions of your garment. Select an even number to duplicate as many as you like. The more shapes you have, the more options you’ll have to create a great mosaic pattern.
Step 3
Choose a small-sized shape. Adjust the size to the proportions of your garment. Select an even number to duplicate that is more than what you selected for the medium shapes. With these smaller pieces, you can add more detail to your design.
Step 4
Choose a large-sized shape. Once again, adjust the size to the proportions of your garment. Select an even number to duplicate that is less than what you selected for the medium shapes. These will serve as anchors and focal points in your design, so you don’t need as many.
Step 5
If you’ve chosen any asymmetrical pieces, you’ll need to mirror half of the number that you selected for each size. This will allow you to create a mirrored, symmetrical design on your garment.
Step 6
With a fabric of your choice, cut a square to fit the entire size of the mat.
Step 7
Place your fabric onto the standard mat firmly. Feed it into the machine.

Step 8
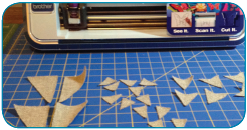
Select “Cut” and let your ScanNCut do its magic! Remove the mat from the machine carefully so you don’t pull any pieces from your fabric.
Step 9
Peel away all cut pieces.
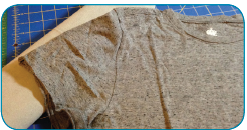
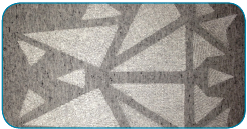
Step 10
Now the fun begins! Create a pattern on your garment. Peel away the backing from each shape and iron onto your garment.
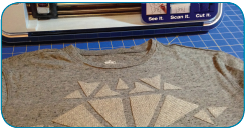
Step 11
Voilà! Your T-shirt is now complete and ready for you to rock!
With gifts, it’s also what’s on the outside that counts.
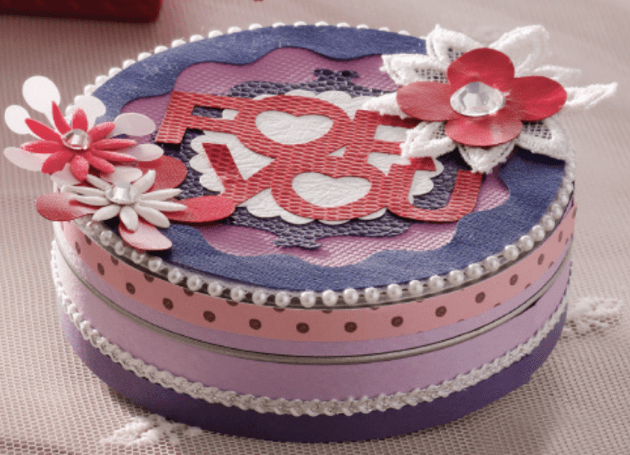
Decorative gift boxes are a great way to show how much you care. And with personalized design elements, you can make your gift count inside and out for the person who matters most. Create your own canister-shaped gift container for that someone special by following the simple steps below!
Materials
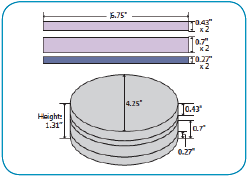
• 13” metal canister with removable lid
• 10 kinds of fun, colourful papers
• Size of “FOR YOU’ text: cut to 1.96” x 2.76”
• Rhinestones
• Ribbon
• Lace flowers
• Glue
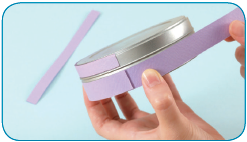
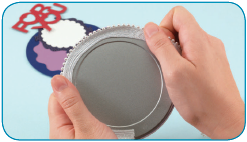
Step 1
Create the side pieces that go around the can. Use a tape measure to measure the can’s circumference. If it’s longer than 12”, cut as multiple pieces.
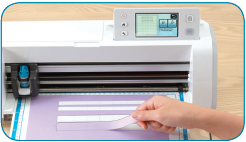
Tip! When cutting dark-coloured material using Direct Cut, use a white or other light-coloured pen to draw the cutting lines on the back of the material for better recognition. Function: Direct Cut
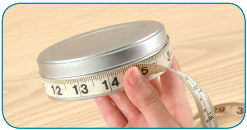
Step 2
The circumference of the can used in this project is 13”. Since it’s greater than 12”, cut the side piece in two parts, each measuring about half the length (6.75”).
Step 3
Hand draw band lines for the side pieces on the back of the material and cut using Direct Cut. Function: Direct Cut
Step 4
Glue the cut bands to the side of the can.
Step 5
Cut the built-in pattern pieces. Glue the first ribbon and then the cut pieces to the can in layers.
Built-in patterns: BA-A045, BA-A048, BA-A051, AR-A011, AR-A014, AR-I001, AR-K028, LO-A021
Step 6
Decorate by attaching lace, rhinestones, and other items. Position your lace and ribbon over the edges and seams for a great, finished look.
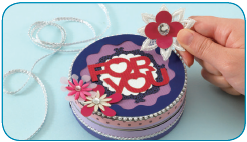
You’re done.
Now you just have to figure out what goes inside the box!
You know those awesome paper scraps you keep putting aside for a project that never happens? We have the solution: a paper confetti garland!
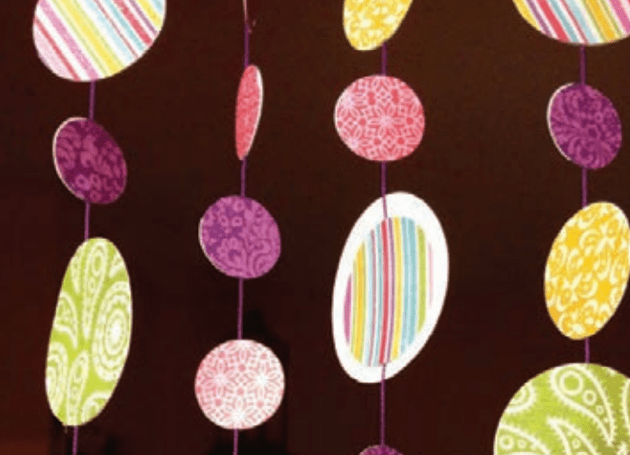
And don’t worry about clashing colours. You can make a bunch of strands from all kinds of contrasting papers. As long as they’re strung in a uniform way, they’ll look divine. (more…)
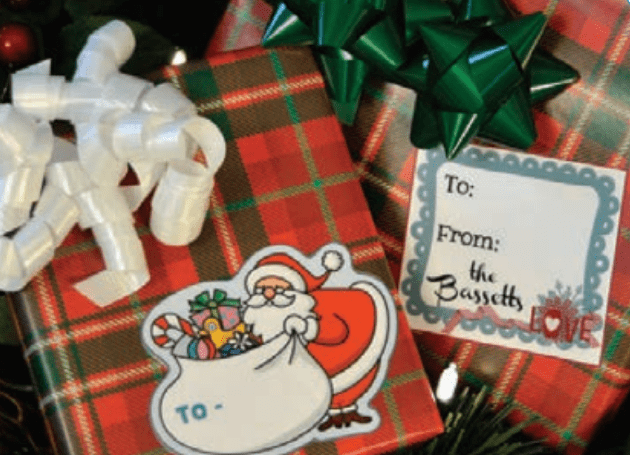
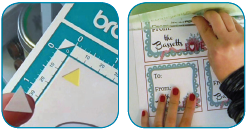
It’s so easy to fall into the habit of reusing the same holiday gift tags year after year. But it’s totally worth changing them. Taking the time for personalized touches shows your loved ones that — when it comes to them — even the smallest details matter.
Materials
• ScanNCut machine and accessories
• ScanNCut Printable Sticker Kit
• ScanNCutCanvas
• Brother colour ink-jet printer
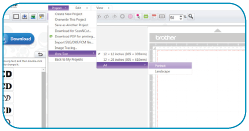
Step 1
Open up ScanNCutCanvas. Change the project area size by going to “Project” and then “Area Size.” Change it to “A4” and “Portrait.”
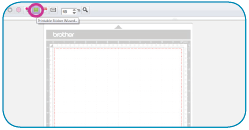
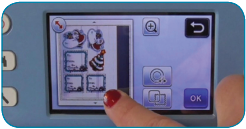
Step 2
Next, click on the “Printable Sticker Wizard” button. Scroll through to find the merry sticker you want to create.
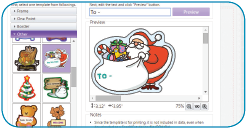
Step 3
There are two ways to add text to stickers in ScanNCutCanvas.
1. When you choose your sticker, you’ll see that it already has text on it. Delete that text and add in the text you want. Click “Preview” to see the changes. Click “OK” to add it to the mat on your computer screen.
OR:
2. Delete the font in the Printable Sticker Wizard. Use the ScanNCutCanvas “Text” feature to add text to the gift tag once it’s placed on your mat. To change the font colours and other options, click on the “Properties” icon.
Step 4
Now, you can save your whole sticker sheet as a .pdf file so it can be printed. Just click on the PDF button, and then click on the file name to rename it. Hit “Save.”
Step 5
Print out the .pdf file on your inkjet colour printer. For best results, make sure you’re printing in photo quality on the white side of the sticker paper that’s included with the kit. Allow your print to dry.
Step 6
Now you’ll need to laminate the top of the sticker. Prepare the laminate sheet by pulling off the tear strip. This lets you keep a little sticky spot at the bottom of the sheet. Line the sticky spot up with the bottom of your printout. Use the ruler as a scraper to carefully smooth out the laminate so that no air bubbles develop.
Step 7
Finally, apply the sheet to the standard cutting mat and insert it into the ScanNCut. Make sure your machine settings are set at the recommended settings for the sticker kit. Do a test cut before you cut out your real sticker. You should be able to cut through the sticker (and not the backing), so adjust your machine settings and blade accordingly.
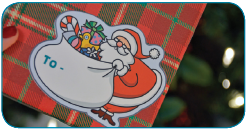
Voilà! You’re done with helping Santa—for this year!
If you’ve got toddlers, you know their clothes can barely survive a few minutes without a stain or a tear.
Can’t clean Jenny’s jammy jeans? No worries. Slap a patch on ‘em. Blammo! You just took those tiny pants to the next level in cutting-edge kids’ fashion.
Materials
• Brother ScanNCut
• Fabric
• Canvas
• Brother sewing machine
Step 1
Cut out a bunch of funky shapes from colourful fabrics.
Tip! To cut like a master, use the high tack fabric support sheet on the standard mat to secure your fabric.

Step 2
Layer your shapes on top of the fabric (for extra stability).
Step 3
Use your Brother sewing machine to stitch details into your shapes.
Step 4
You’ve now got a pile of pretty little patches that are ready to cover up your tykes’ tears and stains.
Tip! Make a bunch. You’ll need ‘em! (And you thought your kids were cute already!)
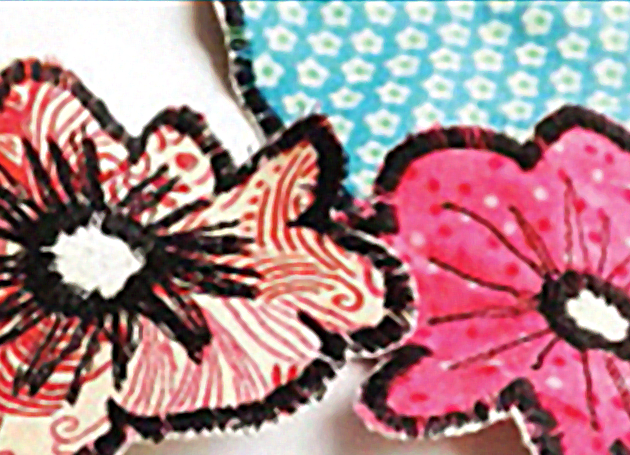
With the ScanNCut, felt can finally blossom.
If you’ve ever worked with felt, you know it can be finicky—like the flowers that droop no matter how much love you give them. When a machine isn’t designed to handle the plush textile, it can get stuck in the blade and dragged right off the mat. Ouch!
But felt’s a cinch for the ScanNCut. With its revolutionary fabric cutting system, you can finally turn it into any shape you want, and send happy felt vibes to everyone you see! (more…)

The popular Brother Cording Foot SA110/SA148 is great for creating a wide variety of cording effects. For this fun and easy project, you’ll learn how to use the Brother Cording Foot to trim ready-made napkins with cute tassel-trimmed corners. Feet have never been more fun! Our feet are guaranteed to make your sewing and embroidery jobs easier and more exciting to create. Attach piping, sequins, and appliqués effortlessly and accurately with the use of these handy accessories. So, whether you love gathering and pleating, cording, or fringe, we have the foot to fit your needs.
Materials and Supplies
- SA110 Brother Cording Foot for 7mm Horizontal Machine or SA148 Brother Cording Foot for 5 mm Machine.
- Brother Sewing Machine.
- Basic sewing notions including sewing thread to match fabrics.
- Sharp sewing needle size 11-14.
- Cording to contrast with napkin. Suggestions include pearl cotton or thin yarn. You may find it necessary to press the strands to remove wrinkles. (We used three strands of acrylic pearl cotton.)
- Ready-made napkins in the amount desired for your table setting. (We used napkins measuring 20 inches X 20 inches.)
Instructions for Trimming Napkins with Cording
Before you start, please read our section titled, About the Brother Cording Foot, at the end of these instructions.
Figure #1
1. Cut 12 lengths of cording measuring 28 inches long. Carefully feed 3 cords into the foot, leaving 4 inches of excess cording behind it. Place the napkin edge under the foot, lining up the edge of the foot with the edge of the napkin hem. Select a suitable stitch for couching the cording in place. (Figure #1.) Stitch along the napkin edge, leaving the excess cording loose at each end (Figure #2.) Repeat for each edge.
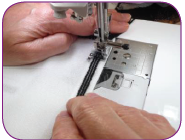
Figure #2
2. To form tassels, grasp the loose cords and tie a double knot, just as you would if you were tying shoelaces. (Figure #3A.) Next, wrap the cords around your finger and slip the ends through to form a slipknot. Pull tightly on the knot to secure the cords together. (Figure #3A.)
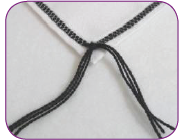
Figure #3A
3. Trim ends so they are even. (Figure #4.)
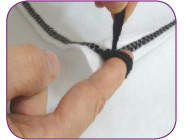
Figure #3B
4. Repeat all four steps for each napkin.
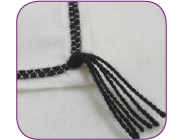
Figure #4
You’re done!
About the Brother Cording Foot
This 3-way cording foot (SA110/SA148) has a clip attached to the top for holding up to 3 cords at a time. Many cords and embellishment yarns can be used with this foot. Simply test for suitability by inserting the cord and making sure it slides properly in the channel. If the cord is too thin, it won’t be properly held in place during stitching. And if the cord is too thick, it won’t easily pass through during the stitching process. Use one, two, or all three slots at a time. When stitching, be sure to gently guide the cords in front of the foot, keeping them smooth. Take care that you do not pull on the cords, or your fabric will pucker. A variety of decorative stitches can be used to hold your cord in place. Experiment with changing the stitch width, making sure the stitches catch the cords sufficiently. Generally, it’s a good idea to lengthen the stitch slightly. We recommend testing your stitch and cording prior to using the foot for your project. See images for some recommended stitches that can be use with this foot.
A variety of decorative stitches can be used to hold your cord in place. Experiment with changing the stitch width, making sure the stitches catch the cords sufficiently. Generally, it’s a good idea to lengthen the stitch slightly. We recommend testing your stitch and cording prior to using the foot for your project. See images for some recommended stitches that can be used with this foot.
Let’s face it, as a parent, dealing with an over-burdened schedule can be tough. Whether it’s day camp, school or just tidying up the house, the challenges you face organizing your kids’ lives can sometimes feel overwhelming. But in a recent Brother survey, 3 in 4 parents agreed that it doesn’t need to be this way!

The new school year is just around the corner. As much as this is fun and exciting, getting ready for school normally brings on some levels of stress and frenzy in the household. Let’s be honest – there’s a lot to do and to think about. But don’t fret. Organizing the kids for school is easier than you think.
If you’re already imagining your kids coming back from school with personal items and clothes missing, why not label them? Brother carries a variety of P-touch labellers that are affordable and perfect for on-the-go use. P-touch TZe tape conveniently comes in iron-on format and it’s real easy to use:
- Just type a label, print it and iron it on.
- The adhesive doesn’t damage clothes
- And it can stay on for up to 20 washes or more
Shirts, t-shirts, pyjamas, underwear, face and bath towels, socks, shorts pullovers, swimsuits… you name it! Let nothing escape your labelling powers.
Pyjamas, shirts, t-shirts, underwear, face and bath towels, socks, shorts pullovers, swimsuits… you name it! Let nothing escape your labelling powers.
P-touch laminated labels on the other hand, come in all sorts of colours and sizes and are virtually indestructible. They’re great for anything that’s not clothes. Why are they super-tough? Well, they’re scrape-proof, water-proof and U.V. resistant. They’ll easily stick to your child’s belongings all through camp and way beyond. These are essential for things like toiletry kits, flashlights, and medication!
Getting organized this summer by labelling your child’s belongings will help avoid lots of headaches and stress. It might even save you money in the long run as you will avoid lost items!
So start labelling today and share your labelling stories with us on our Facebook Page: www.facebook/BrotherCanada. We would love to see your great labelling ideas and we’re certain our other customers will too!
Enjoy your summer!
Survey source: Survey conducted for Brother Canada by third party.
Want more ideas on how labelling can save you time? Find more here.
Stop asking Mother Nature why February’s so darn cold and take matters into your own hands! Spread some warmth and give your loved ones this very special Valentine’s Day card.

The Tea Lover’s Card
Keep your loved one’s warm this Valentines Day!
Make it even more special and personalised with homemade herbal tea blends or hot chocolate bags. For coffee lovers, buy a large pot of gourmet ground coffee and make small packages using cute little plastic or paper bags such as these:
P.S. You can easily find original gift bags on Etsy 😉
With love, from Brother to you ♥
If Christmas’s definitely the jolliest time of the year, it’s also the busiest season of the year. No worries, Brother’s got your back! Our early Christmas gift to you: three DIY projects that’ll get you covered and ready to rock it like a Christmas Diva!

Quick & Easy DIY Christmas Cards
Nothing says better “Thinking of you” than a handmade Christmas card. Here are over 50 quick and easy Christmas card templates.
½ Fold Christmas Card Templates
¼ Fold Christmas Card Templates
Personalised 2014 Calendar
The New Year’s just around the corner and everyone’s going to need a new calendar. So, craft your very own 2014 calendar and offer it as a hostess gift!
Download instructions to create your calendar.
Homespun Holiday Banner
Time to deck the halls and get your home all cozied up for Jack Frost’s arrival! Follow these easy steps to create a fabric banner that’ll greet family and friends as they enter your home.

Now, just remember to put on a smile! Because ’tis the season to be jolly…Fa la la la la, la la la la.
Wishing you Happy Holidays and a Happy New Year from the Brother Family!
It’s summer camp season. Are you already imagining your kids coming back from camp with clothes missing? Why not label them? (Their clothes, not them).

P-touch® labels are ideal for this.
Here’s why :
1. P-touch® TZe tape comes in iron-on format and is easy to use:
o Just type a label, print it and iron it on.
o The adhesive doesn’t damage clothes
o And it can stay on for 20 washes or more.
Pyjamas, shirts, t-shirts, underwear, face and bath towels, socks, shorts, pullovers, swimsuits… let nothing escape your labeling, and your smile will be even bigger you’re your little campers come home!
2. P-touch® laminated labels on the other hand are great for anything that’s not clothes. They’re super-tough: scrape-proof, water-proof and U.V. resistant. They’ll easily stick to your child’s belongings all through camp and way beyond.
Enjoy your summer!
For more information on Brother labellers and tapes, just visit http://brother.ca